RS-1_instruction manual.pdf - 第573页
Part 1 B asic O peration Chapter 4 Cr eating a Produc tion Progra m 4- 238 ③ C ompon ent return setting Select how t o handle an e xtremely small com ponent whose dimens ion is 1 mm or less after the system m easures it.…
Part 1 Basic Operation Chapter 4 Creating a Production Program
4-237
(6) Continuous measurement
The system measures all components you specified.
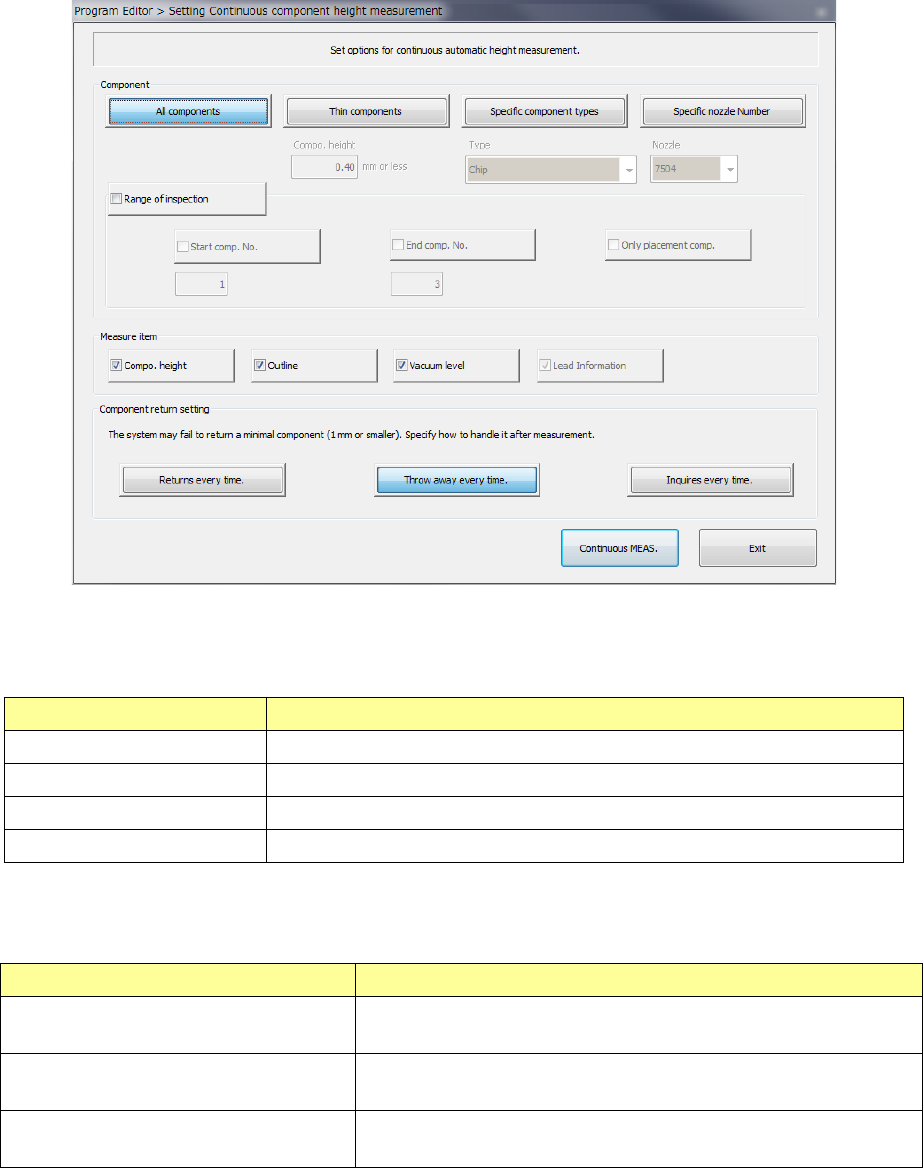
1) Setting the conditions for continuous measurement
When you select the [Machine operation] command from the Program Editor menu, and
then the [All component] command, the following screen appears.
① Component
To measure only components that satisfy the certain conditions among components
specified in the Component data, select the button(s) corresponding to the desired
condition(s), and then set the details.
Condition Overview
All components Measures all Component data.
Thin components Measures only components whose height is the specified value or lower.
Specific component types Measures the specified component type(s) only.
Specific nozzle Number Measures only components that use the specified nozzle.
To specify the range of component numbers to further select components among those
which already satisfy the conditions specified with the buttons above, check off the check
box “Range of inspection” and then specify the range of components to be measured.
Menu item Overview
Start comp. No.(Start component No.) Check off this check box to specify the component data number of
the first component to be measured.。
End comp. No. (End component No.)
Check off this check box to specify the component data number of
the last component to be measured.
Only placement comp.
(Only placement components)
Check off this check box if only components specified in Placement
data are to be measured.
② Measure item
Select the item(s) to be measured. By default, all available items are selected.
The items that can be measured vary depending on the component types.
Part 1 Basic Operation Chapter 4 Creating a Production Program
4-238
③ Component return setting
Select how to handle an extremely small component whose dimension is 1 mm or less after
the system measures it.
Menu item Overview
Returns every time The system returns a component to its original position every time the system finishes
measuring it.
Throw away every time The system discards a component every time the system finishes measuring it.
Inquires every time The system asks you how to handle a component every time the system finishes measuring it.
④ <Continuous MEAS.> button
This button starts continuous measurement of components.
⑤ <Exit> button
This button switches the screen back to the previous screen.
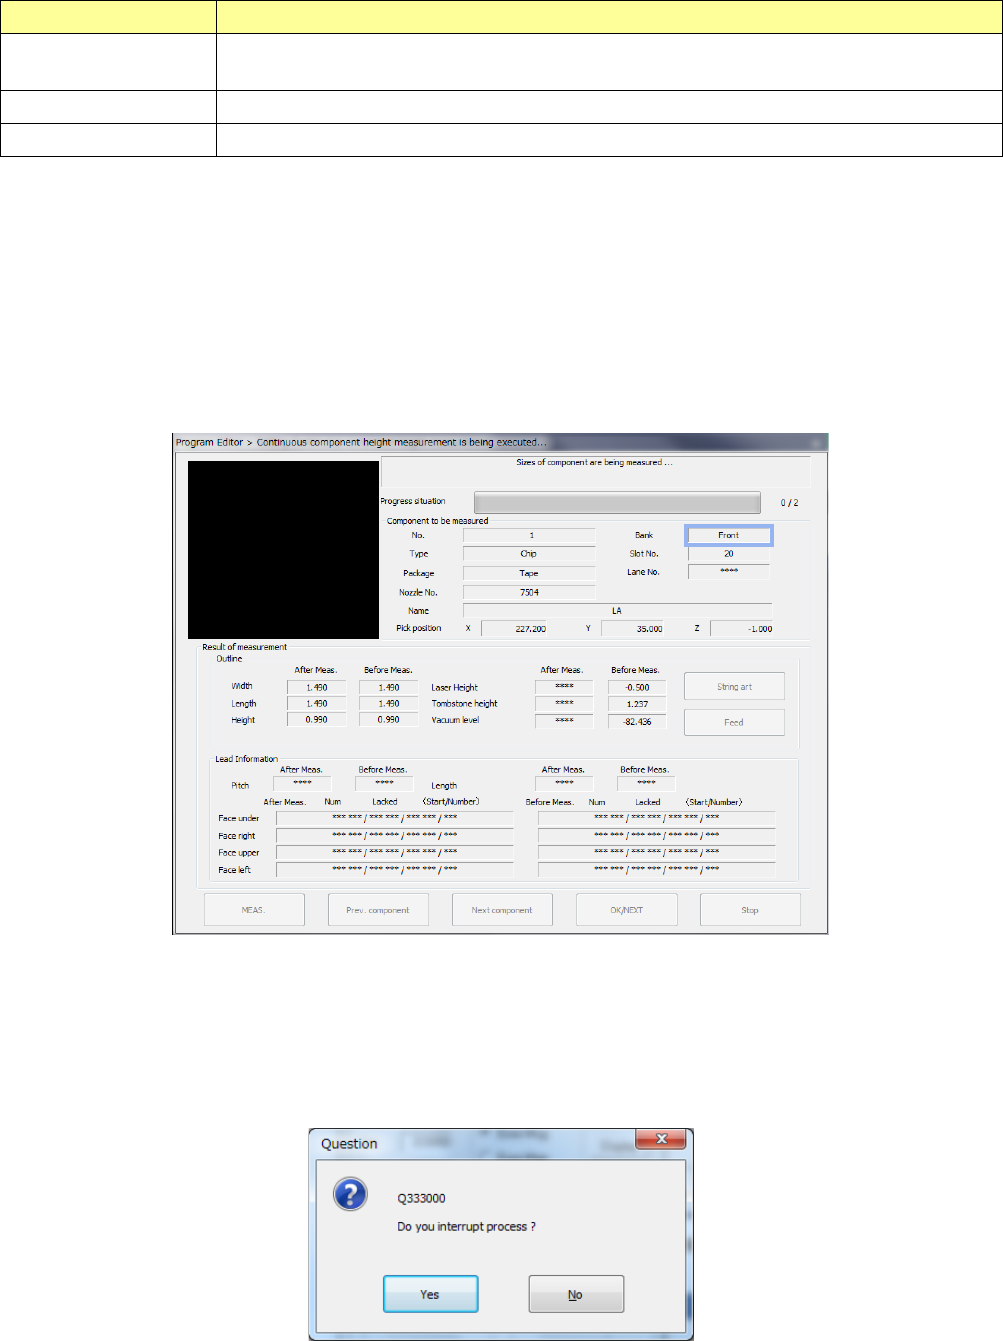
2) Screen displayed during continuous measurement
(“Continuous component measurement is being executed” screen)
The dialog box like the one shown below appears during continuous measurement, and it
shows that the processing being executed is updated sequentially.
a) Progress situation
The progress bar indicates the current progress situation.
To forcibly abort the current continuous measurement operation, press the <STOP> switch.
The following dialog box appears on the screen. Select whether to abort the measurement
operation or not.
Part 1 Basic Operation Chapter 4 Creating a Production Program
4-239
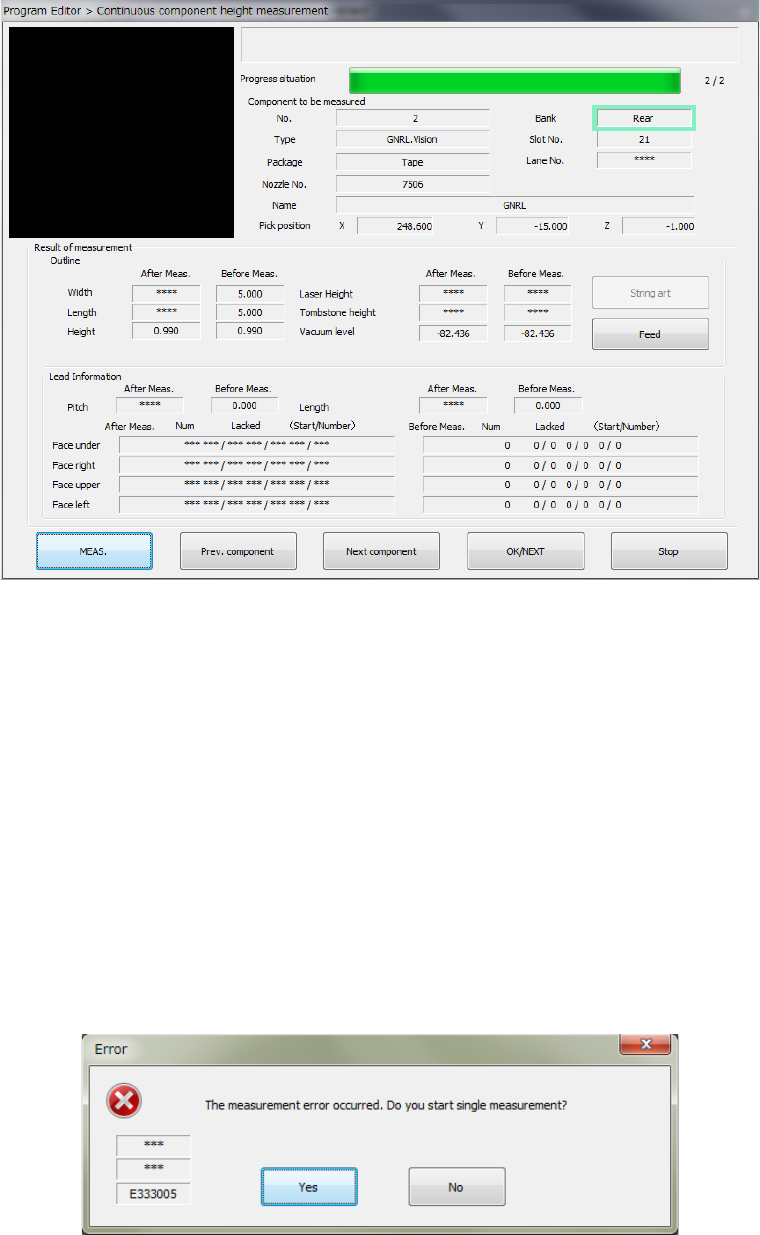
3) Result of the continuous measurement
When continuous measurement of components finishes, the following result screen
appears.
① <OK> button
This button validates the measurement result, and then stores the values obtained with the
measurement into the Component data. Then, the system measures the next component.
② <Cancel> button
This button cancels the measurement result, and then stops continuous measurement.
The system displays the previous screen for setting the continuous measurement conditions
again.
③ <MEAS.> button
This button measures a component being measured in Single Measurement mode.
④ If a measurement error occurs
If a measurement error occurs for any reason, the following dialog box appears on the
screen. When you click the <Yes> button, the system enters Single Measurement mode.
When you select "No", the next component is measured.