RS-1_instruction manual.pdf - 第487页
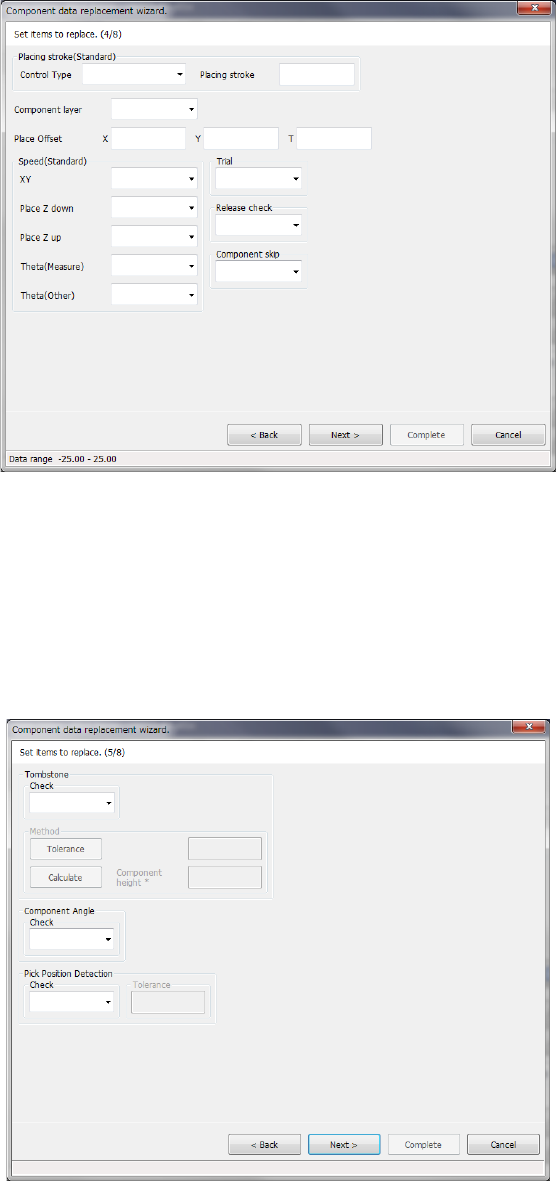
Part 1 B asic O peration Chapter 4 Cr eating a Produc tion Progra m 4- 152 Data enter ed on the “ Pl ace Condit i on ” tab of the “ Com ponent ” data screen i s displayed o n the screen. Enter the des ired value f or eac…

Part 1 Basic Operation Chapter 4 Creating a Production Program
4-151
Data entered on the “Centering” tab of the “Component” data screen is displayed on the screen.
Enter the desired value for each item.
The input range is displayed on the bottom of the dialog box.
When you select the <Back> button, the screen is switched back to the previous screen.
When you select the <Next> button, the screen is switched back to the next screen.
When you select the <Cancel> button, the system aborts the current processing, and then closes
the dialog box.
Data entered on the “Pick Condition” tab of the “Component” data screen is displayed on the
screen.
Enter the desired value for each item.
The input range is displayed on the bottom of the dialog box.
When you select the <Back> button, the screen is switched back to the previous screen.
When you select the <Next> button, the screen is switched back to the next screen.
When you select the <Cancel> button, the system aborts the current processing, and then closes
the dialog box.
Part 1 Basic Operation Chapter 4 Creating a Production Program
4-152
Data entered on the “Place Condition” tab of the “Component” data screen is displayed on the
screen.
Enter the desired value for each item.
The input range is displayed on the bottom of the dialog box.
When you select the <Back> button, the screen is switched back to the previous screen.
When you select the <Next> button, the screen is switched back to the next screen.
When you select the <Cancel> button, the system aborts the current processing, and then closes
the dialog box.
Data entered on the “Inspection 1” tab of the “Component” data screen is displayed on the screen.
Enter the desired value for each item.
The input range is displayed on the bottom of the dialog box.
When you select the <Back> button, the screen is switched back to the previous screen.
When you select the <Next> button, the screen is switched back to the next screen.
When you select the <Cancel> button, the system aborts the current processing, and then closes
the dialog box.
Part 1 Basic Operation Chapter 4 Creating a Production Program
4-153
Data entered on the “Inspection 2” tab of the “Component” data screen is displayed on the screen.
Enter the desired value for each item.
The input range is displayed on the bottom of the dialog box.
When you select the <Back> button, the screen is switched back to the previous screen.
When you select the <Next> button, the screen is switched back to the next screen.
When you select the <Cancel> button, the system aborts the current processing, and then closes
the dialog box.
Data entered on the “Inspection 3” tab of the “Component” data screen is displayed on the screen.
Enter the desired value for each item.
The input range is displayed on the bottom of the dialog box.
When you select the <Back> button, the screen is switched back to the previous screen.
When you select the <Next> button, the screen is switched back to the next screen.
When you select the <Cancel> button, the system aborts the current processing, and then closes
the dialog box.