RS-1_instruction manual.pdf - 第723页
Part 2 D etaile d Descript ion of E ach Functi on Chapter 8 Machine Set up 8- 15 If USB mem ory has not y et been incorporated i nto the USB port or if the US B memory used i s defective and c annot be called up, by defa…
Part 2 Detailed Description of Each Function Chapter 8 Machine Setup
8-14
Saving nozzle data
When nozzle data has been edited and exit OK is touched, the data save confirmation
screen does not appear during the exit from machine setup, but the edited data is
automatically saved.
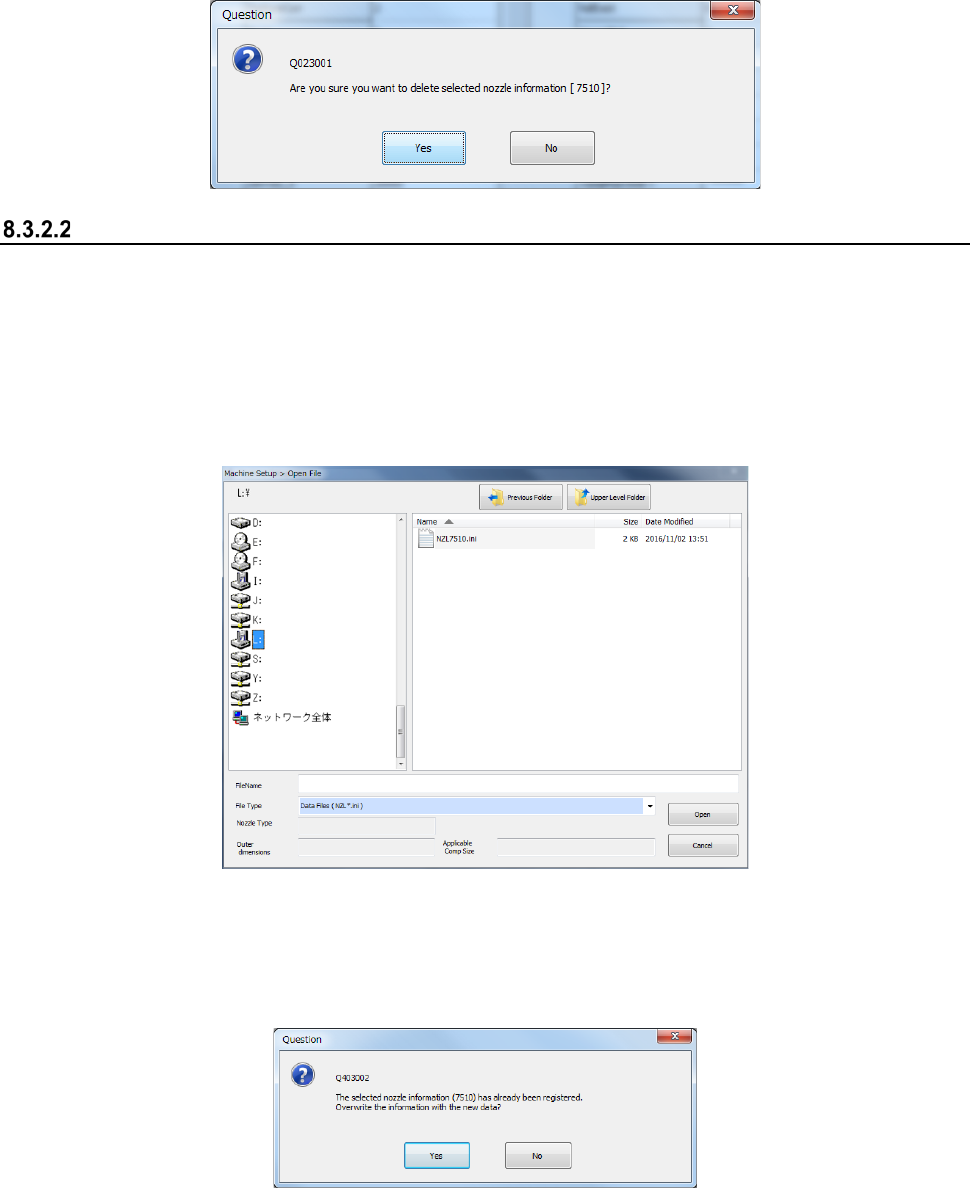
Deleting nozzle data
When you select a nozzle number displayed in the nozzle number list, and press the [Del]
key, the following confirmation message appears on the screen to allow you to delete the
registered nozzle data. You cannot select two or more nozzles at the same time. In
addition, you cannot delete data on the nozzles because they are the initial nozzles.
Read Nzl. data (read nozzle data)
This command adds and registers the information on the customized nozzle to the system.
Select this command if you use any customized nozzle.
Normally, information on an additional nozzle is provided by a floppy disk.
The file format of the additional nozzle information is “NZL***.ini”, that is an “ini” file, where ***
indicates the nozzle number.
Follow the procedure below to register the new nozzle information in the machine via USB
memory or network.
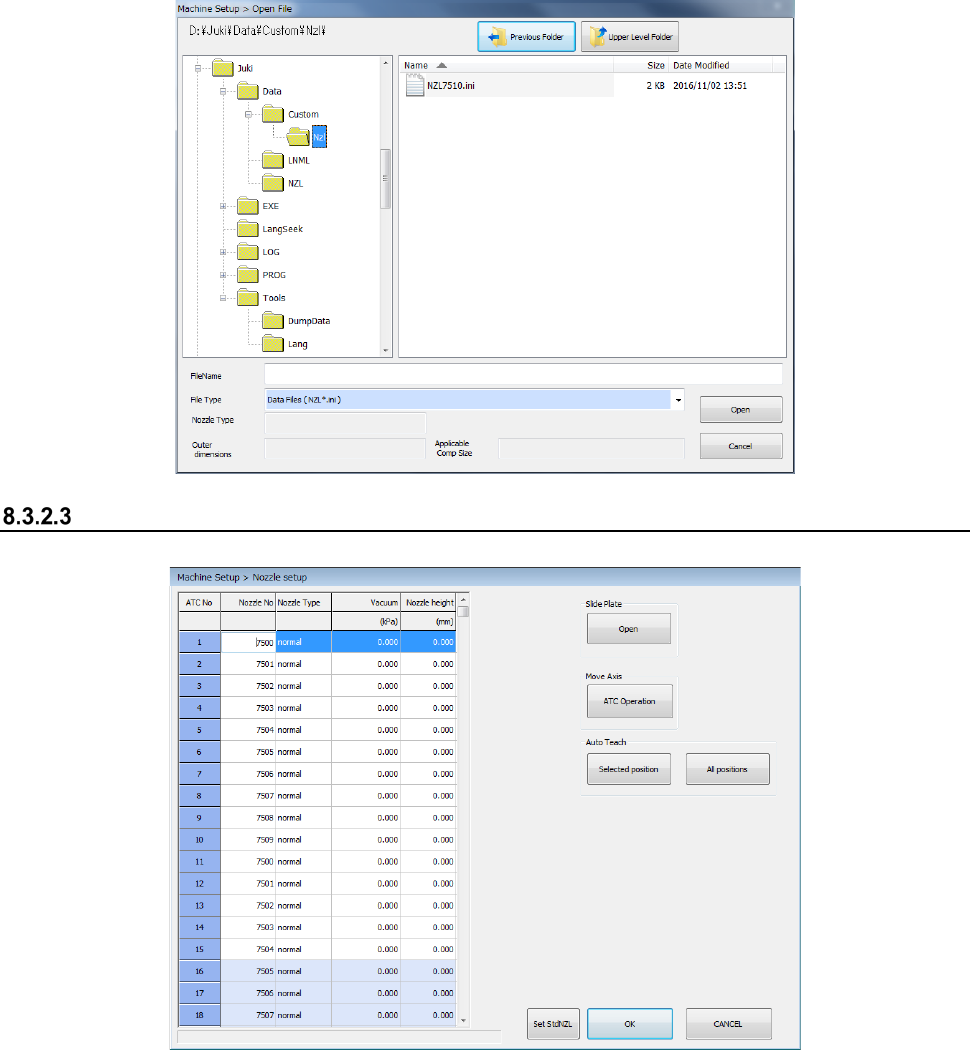
When you select “Read nozzle data”, the “Open nozzle data file” screen appears.
Select the desired file and press the <Open> button. At this point, you have finished registering
new nozzle information.
If you press the <Cancel> button, any data is not registered.
You can check the nozzle numbers you added on the Registered Nozzle No. List.
If the specified nozzle information already exists, the following “Question” screen appears on the
screen. When you select the <Yes> button, the corresponding nozzle data is updated.
Part 2 Detailed Description of Each Function Chapter 8 Machine Setup
8-15
If USB memory has not yet been incorporated into the USB port or if the USB memory used is
defective and cannot be called up, by default, the additional nozzle data folder reference screen
appears.
The data file of existing additional nozzles is housed here.
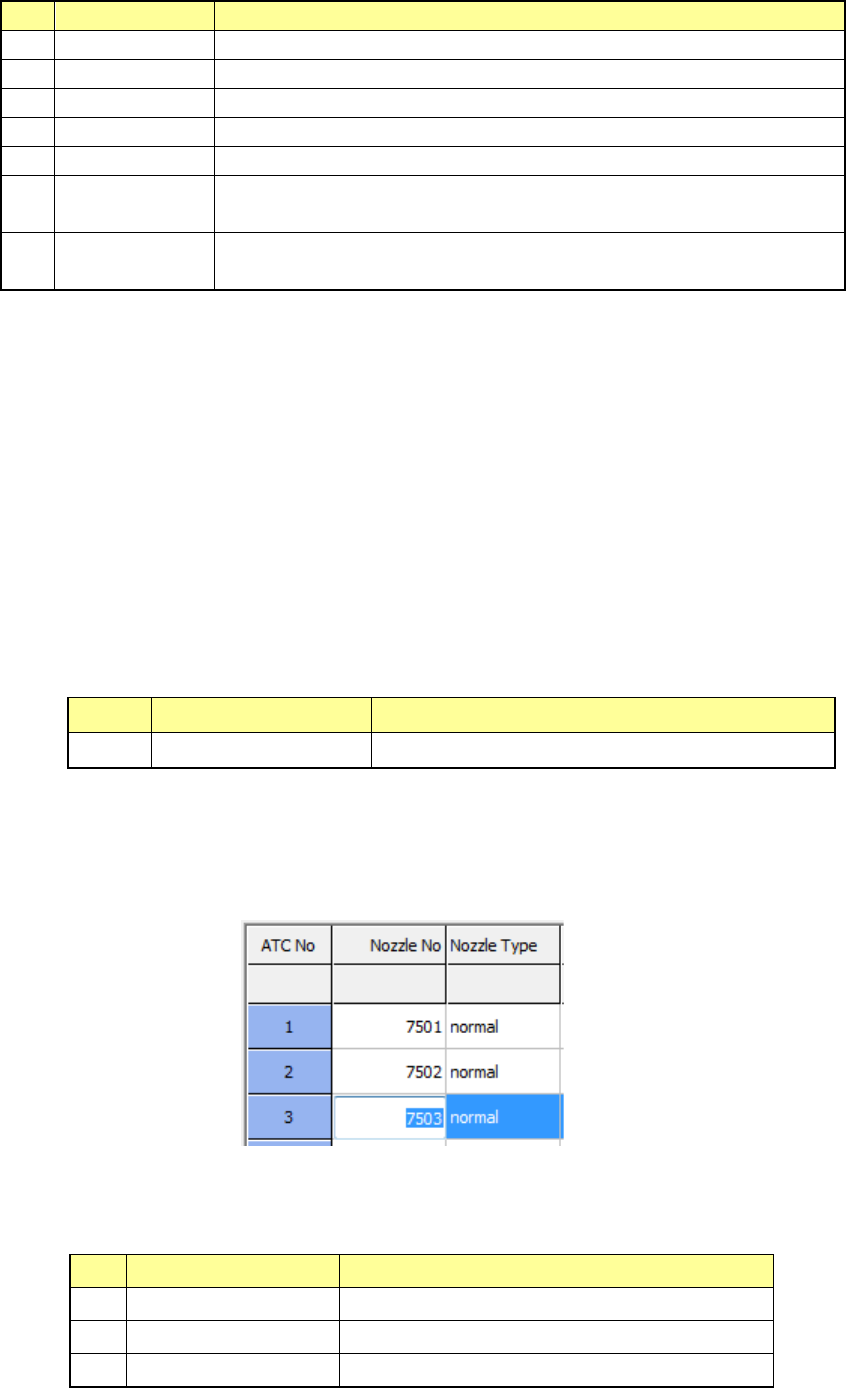
Nozzle setup
When you select the [Nozzle setup] command, the following screen appears.
(1) Purpose of use
The setting item “Nozzle height” is to be used to make fine adjustments of the height for
measuring a component with laser.
The setting item “Vacuum” is to be used to judge if there is a nozzle or a component. Note
that the system uses laser to check to see if there is a nozzle or a component, and so values
set here are used as supplementary information only.
Part 2 Detailed Description of Each Function Chapter 8 Machine Setup
8-16
(2) Setting items
No.
Items
Description
1
ATC No
ATC No.: 1 to 45
2
Nozzle No
Nozzle No. to be assigned to ATC
3
Nozzle Type
Nozzle type to be assigned to ATC (automatic acquisition only)
4
Vacuum
Vacuum value with a nozzle (automatic acquisition only)
5
Nozzle height
Length offset for the reference nozzle (automatic acquisition only)
6 Reflection
OK: Low reflection nozzle, NG: High reflection nozzle or
measurement not executed
7 Load cell
OK: A load cell is checked normally., NG: An error is detected
with a load cell check or a load cell check has not been run yet.
(3) How to set a nozzle
The reference head on which a nozzle is mounted measures the height of the nozzle tip
(measured value is to be entered into the “Noz. height” field) and nozzle width (to be entered
into the “Noz. No.) with laser. In addition, the reference head obtains the vacuum value
also.
1) Nozzle No
Set the number of a nozzle to be assigned to the ATC number displayed on the left.
a) The “ATC No” is a number assigned to the ATC, and enter the number indicating a
nozzle to be assigned to this ATC number.
b) The nozzle number on which the focus is located can be set. Validate the entered
characters with the [ENTER] key or the [Field Movement] key. You can enter a
nozzle number within the range shown in the table below.
No. Setting item Range
1 Nozzle No 7100 to 8999 or no assignment (no entry)
Eliminate input numerals from cells with the [DEL] key or with the [BACK SPACE] key,
then validate with the [ENTER] key or the [Field Movement] key. The nozzle assignment
is canceled and everything displayed for the assigned ATC is eliminated.
Example: In this case, a nozzle number is set in the “ATC” whose number is “3.”
2) Nozzle Type
The type of a nozzle to be attached to the ATC number displayed on the left of the
screen is displayed here.
No.
Setting item
Description
1
Normal
Normal nozzle
2 T-type Cleaner type nozzle
3
Gripper
Gripper nozzle