RS-1_instruction manual.pdf - 第521页
Part 1 B asic O peration Chapter 4 Cr eating a Produc tion Progra m 4- 186 If you press t he clockwi se/antic l ockw ise rotation b utton displayed on t he left side of t he screen when the <Th eta axis> bu tton is…
Part 1 Basic Operation Chapter 4 Creating a Production Program
4-185
6) Move Speed
Operate these buttons in the same manner teaching with a camera.
The screen shown above is displayed when the XY-axes are selected. When you select
another axis, see the following pages.
If you press one of eight arrow keys when the <XY axis> button is selected as the menu item
“Move Axis Select,” the head moves in the XY direction, and the axes continue to move while
you are touching the button.
The current coordinates of the head are displayed on the upper section of the screen.
CAUTION
To avoid a risk of injury, do not put your hands inside the machine
or move your face or head close the machine while the system is
teaching data.
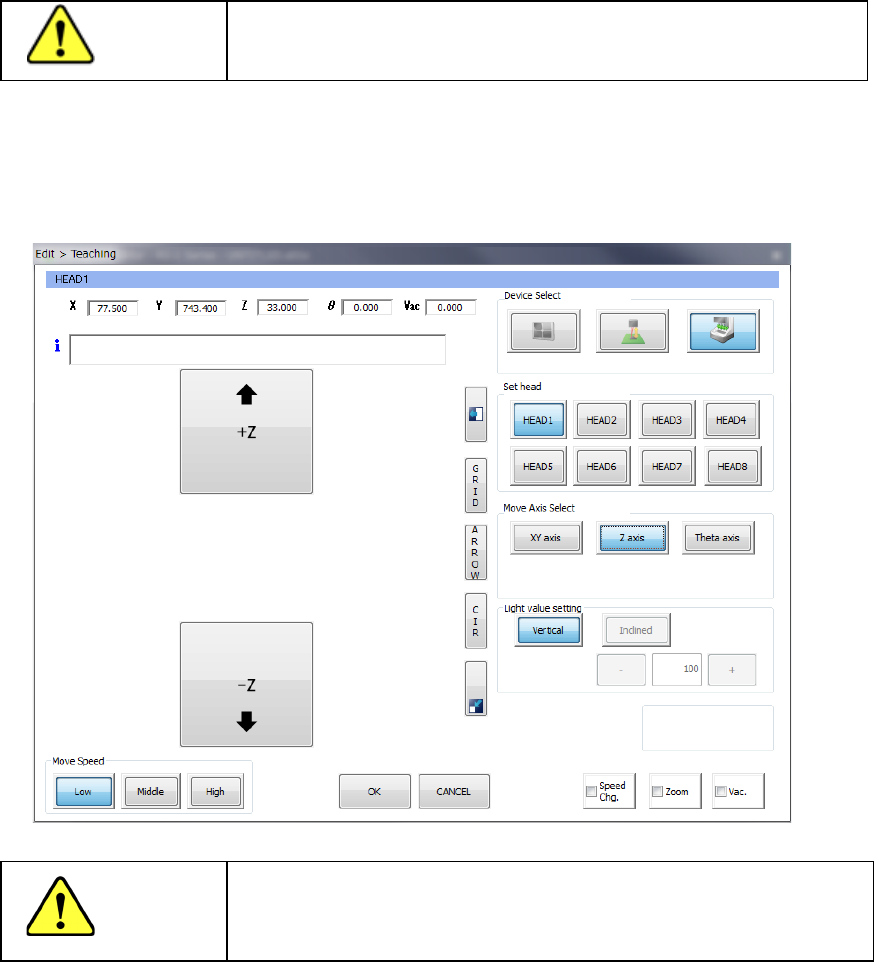
If you press the up/down arrow buttons displayed on the left side of the screen when the <Z axis>
button is selected as the menu item “Move Axis Select,” the head moves in the Z direction.
Be sure to check the safety around the head so that there cannot be any substance the nozzle that
interferes with on the lower side before moving the head.
CAUTION
To avoid a risk of injury, do not put your hands inside the machine
or move your face or head close the machine while the system is
teaching data.
Part 1 Basic Operation Chapter 4 Creating a Production Program
4-186
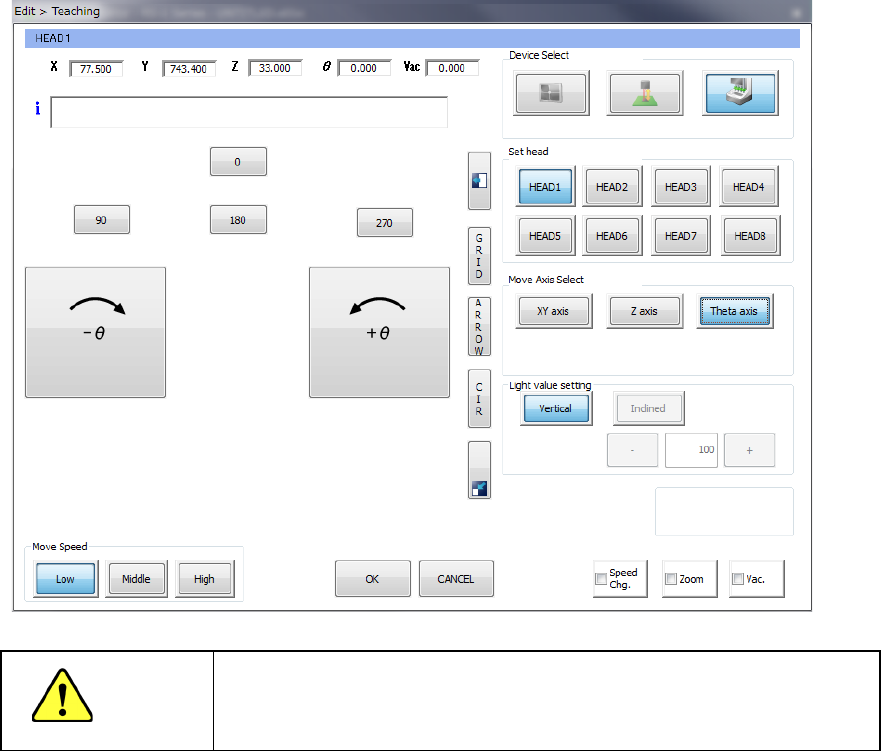
If you press the clockwise/anticlockwise rotation button displayed on the left side of the screen
when the <Theta axis> button is selected as the menu item “Move Axis Select,” the head rotates.
The rotating direction is decided viewed from the top of the machine.
When you press one of the buttons <0>, <90>, <180> and <270>, the nozzle head rotates by the
angle indicated with the button.
CAUTION
To avoid a risk of injury, do not put your hands inside the machine or
move your face or head close the machine while the system is
teaching data.
Part 1 Basic Operation Chapter 4 Creating a Production Program
4-187
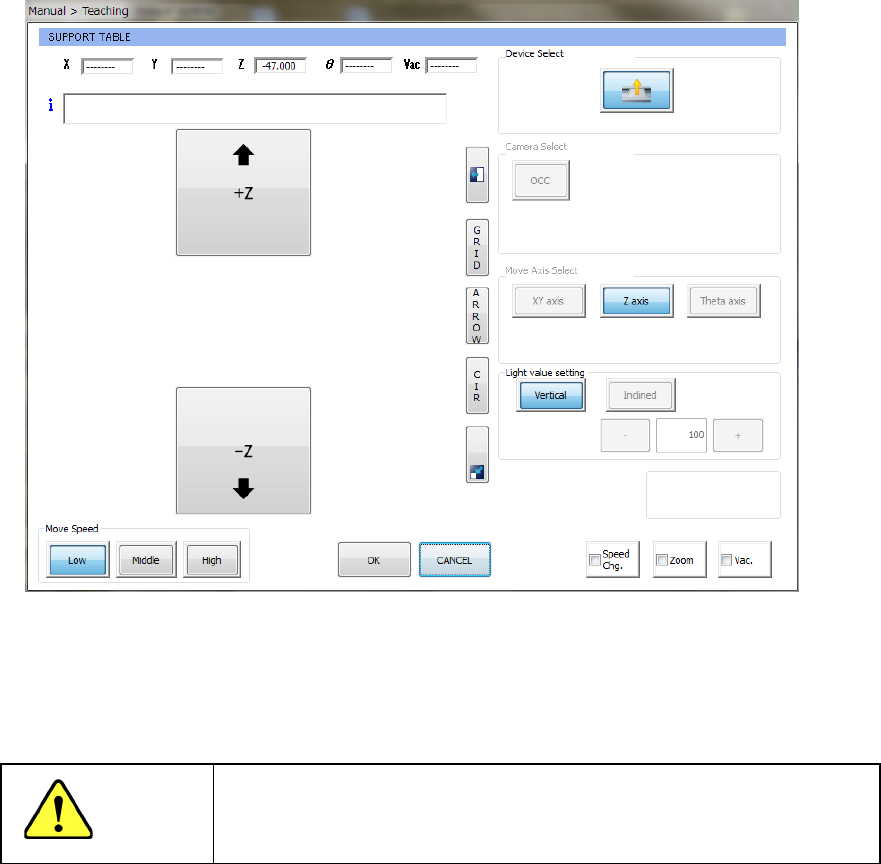
(4) Teaching with the support table
When you start up the teaching function from the menu item such as the “PWB thickness,”
the teaching screen with the support table starts up.
When you press the up/down arrow button displayed on the left side of the screen, the
support tables moves up/down correspondingly.
The current coordinates to which the support table has moved is displayed on the upper
section of the screen.
CAUTION
To avoid a risk of injury, do not put your hands inside the machine or
move your face or head close the machine while the system is
teaching data.