RS-1_instruction manual.pdf - 第917页
Part 2 D etaile d Descript ion of E ach Functi on Chapter 12 Handling th e Optional Device s 12 - 33 How to attach a r eel Attach a reel on a feeder exchan ge trolley whose mo del numb er is 40187895, 40187896, 40187897,…

Part 2 Detailed Description of Each Function Chapter 12 Handling the Optional Devices
12-32
(1) Attachment procedure
1) Attach each feeder on the “electric bank 2.”
2) Check to see if the “feeder bank switch 3” is set to OFF.
3) Insert the “feeder exchange trolley main unit for an electric feeder 1” into the mounter
main unit until it abuts to the inside.
4) When you set the “feeder bank switch 3” to ON, the “electric bank 2” moves up and the
feeder exchange trolley is attached onto the mounter main unit.
* See Section 12.1 “Feeder types” for the procedure for attaching each feeder onto an
electric bank.
<Note>
If you operate the machine even though either the front one or the rear one of the feeder exchange
trolleys is moved down, the XY-axes move at low speed in the same manner as when the cover
opens.
(2) Detachment procedure
1) When you set the “feeder bank switch 3” to OFF, the “electric bank 2” moves down.
2) Only after the “electric bank 2” moves down completely, pull out the “feeder exchange
trolley for an electric feeder 1.”
CAUITON
- To prevent the body from injury or prevent the machine from being
damaged, be sure to attach the feeder exchange trolley on the
machine main unit only after the main unit stops completely.
- When you operate the bank switch, be sure to check the switch with
eyes carefully not to take other switches, especially the main power
switch, as the bank switch. While you are operating the bank switch,
never put your hand inside the machine or move your face or head
close to the machine.
- When you attach a feeder bank onto the machine main unit with the
feeder exchange trolley for an electric feeder, do not plant your hands
on the trolley or do not apply any load on it while the machine is
teaching a pick position of each feeder or while the machine is
performing the basic production operation.
Part 2 Detailed Description of Each Function Chapter 12 Handling the Optional Devices
12-33
How to attach a reel
Attach a reel on a feeder exchange trolley whose model number is 40187895, 40187896,
40187897, 40187898, 40187899 or 4018790 as shown below.
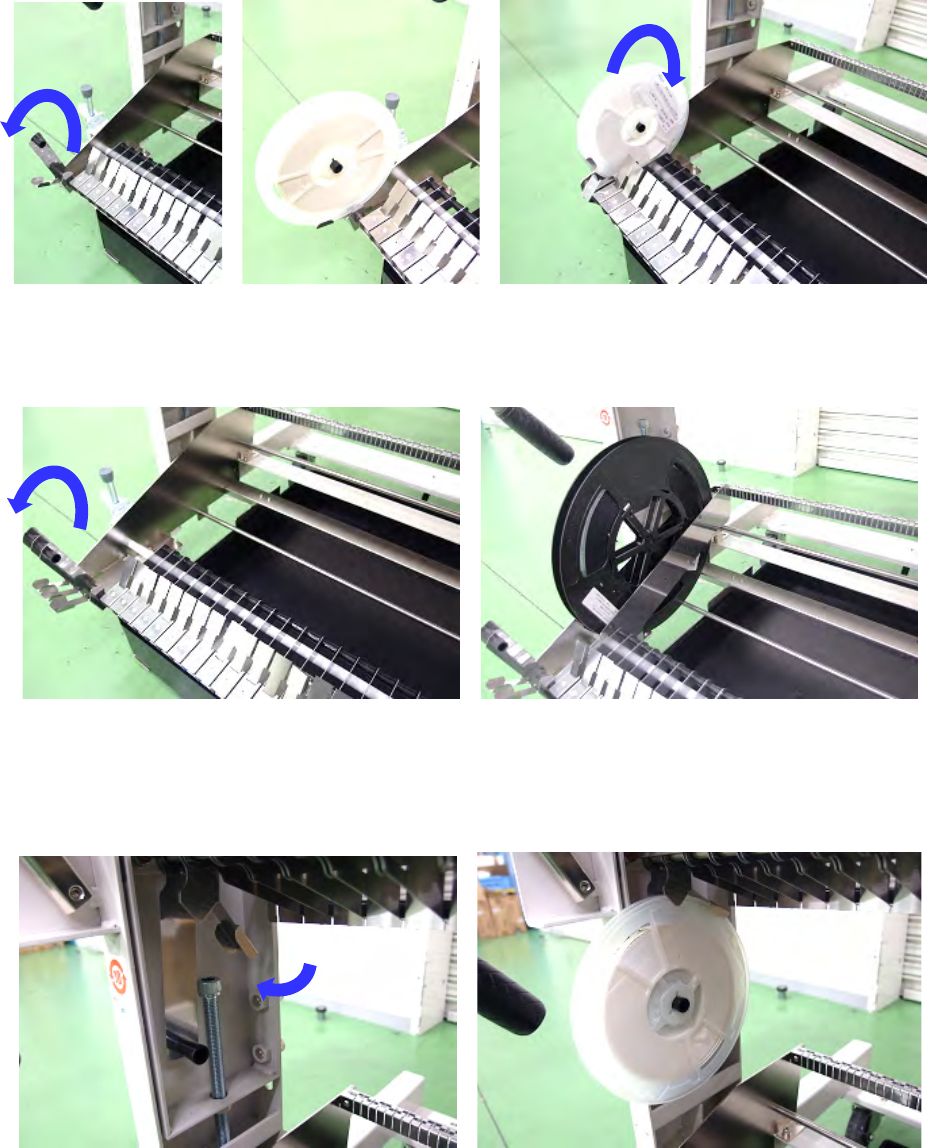
How to use the lower reel holder
- When attaching a 180-mm reel
Raise the reel holder toward you to set a reel on the holder. After setting the reel, put back the
reel holder to use the trolley.
- When attaching a reel larger than a 180-mm reel
Raise the reel holder toward you to set a reel on two shafts.
Install the separation plate to prevent the reel from falling down.
How to use the upper reel holder
This reel holder is exclusively designed for a 180-mm reel.
Remove the reel holder from the hook to pull it out toward you.
Set a 180-mm reel on the holder as shown in the photo below.
Part 2 Detailed Description of Each Function Chapter 12 Handling the Optional Devices
12-34
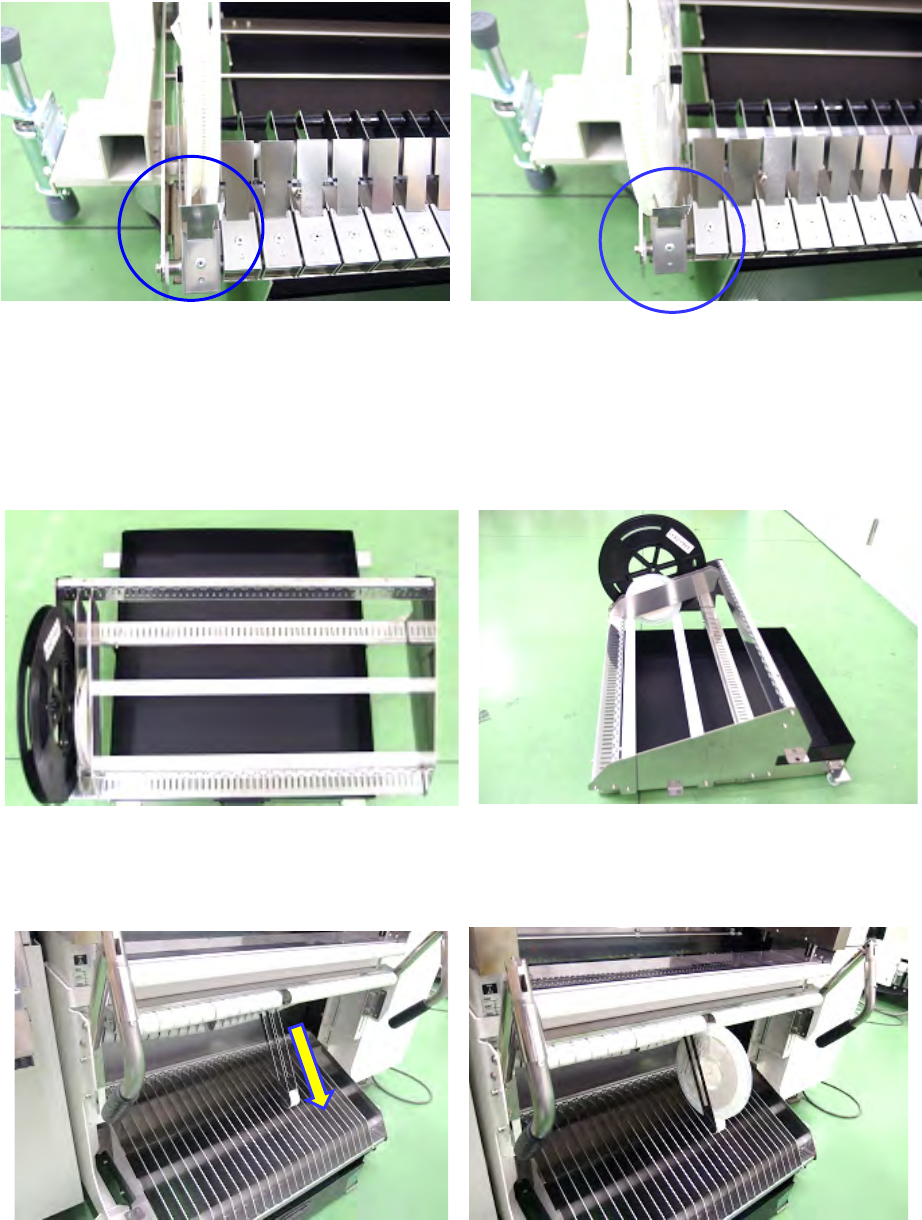
Note
Note the following point to install a reel on a feeder exchange trolley:
Check to see if a reel is stored in the reel holder correctly.
The left figure shows correct installation of a reel on the holder. If a reel is installed as shown in the
right figure, install it correctly.
Attach a reel on a feeder exchange trolley whose model number is 40215185, 40215186,
40215187, 40215188, 40215189 or 40215190 as shown below.
Lower reel holder
Place a reel on the resin roller to use it.
Install the separation plate to prevent the reel from falling down.
Upper reel holder
This reel holder is exclusively designed for a 180-mm reel.
Pull out the reel holder, and then set a reel as shown in the photo below.