RS-1_instruction manual.pdf - 第918页
Part 2 D etaile d Descript ion of E ach Functi on Chapter 12 Handling th e Optional Device s 12 - 34 Note Note the follo wing poi nt to install a ree l on a feeder exchange tr olley: Check to see if a reel is stor ed in …
Part 2 Detailed Description of Each Function Chapter 12 Handling the Optional Devices
12-33
How to attach a reel
Attach a reel on a feeder exchange trolley whose model number is 40187895, 40187896,
40187897, 40187898, 40187899 or 4018790 as shown below.
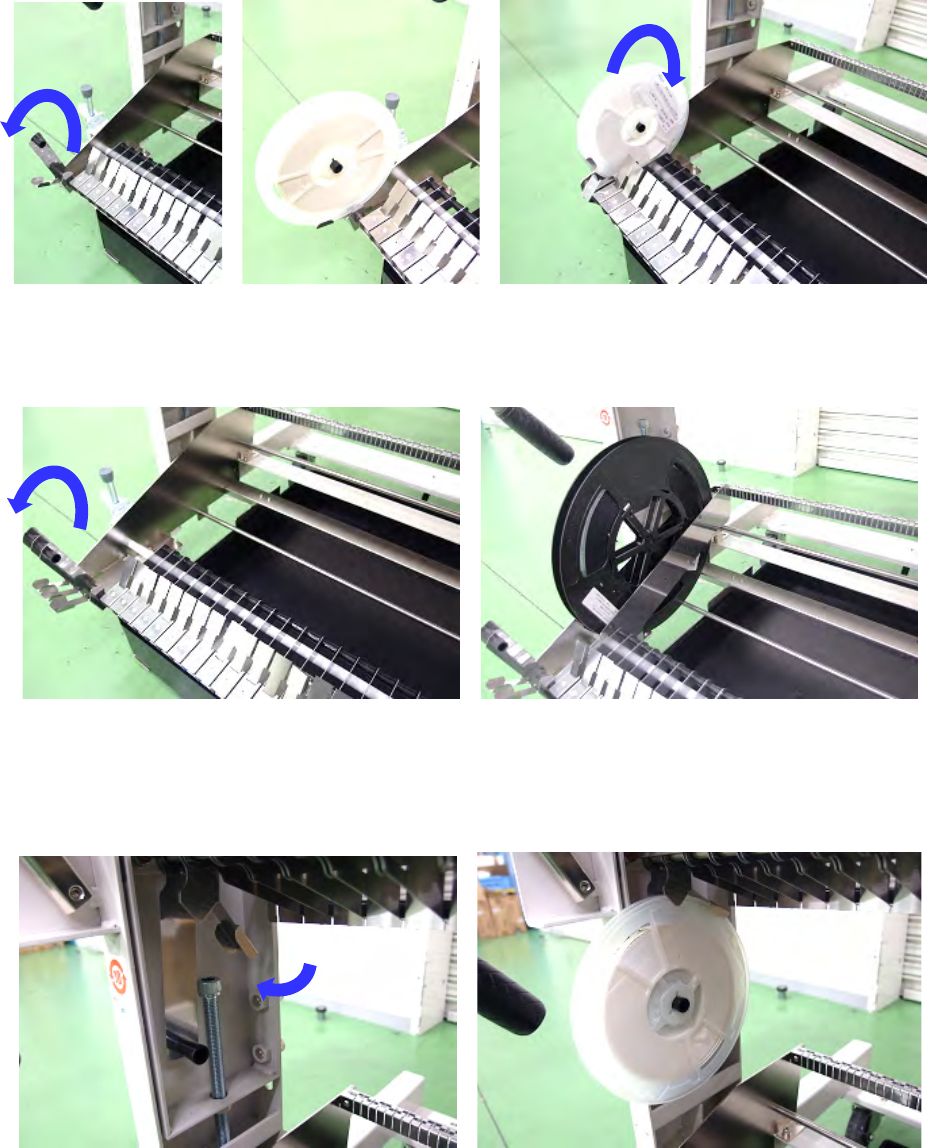
How to use the lower reel holder
- When attaching a 180-mm reel
Raise the reel holder toward you to set a reel on the holder. After setting the reel, put back the
reel holder to use the trolley.
- When attaching a reel larger than a 180-mm reel
Raise the reel holder toward you to set a reel on two shafts.
Install the separation plate to prevent the reel from falling down.
How to use the upper reel holder
This reel holder is exclusively designed for a 180-mm reel.
Remove the reel holder from the hook to pull it out toward you.
Set a 180-mm reel on the holder as shown in the photo below.
Part 2 Detailed Description of Each Function Chapter 12 Handling the Optional Devices
12-34
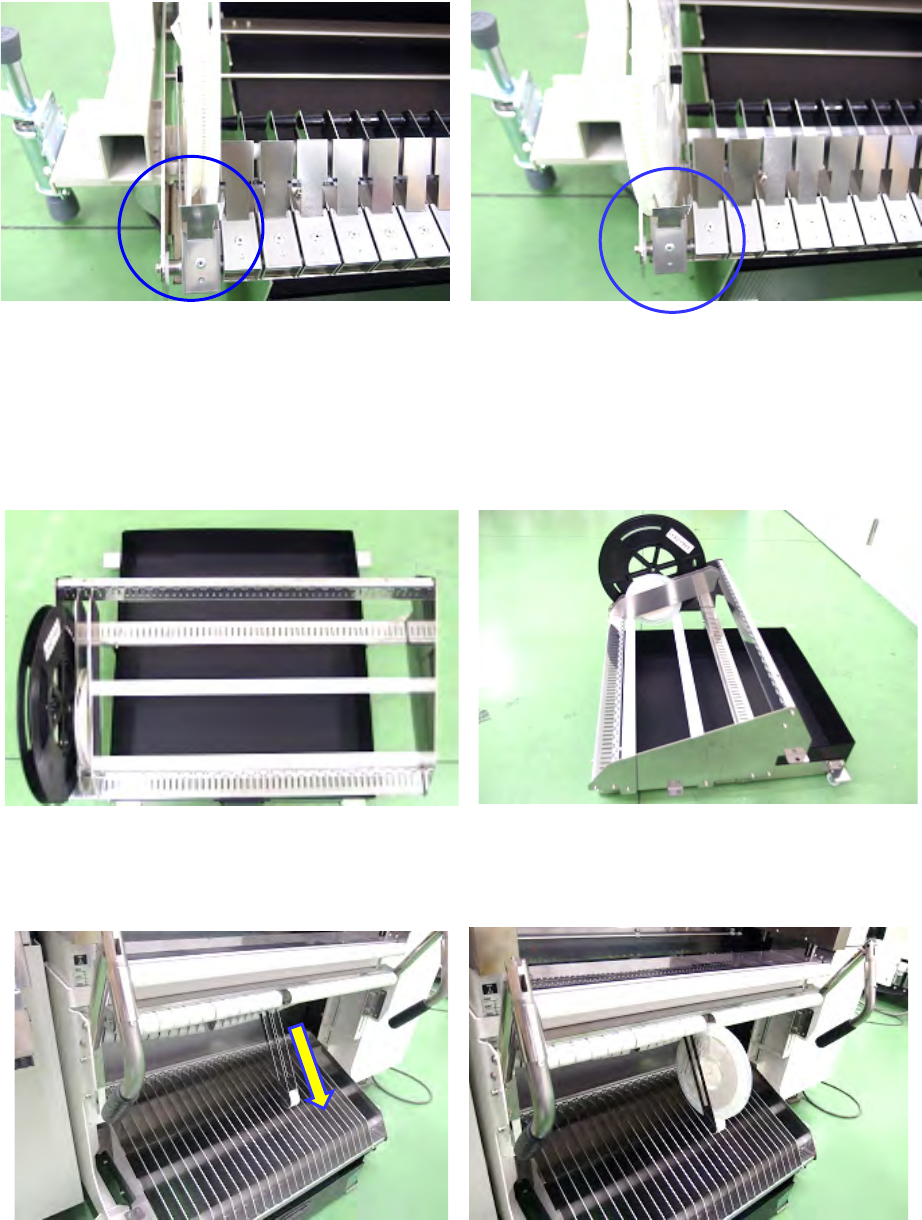
Note
Note the following point to install a reel on a feeder exchange trolley:
Check to see if a reel is stored in the reel holder correctly.
The left figure shows correct installation of a reel on the holder. If a reel is installed as shown in the
right figure, install it correctly.
Attach a reel on a feeder exchange trolley whose model number is 40215185, 40215186,
40215187, 40215188, 40215189 or 40215190 as shown below.
Lower reel holder
Place a reel on the resin roller to use it.
Install the separation plate to prevent the reel from falling down.
Upper reel holder
This reel holder is exclusively designed for a 180-mm reel.
Pull out the reel holder, and then set a reel as shown in the photo below.
Part 2 Detailed Description of Each Function Chapter 12 Handling the Optional Devices
12-35
12.6 Cutter
12.6.1 Overview
The tape was automatically cut after placement and processed collectively.
This is an integrated type which is mounted on the main body.
12.6.2 Operations
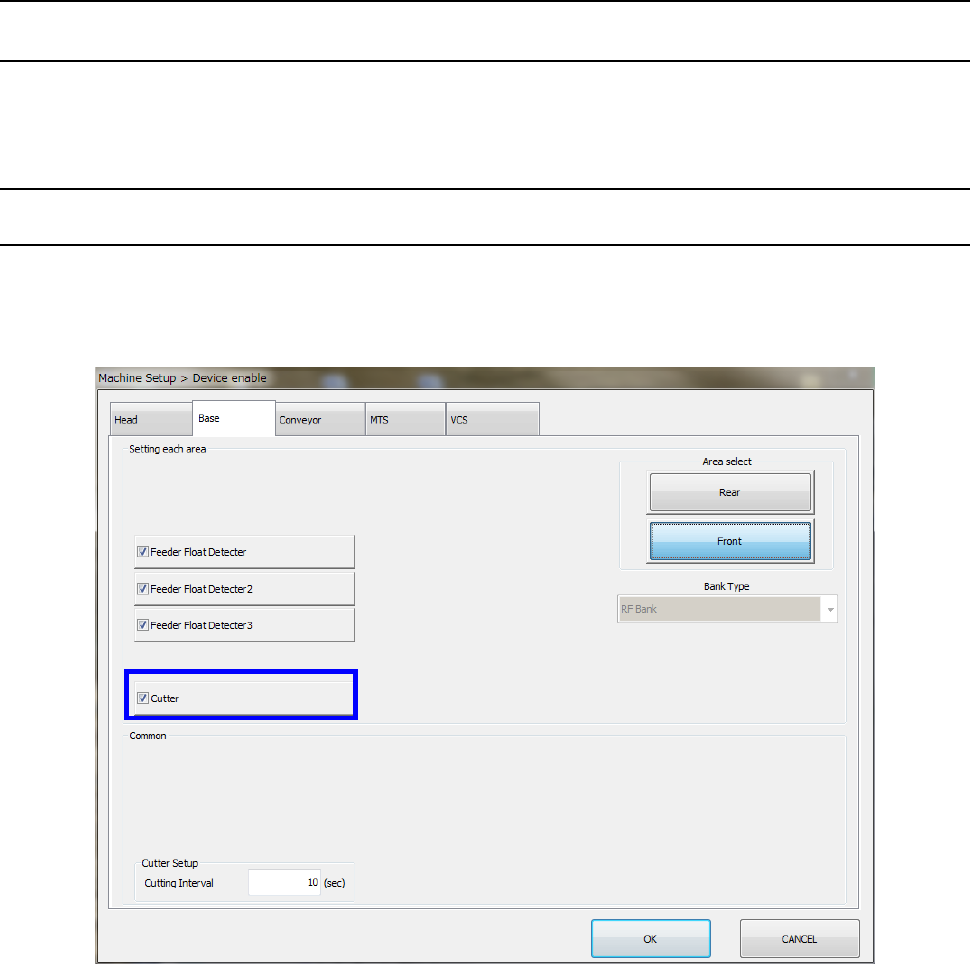
12.6.2.1 Machine setup
Select [Device enable] – [Option unit] in the machine setup screen and make sure that “Cutter” is
checked off.
For the setting method, refer to “8.3.1.2 Base.”