RS-1_instruction manual.pdf - 第141页
Part 1 B asic O peration Chapter 2 Pr oduction 2- 30 ② P ress the < Pick T race> butt on. The follow ing “Pick pos i tion tr acking” scree n appears. CAUTION Before the sy stem ope ns the “Pick pos ition track ing”…
Part 1 Basic Operation Chapter 2 Production
2-29
Preparation of a component supply device
Set an available feeder onto the fixed bank.
After setting the feeder, perform the component pick-up position tracking operation.
<Procedure>
① Select the [Plan support] command form the “Product” menu.
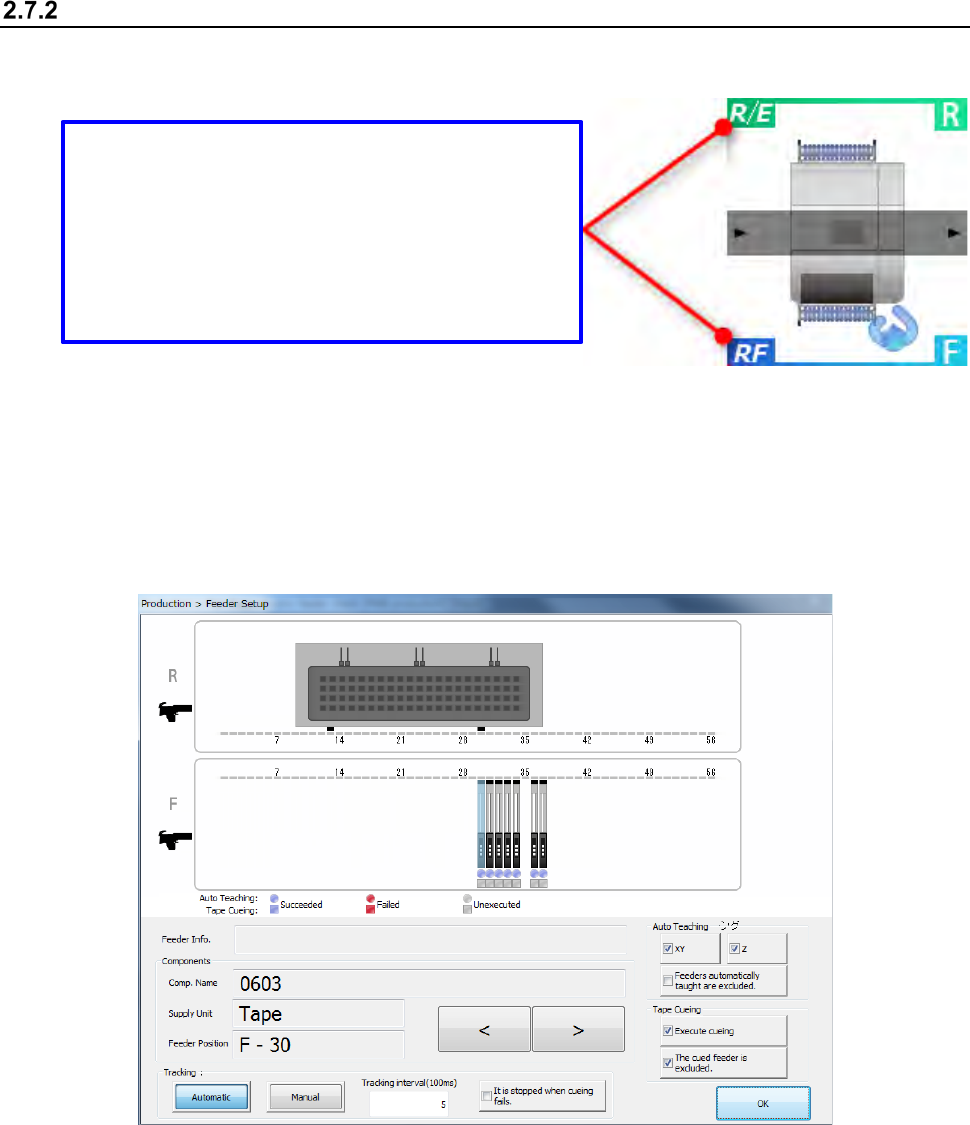
Press the <Feeder Setup> button.
The following “Feeder Setup” screen appears.
Bank type display
The current bank type is displayed.
There are feeders that cannot be used according to
the bank type.
R/E: The RF type and EF type electric feeders can
be used.
RF: The RF type electric feeder can be used.

Part 1 Basic Operation Chapter 2 Production
2-30
② Press the <Pick Trace> button.
The following “Pick position tracking” screen appears.
CAUTION
Before the system opens the “Pick position tracking” screen, the axes
move. Before pressing the <Pick Trace> button, be sure to check to
see if there is no person who is operating the insides of the machine.
In addition, to prevent any damage to your body, never put your hand
into the machine or bring your face or head close to the machine while
the machine is operating.
* See Section 2.14.6 “Tracking a component pick position with a camera” for details of the
pick position tracking function.
Part 1 Basic Operation Chapter 2 Production
2-31
Preparation of the ATC
Check to see if the nozzle number set on the “Machine setup” screen matches that set on the ATC.
<Procedure>
① Select the [Plan support] command from the “Product” menu.
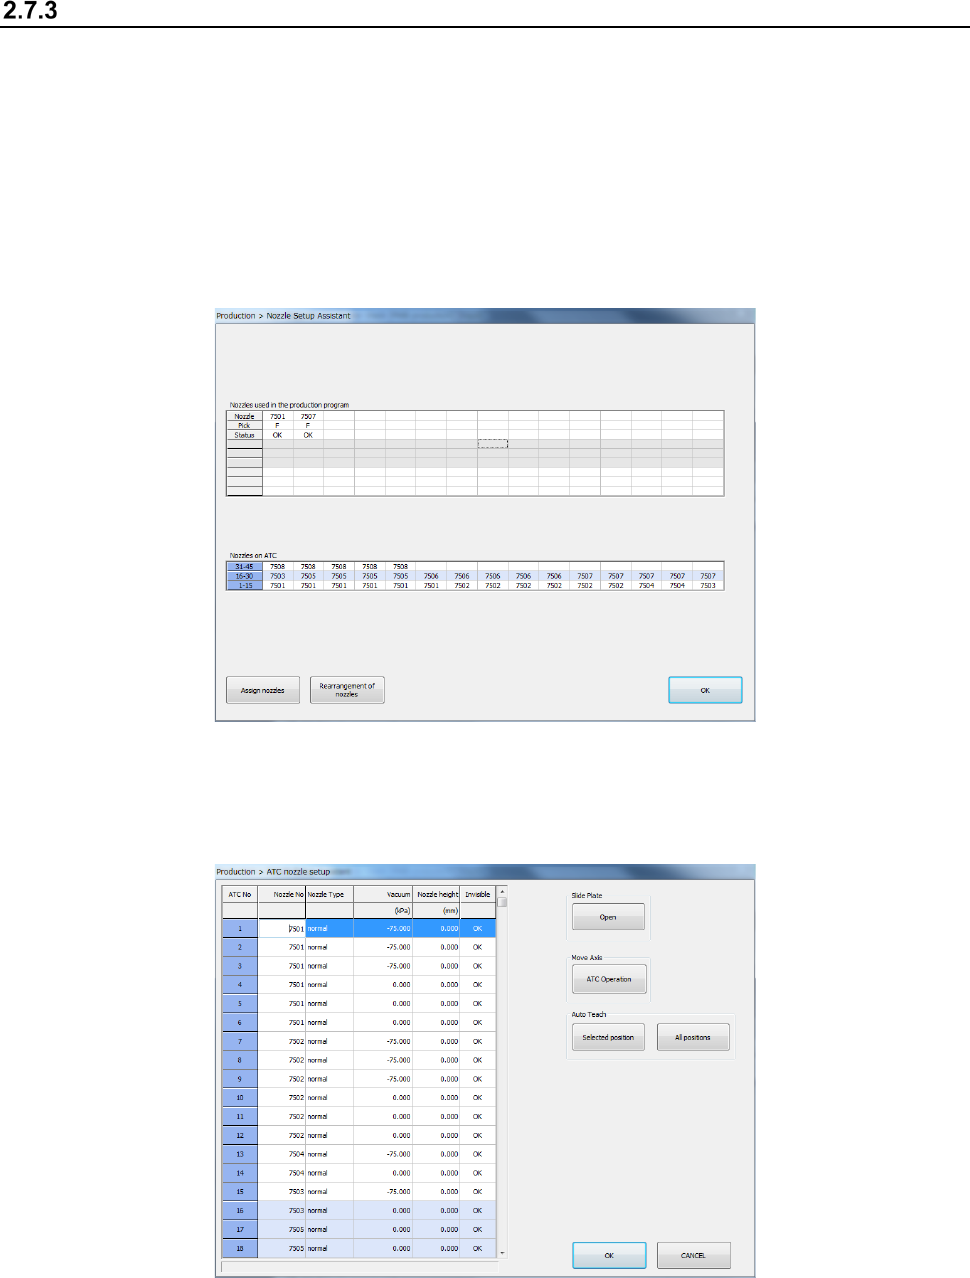
Press the <Nozzle Setup Assistant> button.
The following “Nozzle Setup Assistant” screen appears.
This screen shows the nozzle assignment specified in the production program and the nozzles
actually assigned on the ATC.
If there is any difference between them, it is displayed in red. In such a case, assign a
nozzle(s) by following the descriptions of the next section.
* See Section 2.12.1.11 “Nozzle Setup Assistant” for details of the “Nozzle Setup Assistant”
function.
② Select the <Assign nozzles> button on the “Nozzle Setup Assistant” screen.
You can assign a nozzle on the ATC.
* See Section 8.3.2.3 “ATC nozzle setup” for details of how to set up nozzles on the ATC.