RS-1_instruction manual.pdf - 第142页
Part 1 B asic O peration Chapter 2 Pr oduction 2- 31 Preparation of the ATC Check to see if the nozzle number set on the “Machi ne setup” scr een matches that set on the A TC. <Procedu re> ① S elect t he [Plan su p…

Part 1 Basic Operation Chapter 2 Production
2-30
② Press the <Pick Trace> button.
The following “Pick position tracking” screen appears.
CAUTION
Before the system opens the “Pick position tracking” screen, the axes
move. Before pressing the <Pick Trace> button, be sure to check to
see if there is no person who is operating the insides of the machine.
In addition, to prevent any damage to your body, never put your hand
into the machine or bring your face or head close to the machine while
the machine is operating.
* See Section 2.14.6 “Tracking a component pick position with a camera” for details of the
pick position tracking function.
Part 1 Basic Operation Chapter 2 Production
2-31
Preparation of the ATC
Check to see if the nozzle number set on the “Machine setup” screen matches that set on the ATC.
<Procedure>
① Select the [Plan support] command from the “Product” menu.
Press the <Nozzle Setup Assistant> button.
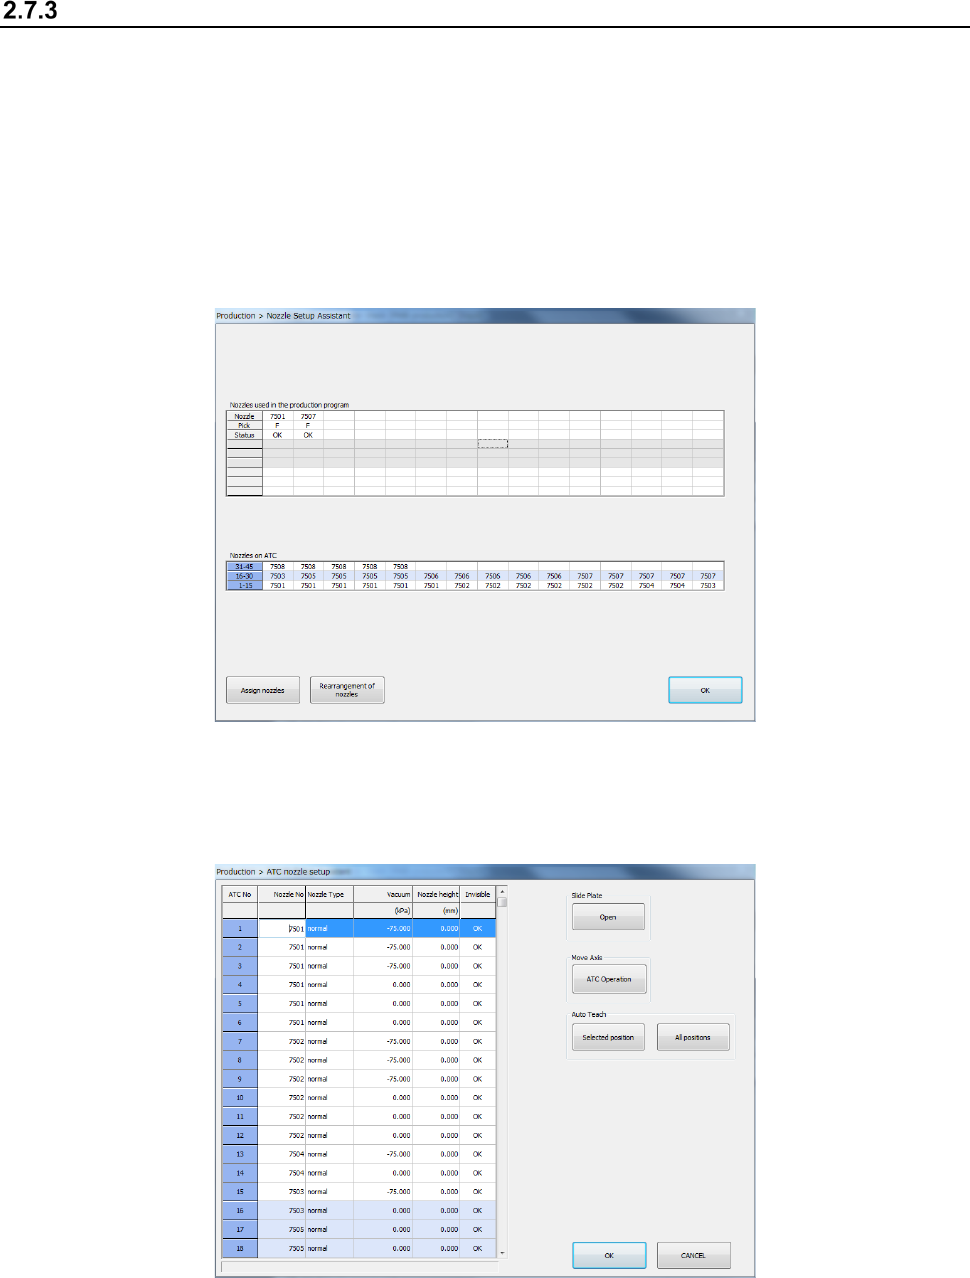
The following “Nozzle Setup Assistant” screen appears.
This screen shows the nozzle assignment specified in the production program and the nozzles
actually assigned on the ATC.
If there is any difference between them, it is displayed in red. In such a case, assign a
nozzle(s) by following the descriptions of the next section.
* See Section 2.12.1.11 “Nozzle Setup Assistant” for details of the “Nozzle Setup Assistant”
function.
② Select the <Assign nozzles> button on the “Nozzle Setup Assistant” screen.
You can assign a nozzle on the ATC.
* See Section 8.3.2.3 “ATC nozzle setup” for details of how to set up nozzles on the ATC.
Part 1 Basic Operation Chapter 2 Production
2-32
スライドプレート②
ATCブラケット①
スライドプレート②が開いた状態
ノズル⑨
平部
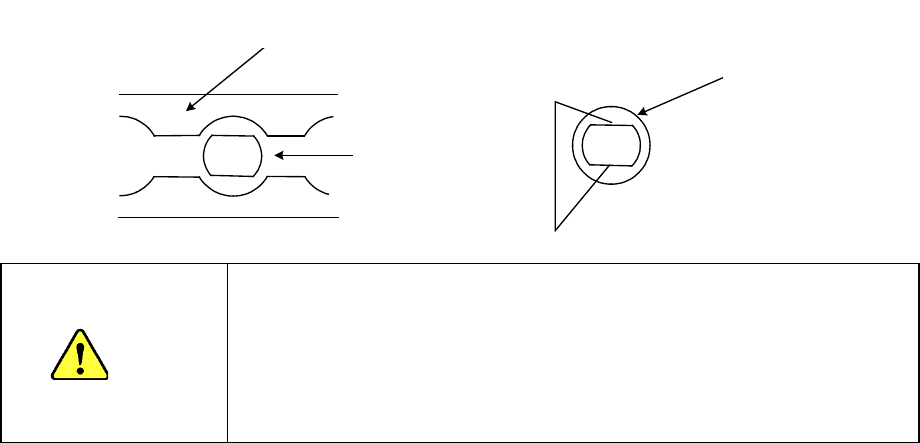
Slide plate ②
ATC bracket ①
When the slid plate ② is opened
Nozzle ⑨
Flat portion
<Procedure for mounting/dismounting nozzles on the ATC>
1. Press the <Open> button to open the slide plate 2.
2. Mount or dismount the nozzle ⑨ on/from the ATC while aligning the flat portion of the
nozzle ⑨ with the long hole of the ATC bracket ①.
CAUTION
- Replace the nozzle to the position at which it was used to be
located. If you have replaced the nozzle with another one, change
the settings of the “ATC nozzle setup” menu of the “Machine setup”
utility.
- Do not attach the nozzle onto the head directly. (Or the contact
surface with laser gets stained and it may cause an error.)