RS-1_instruction manual.pdf - 第296页
Part 1 Basic Operat ion Chapter3 D aily maintenance 3-4 Inspection/ Replace ment Replacem ent of the filter el ement When to replac e : one year When to repla ce a filter element : E very two years or w hen t he air pres…
Part 1 Basic Operation Chapter3 Daily maintenance
3-3
Checking Each Part
Inspection item
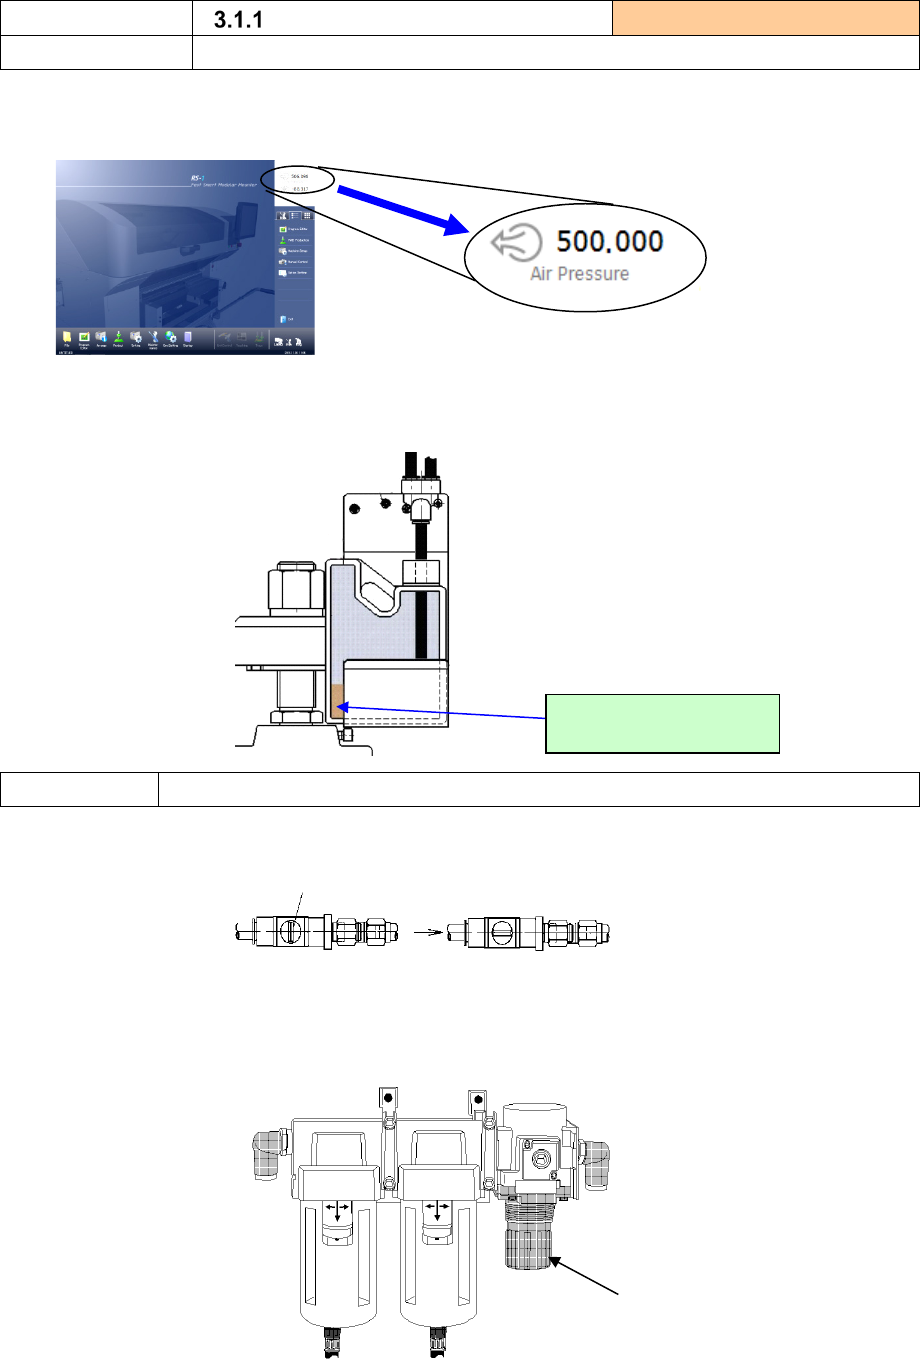
Air pressure/drain tank
Inspection frequency: everyday
What to inspect
Check the original air pressure and the drain.
1) Touch the upper right corner of the screen and check to see if the pressure of the used air is 500 ±
50 kPa.
2) If the indicated value is not within this range, check to see if air from the factory leaks anywhere. If
there is not any problem, follow “How to adjust” below to readjust the pressure.
3) Drain oil and water in the bottle connected to the drain.
How to adjust
Adjustment of the original air pressure
1) Put the knob ① into the open state.
2) Pull the knob of the regulator ② downward, then rotate it so that the pressure of the used air can
become 0.5 MPa.
Discard oil or water
collected in the bottle.
Open status
Closed status
①
②
Part 1 Basic Operation Chapter3 Daily maintenance
3-4
Inspection/Replacement
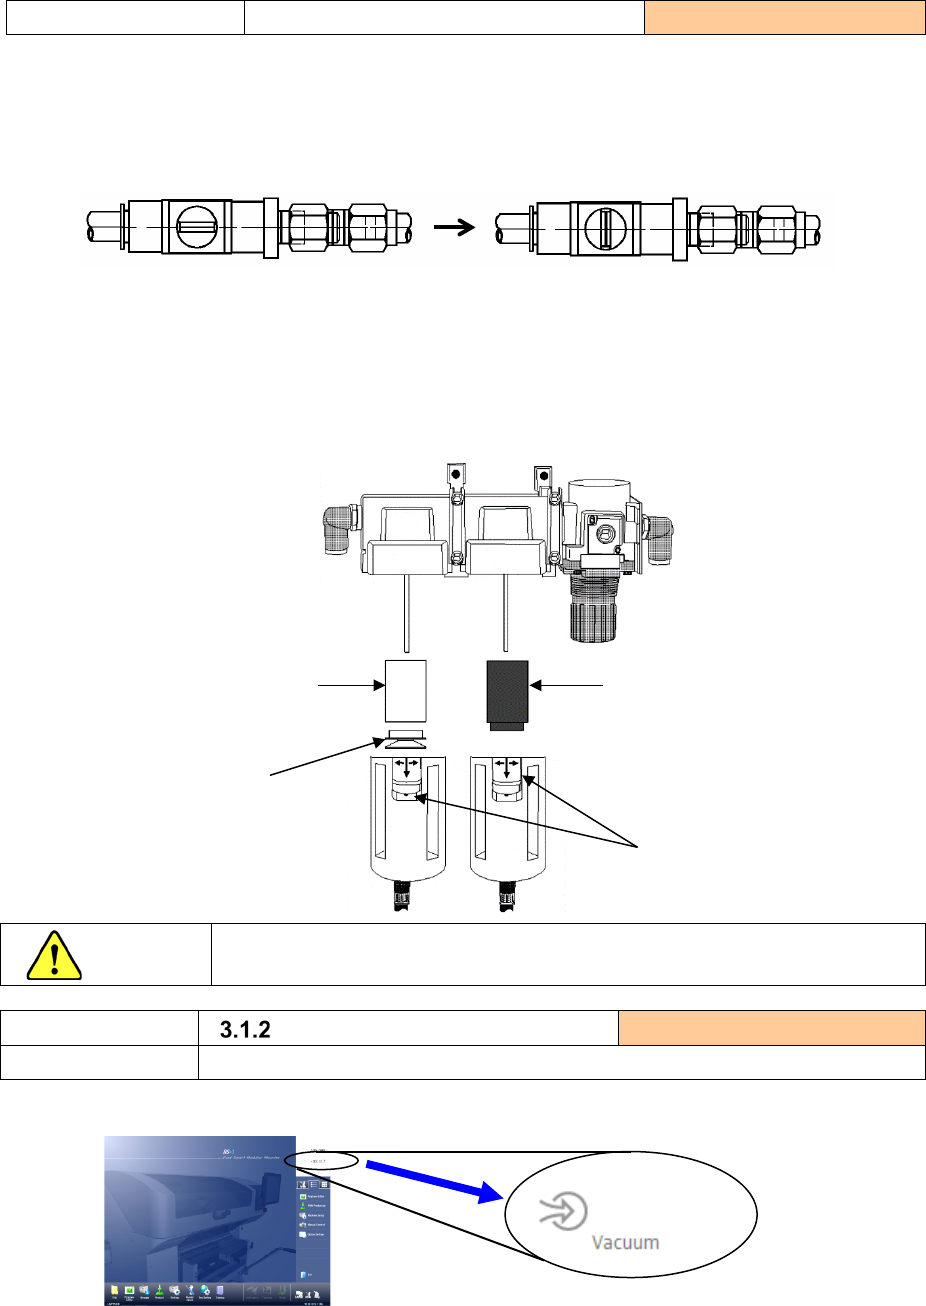
Replacement of the filter element
When to replace: one year
When to replace a filter element:
Every two years or when the air pressures decreases to approximately 0.1 MPa (1 kgf/cm
2
).
How to replace a filter element
1) Close the finger valve knob.
2) While pushing the sliding part downward, rotate the main unit to the left or the right by 45 degrees to
pull it out downward.
3) Remove the filter element B by rotating the resin part that fixes the filter element B to the left.
Remove the filter element A by rotating it itself to the left.
4) Attach each filter element by following this procedure in the reverse order.
CAUTION
Close the control of the finger valve before following the procedure above.
Inspection item
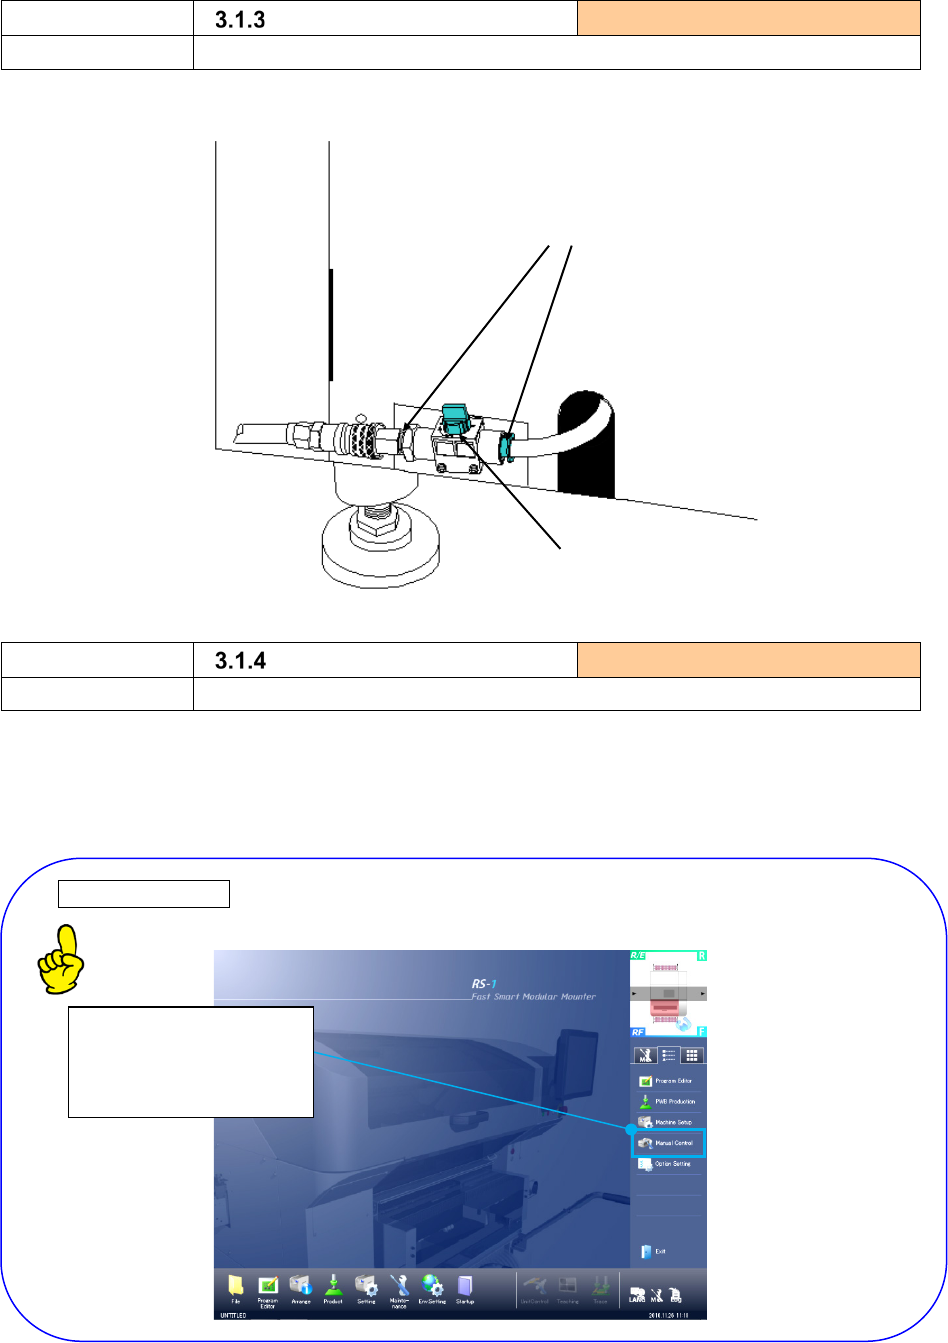
Vacuum pressure
Inspection frequency: everyday
What to inspect
Check the vacuum pressure.
1) Make sure that the vacuum pressure indication of a standby reaches -88 kPa.
2) If the negative pressure display (max) in standby status with vacuum pump specification decreases
to -88kPa or less, consumables must be replaced. Inspect and replace consumables by referring to
“3.7.2 Replacement of vacuum pump parts.”
Open status
Closed status
Filter element A
PF901010000
Filter element B
PF901006000
Resin part
Sliding part
-88.317
Part 1 Basic Operation Chapter3 Daily maintenance
3-5
Inspection item
Piping and joint
Inspection frequency: Every week
What to inspect
Check to see if the optional filter is stained.
1) Check that there is no air leakage.
<Left inside>
Inspection item
Each unit air cylinder
Inspection frequency: Every week
What to inspect
Check to see if any air does not leak from the air pipes.
1) Turn on the power of the machine, select the "Manual control" items, and check that operation is
possible.
① PWB stopper section
② ATC unit
Manual control Instruction manual Chapter9 “Manual Control”
This is the mode for checking each operation or the ON/OFF status of the sensor.
Check to see if there is
no air leakage.
Finger valve
Select the “Manual” button
of the Information area to
start up the Manual
Control utility.