RS-1_instruction manual.pdf - 第651页
Pa r t 2 D et ai l ed Des c r i pt i o n of Ea c h F unc t i o n Chapte r 6 G e neral - Purpose Vision Co mpone nt 6- 20 Sim ple I np ut: Q ui ck E ntr y of Vi si on Da ta o n a Ge ner al - P ur p os e 6.4 Vis io n C omp…
Part 2 Detailed Description of Each Function Chapter 6 General-Purpose Vision Component
6-19
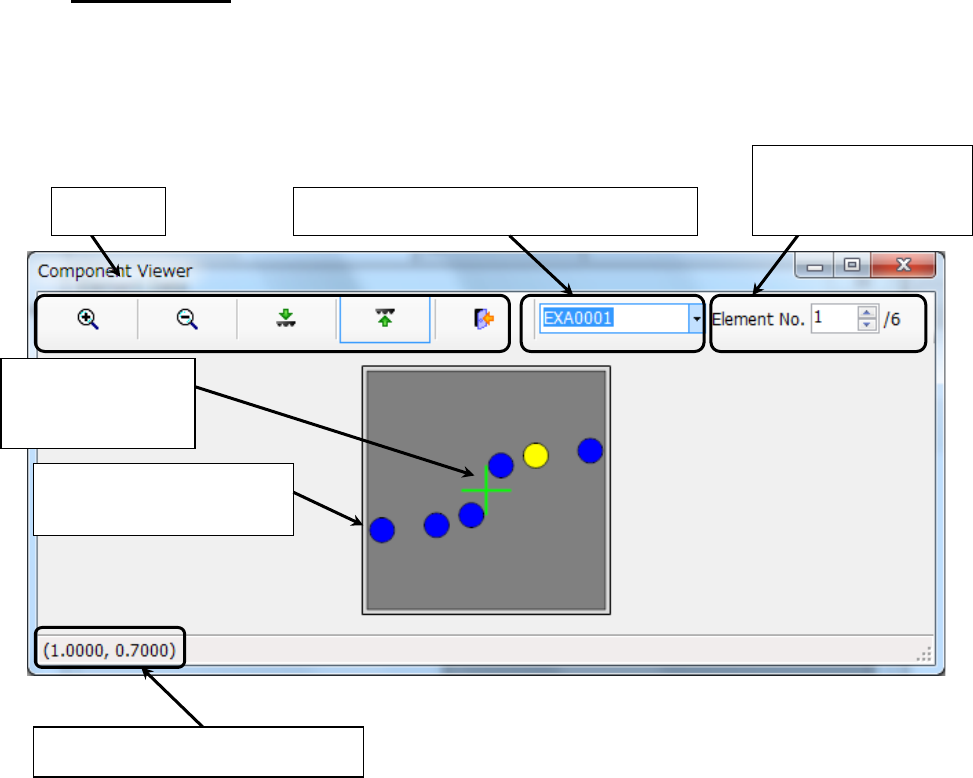
Screen example
The extended array data arrangement image is shown below. When you change the value
in the “Element No.” field with the speed control or when you touch an element displayed on
the screen, the selected element is displayed in yellow. (Elements not selected are
displayed in blue.)
Cross line indicating
the center of a
component
Component outline input in
the Component data
Extended array data group list (display only)
Coordinates of the selected element
Element number of the
selected element and
total number
Tool bar
Part 2 Detailed Description of Each Function Chapter 6 General-Purpose Vision Component
6-20
Simple Input: Quick Entry of Vision Data on a General-Purpose 6.4
Vision Component
This data entry method, “Simple Input” allows you to enter the minimum menu items required to
create vision data thanks to graphics.
Element data to be entered with Simple Input 6.4.1
Simple Input allows you to enter general element data, but you have to enter the complicated
component definition on the “Element Group” screen.).
Data type
Lead component Component whose element groups are all located on one of its sides.
Gull-wing or flat and outer lead
Elements of all element groups are placed in a line respectively.
Outline recognition
component
Corner or side element
(You cannot enter a mark element with Simple Input.)
All elements are “points.”
Ball component You cannot enter any data.
* You cannot create data on an extended array component with Simple Input.
Note: When you select the <Add> or <Edit> button on the “Element Data” screen, and create
or edit data on the “Element Group” or “Element” screen, you cannot use this Simple
Input function to enter the data created or edited.
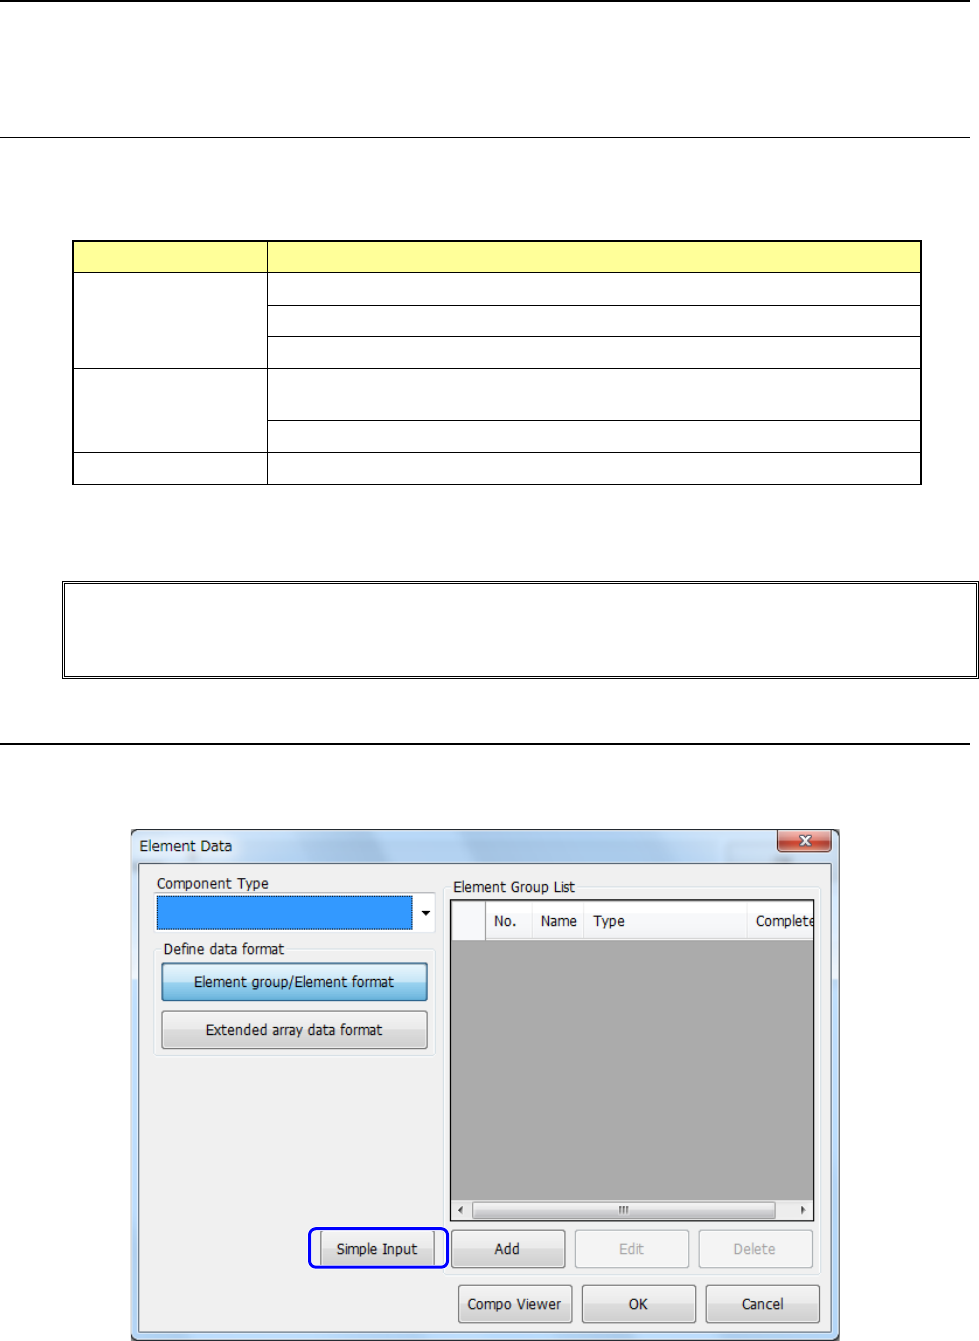
Opening the “Simple Input” screen 6.4.2
When you click the <Simple Input> button after selecting an element in the “Component Type”
field on the “Element Data” screen, the element group definition screen appears.
Part 2 Detailed Description of Each Function Chapter 6 General-Purpose Vision Component
6-21
How to create data on a lead component group 6.4.3
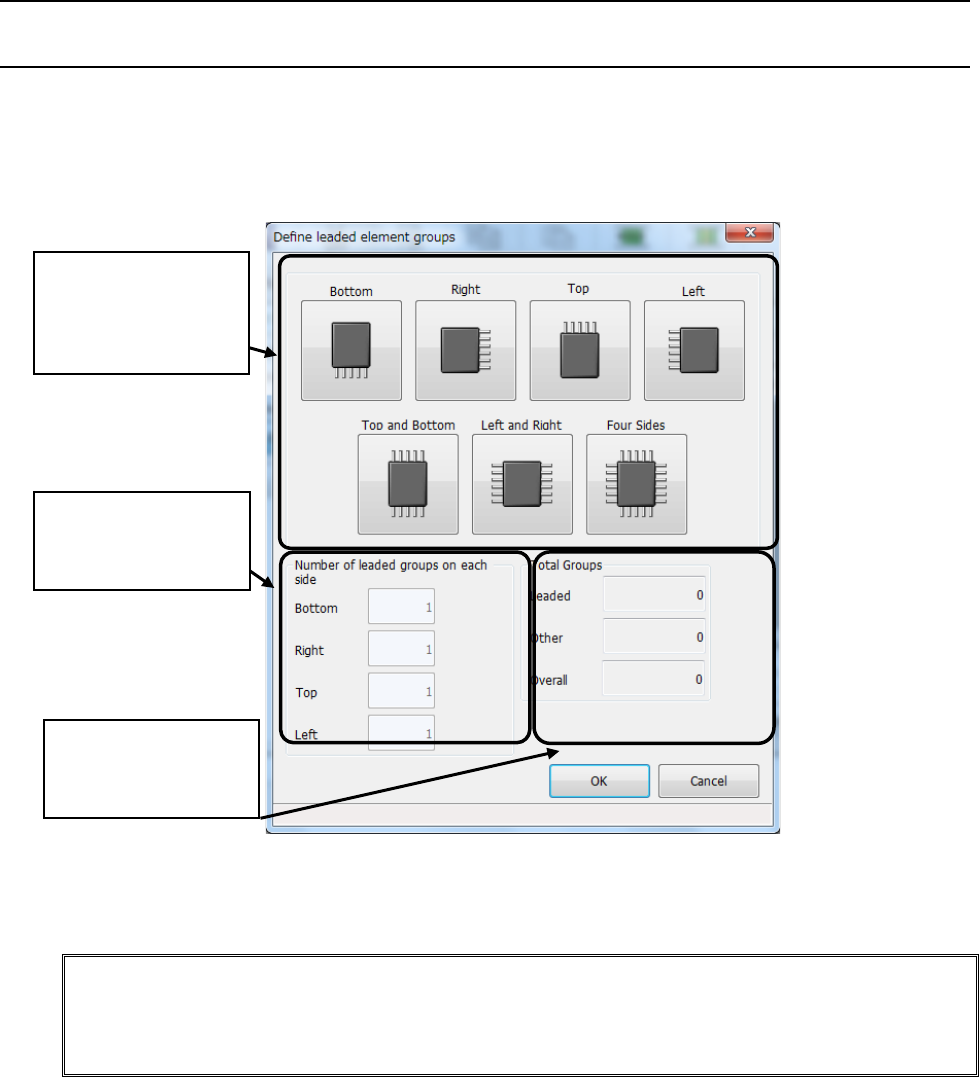
6.4.3.1 Description of the “Define leaded element groups” screen
When you select “Lead component group” on the “Element Data” screen, the following “Define
leaded element groups” screen appears.
After specifying the template whose shape is the same as that of a component, enter the
number of element groups in the “Number of leaded groups on each side” fields.
After entering data, click the <OK> button.
Note: If you quit the “Define leaded element groups” screen after defining element groups and
clicking the <OK> button, the system will not display this screen even though you click
the <Simple Input> button the next time.
To add an element group, do it on the “Simple Input for Leaded Component” dialog box.
③ Total number of
element groups is
displayed here
② Enter the number
of lead groups on
each side.
① Select a template.
(Seven types of
templates are
available.)