RS-1_instruction manual.pdf - 第308页
Part 1 Basic Operat ion Chapter3 D aily maintenance 3- 16 Where to clean Nozzle Cleaning frequency : Every week How to clean Cleaning of the no zzle T ool to be used: Ultrasoni c clean er Recommended soluti on: I PA 1) D…
Part 1 Basic Operation Chapter3 Daily maintenance
3-15
1. When big dirt or dust adheres to the sensor window, blow it off with the blower brush etc. Avoid
blowing it off with the expiration.
2. Contain a small amount of alcohol in a soft cloth (lens cleaner etc.), and wipe small dirt or dust off
with care. Avoid strongly wiping. If the filter is damaged, this will cause an error.
Where to clean
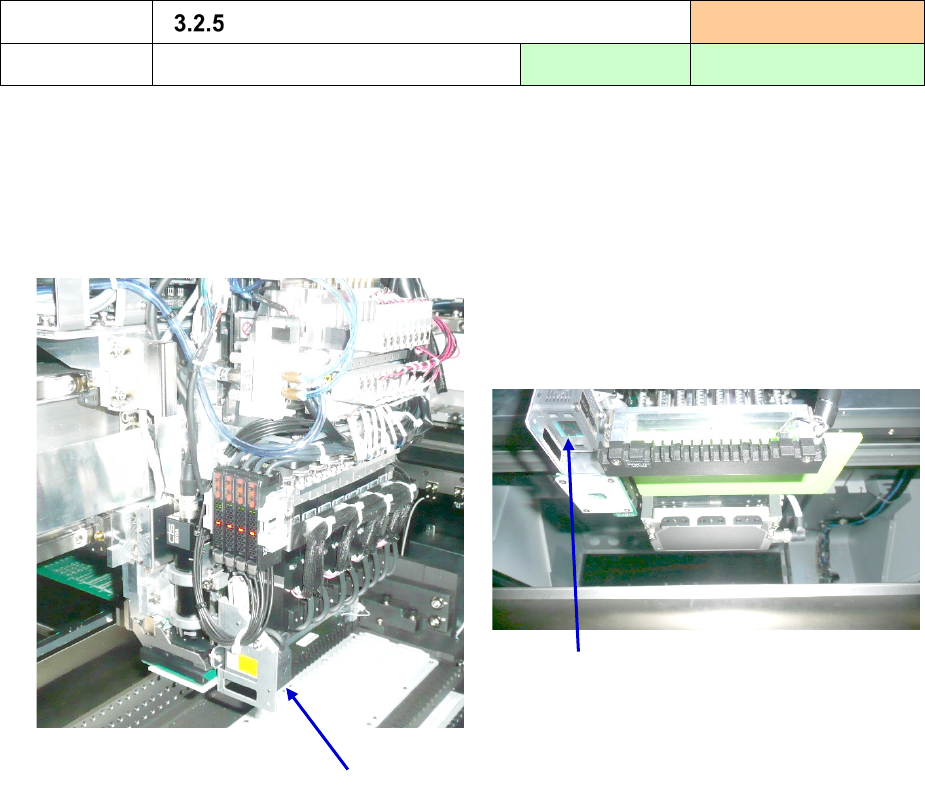
Height Measurement System (HMS)
Cleaning frequency:
Every week
How to clean
Cleaning of the laser window
Tool to be used:
Waste cloth
Recommended solution:
IPA
HMS
Sensor window
Part 1 Basic Operation Chapter3 Daily maintenance
3-16
Where to clean
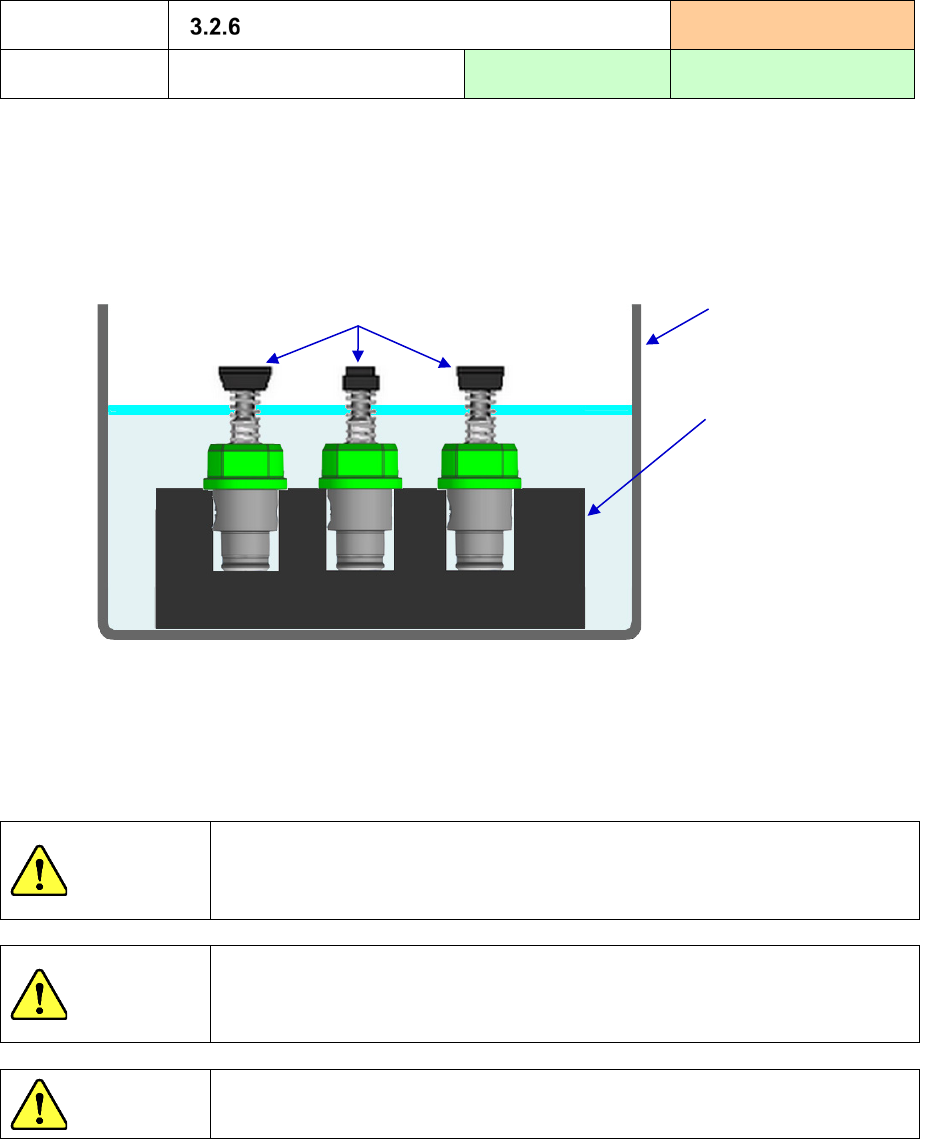
Nozzle
Cleaning frequency:
Every week
How to clean
Cleaning of the nozzle
Tool to be used:
Ultrasonic cleaner
Recommended solution:
IPA
1) Dampen the entire nozzle whose number is from 7500 to 7504, 7509 in alcohol, and clean it with an
ultrasonic cleaner or similar tool for five minutes.
2) To prevent the urethane section of the nozzle tip from being peeled off by cleaning it with alcohol,
use the jig to turn the nozzle whose number is 7505 to 7508 upside down. Then, clean it with an
ultrasonic cleaner so that its tip cannot be dampened in alcohol.
3) Dampen soft cloth with alcohol and use it to clean the urethane part and any part of the nozzle
diffuser on which stains remain stuck to even after you use a supersonic cleaning bath to clean it.
4) After cleaning the nozzle, follow the description of “Applying oil to a nozzle after cleaning it” on the
next page and lubricate the nozzle to prevent its inside from being rusted.
CAUTION
Never use solution (such as acetone) other than alcohol.
The nozzle diffuser may be discolored.
In addition, solution may catch fire. Treat it with enough care.
CAUTION
While you are cleaning the nozzle, be sure to wear a protective mask for
organic odor.
IPA contains a substance harmful to your body.
CAUTION
Never disassemble the nozzle.
Jig block or similar
substance
Urethane part
Beaker or similar
container
Alcohol
We ask you to prepare
the beaker, jib block, etc.
on your side.
Part 1 Basic Operation Chapter3 Daily maintenance
3-17
Lubrication item
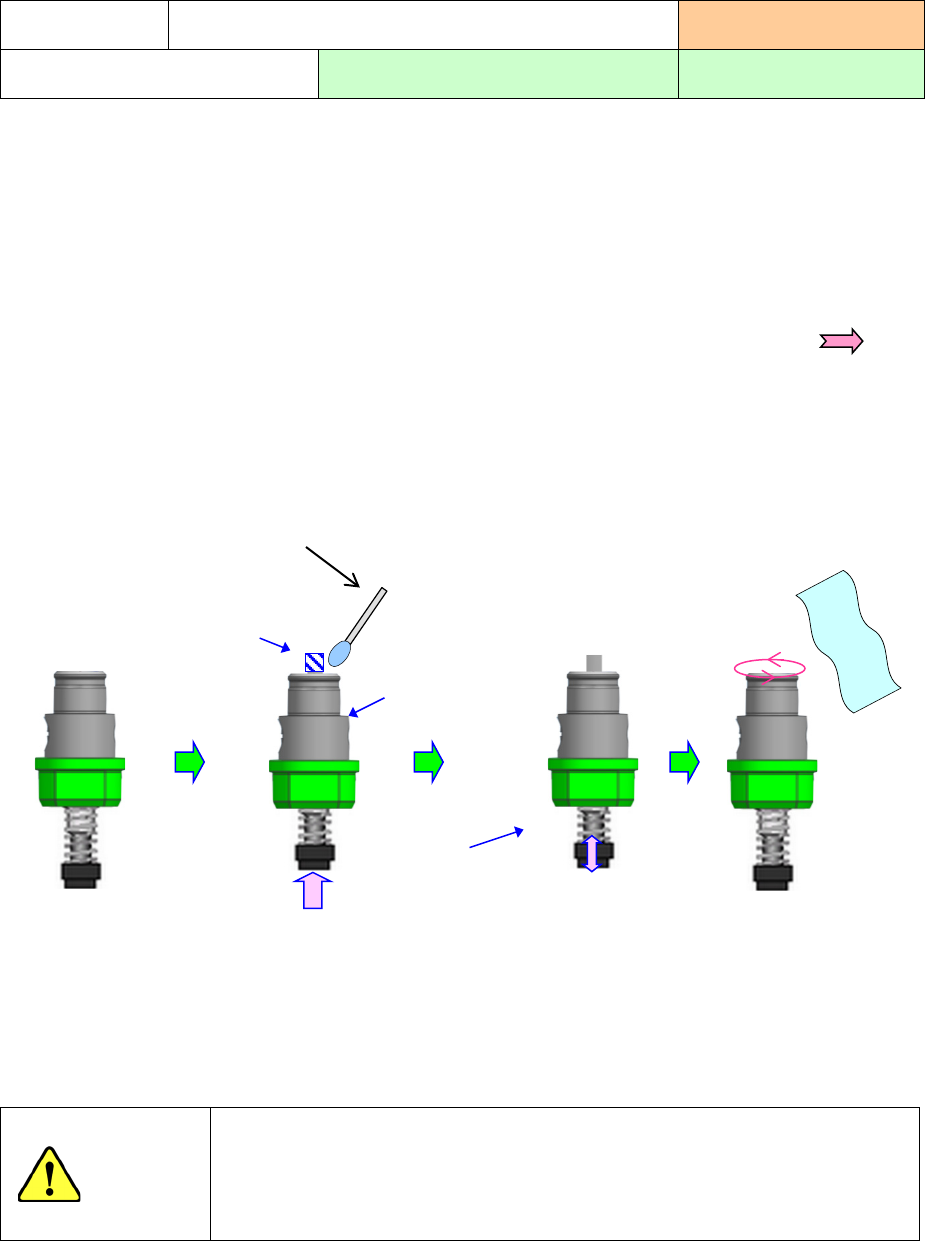
Applying of oil to a nozzle after cleaning it
Lubrication frequency:
Every week
Tools to be used:
Air gun, cotton swab and waste cloth
Oil to be used:
New Defrex No.1
If you leave the nozzle without doing anything to it after cleaning it, the inside of the nozzle may be
rusted.
Follow the procedure below to apply oil to the nozzle slider.
1) After cleaning the nozzle, use an air gun or similar device to blow off alcohol remaining in the nozzle.
2) Apply one drop of oil to the section shaded in the figure below (section protruded from the nozzle
inner when you push the nozzle slider in the direction indicated with the arrow mark ) with a
cotton swab whose half part is dampened with oil.
3) Move the nozzle slider up and down twenty to thirty times to spread oil over the entire nozzle slider.
4) Wipe off excessive oil around the nozzle with clean waste cloth.
5) After applying oil to the nozzle slider, return the nozzle to the ATC unit, and select the [Machine
setup] command and the [Nozzle setup] command in this order.
(Refer to Section 8.3.2.3 “Nozzle setup”)
CAUTION
1) Do not use oil any other than New Defrex Oil No. 1 to a nozzle.
If you use oil whose viscosity is high such as grease, the nozzle
slider cannot return to its original position normally.
2) Be sure to return the nozzle to the ATC unit instead of the head.
Nozzle slider
②
Move up and down the
nozzle slider 20 to 30 times.
①
Apply oil to this part with a
cotton swab dampened with oil.
Part to which oil
should be applied
③
Wipe off excessive oil
with a waste cloth.