RS-1_instruction manual.pdf - 第160页
Part 1 B asic O peration Chapter 2 Pr oduction 2- 49 Stop T o temporarily stop PW B production, pres s the <STO P> switch on the o peration panel. Both stati ons stop produ cing a PWB tempor arily , and two “Stop” …
Part 1 Basic Operation Chapter 2 Production
2-48
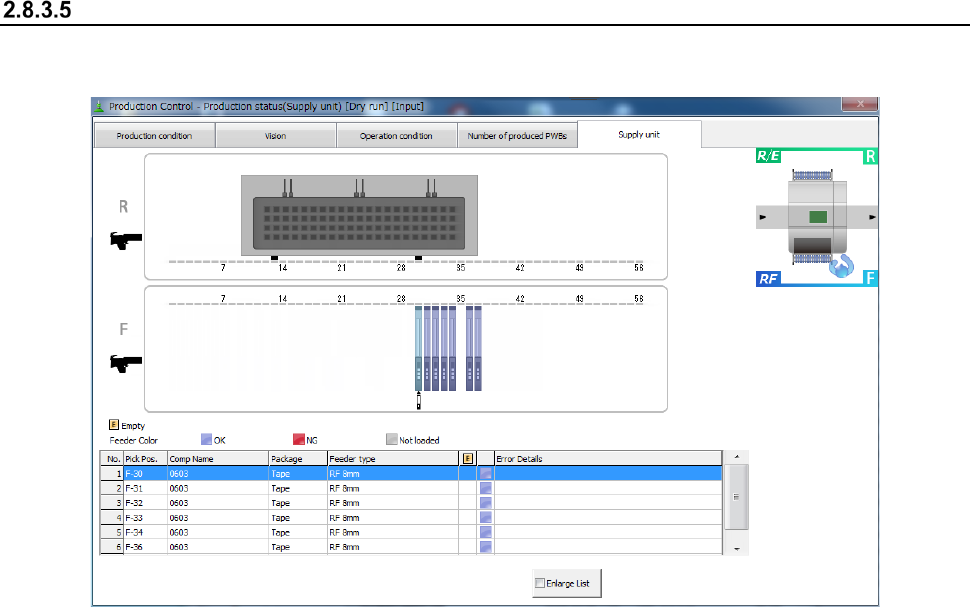
Feeder
The state of an electric feeder during PWB production is displayed here.
See Section 2.10 “Electric feeder check” for details.
Part 1 Basic Operation Chapter 2 Production
2-49
Stop
To temporarily stop PWB production, press the <STOP> switch on the operation panel.
Both stations stop producing a PWB temporarily, and two “Stop” screens appear on the right
and left sides.
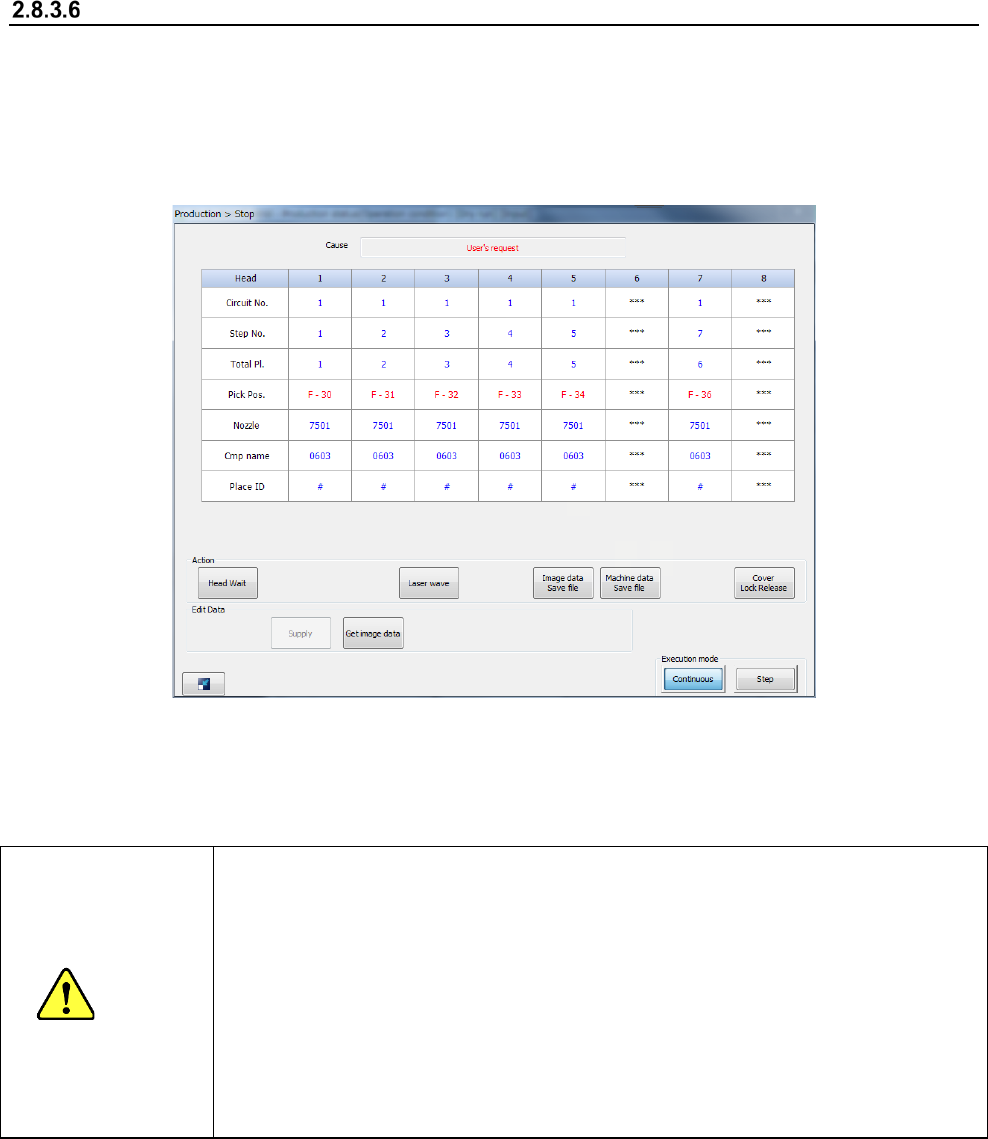
When you press the <STOP> switch in Continuous production mode, or when the production
in Step production mode stops at a step position, the machine is put in the pause state.
The screen displayed when the machine pauses is shown in the figure below.
When you press the <START> switch at this point, the “Stop” screen disappears, and the machine
exits from the pause state. When you press the <STOP> switch, the machine starts performing the
production interrupt process.
CAUTION
Immediately after you press the <START> switch, the head starts moving and the
system starts production.
To avoid injuries, do not put your hands inside the machine or keep your face or
head away from the machine.
Before pressing the <START> switch, check to see if there is no one who is working
the internal parts of the machine.
Before pressing the <START> switch, check to see if there is no one who is near the
machine and may be injured.
Before pressing the <START> switch, check to see if there is no obstacle such as an
adjustment tool that is located or attached inside the machine and may prevent the
machine from operating normally.
Part 1 Basic Operation Chapter 2 Production
2-50
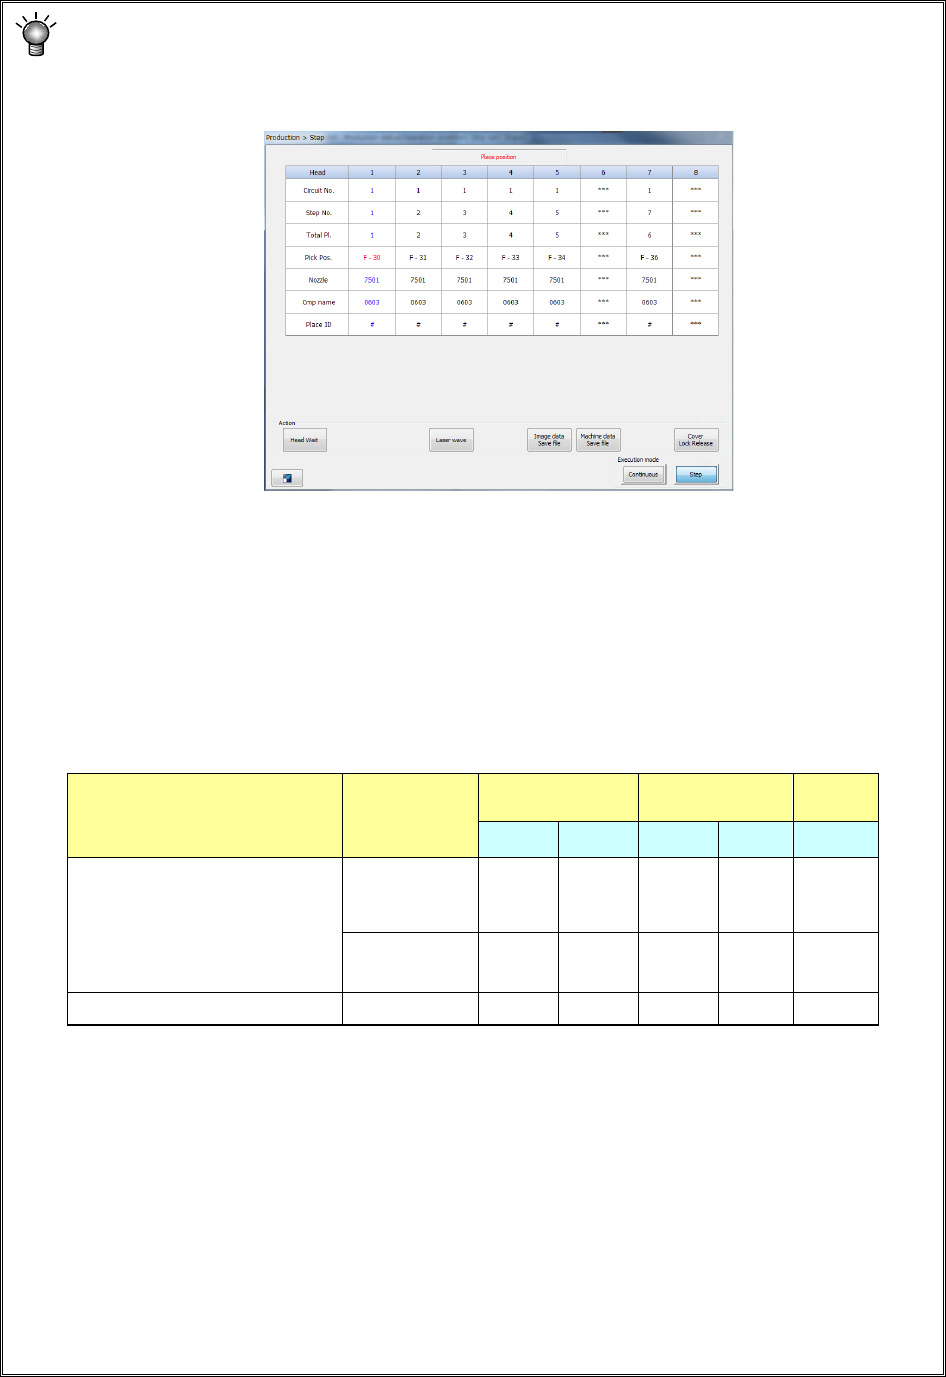
1) If you press the <START> switch of the operation panel to start PWB production when the
<Step> button is selected for the “Execution mode” menu item on the “Production control”
screen, the current screen is switched to the “Production status” screen also. Then, the
“Step” screen appears in the same manner as the “Stop” screen.
2) If you press the <Head Wait> button on the screen when the machine stops on Step
production mode or when the machine pauses during continuous PWB production, you
can move the head to its waiting position.
3) If you select the <Continuous> button or the <Step> button when the machine stops on
Step production mode or when the machine pauses during continuous PWB production,
you can switch production mode from Continuous to Step or vice versa.
4) Teaching in the pause state
When the machine is put in the pause state during production, the following data can be
taught according to the cause of the pause state and the pause position.
1. Teaching of component pick-up positions can be performed when components are to
be placed in Input order and sequentially picked up.
(The system cannot teach the position when two or more components are picked up at
the same time.)
2. For a multi-plane board, teaching of the component placement positions is available
only while the system is placing the reference circuit, and it cannot teach the placement
position when the system detects a bad mark from the reference circuit.
3. Data to be obtained with teaching operation is only data on the device item specified
immediately before you press the <OK> key on the “Teaching” screen. When you
want to obtain the data on all the axes, XY and Z, by teaching, teach each axis
separately to obtain it.
Cause for stopping Stop position
Pick data Placement data
Mark
data
X,Y Z X,Y Z X,Y
- User request by a switch
- The cover is opened.
(in Maintenance mode only)
- The feeder bank moves down.
- The system detects the feeder
floating.
Pick position
○
○
Placement
position
○
Mark recognition error Mark position
○