RS-1_instruction manual.pdf - 第295页
Part 1 Basic Operat ion Chapter3 D aily maintenance 3-3 Checking Each Part Inspection it e m Air pressure/drain tank Inspection freq uenc y : ev eryday What to inspe ct Check the original air press ure and t he drain. 1)…
Part 1 Basic Operation Chapter3 Daily maintenance
3-2
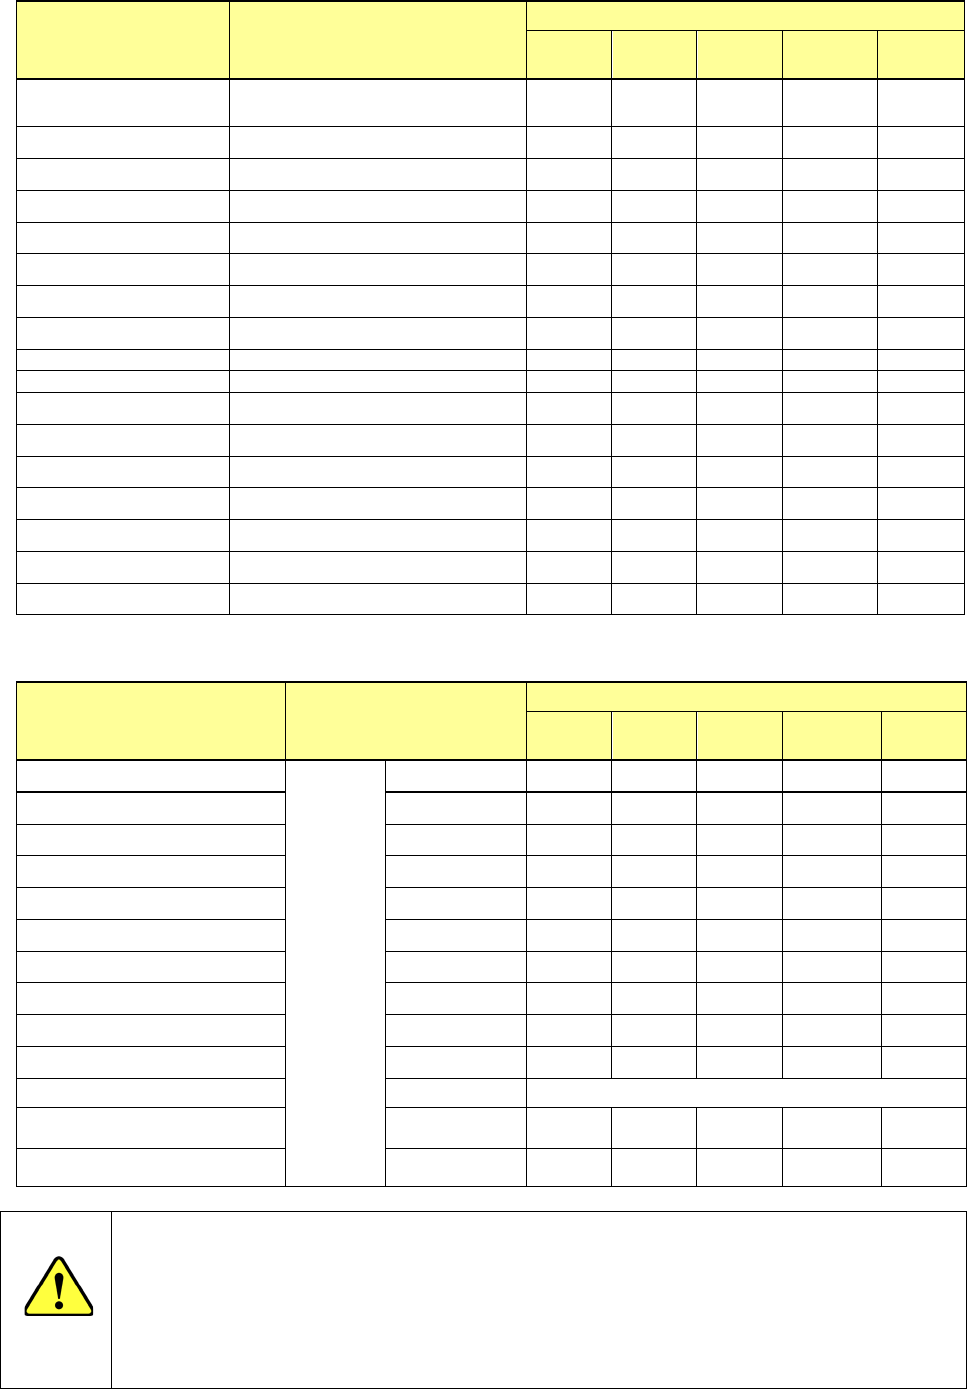
(2) Cleaning
Cleaning point Check
Cleaning frequency
Daily Weekly Monthly Bimonthly
Every
half year
X- and Y-axis direct drive
units
Remove dust and foreign substances.
○
Transfer sensors Remove dust and foreign substances.
○
CAL block Remove dust and foreign substances.
○
Laser align sensor Clean the sensor window. ○
HMS Clean the sensor window.
○
Nozzle
Clean the nozzle.
○
Nozzle outer Clean the inside of the nozzle outer.
○
ATC unit Remove dust and foreign substances.
○
Feeder exchange trolley
Remove dust and foreign substances.
○
Bank lifter
Remove dust and foreign substances.
○
OCC (Polarizing filter) Remove dust and foreign substances.
○
VCS unit Clean the top side. ○
Fan motor filter Remove dust and foreign substances.
○
Cutter blade Remove dust and foreign substances.
○
Load control unit (option) Remove dust and foreign substances.
○
CVS (option) Remove dust and foreign substances.
○
Coplanarity sensor (option) Clean the sensor window.
○
One year = 6,600 hours
(3) Lubrication
Lubrication point Check
Lubricating point
Daily Weekly Monthly Bimonthly
Every
half year
X- and Y-axis direct drive unit rails
Smooth
movement
6459 Grease N
○
X- and Y-axis ball screw NSL Grease
○
Transfer screw shaft 6459 Grease N
○
Transfer guide shaft 6459 Grease N
○
Drive shaft 6459 Grease N
○
Ball screw (Head part) CG2 Grease
○
Spline shaft (head part) CG2 Grease
○
Support table 6459 Grease N
○
Feeder exchange trolley 6459 Grease N
○
Bank lifter 6459 Grease N
○
Nozzle Oil
After cleaning
Nozzle outer
6459 Grease N,
Oil
○
Conveyor stopper (Elongate hole
link mechanism section)
6459 Grease N
○
DANGER
1. For lubrication, use the attached oil or grease, and don’t use the one other than specified by Juki.
2. Use the grease specified by Juki appropriately. If you use the wrong grease, it causes any trouble
in the operation of the machine.
3. New Defrex Oil No. 1: Class four, third petroleum
Grease (6459 Grease N): Not dangerous product regulated with the Fire-Defense law
Grease (NSL Grease): Not dangerous product regulated with the Fire-Defense law
Grease (Grease CG2): Not dangerous product regulated with the Fire-Defense law.
Grease (AFC+400): Not dangerous product regulated with the Fire-Defense law.
Part 1 Basic Operation Chapter3 Daily maintenance
3-3
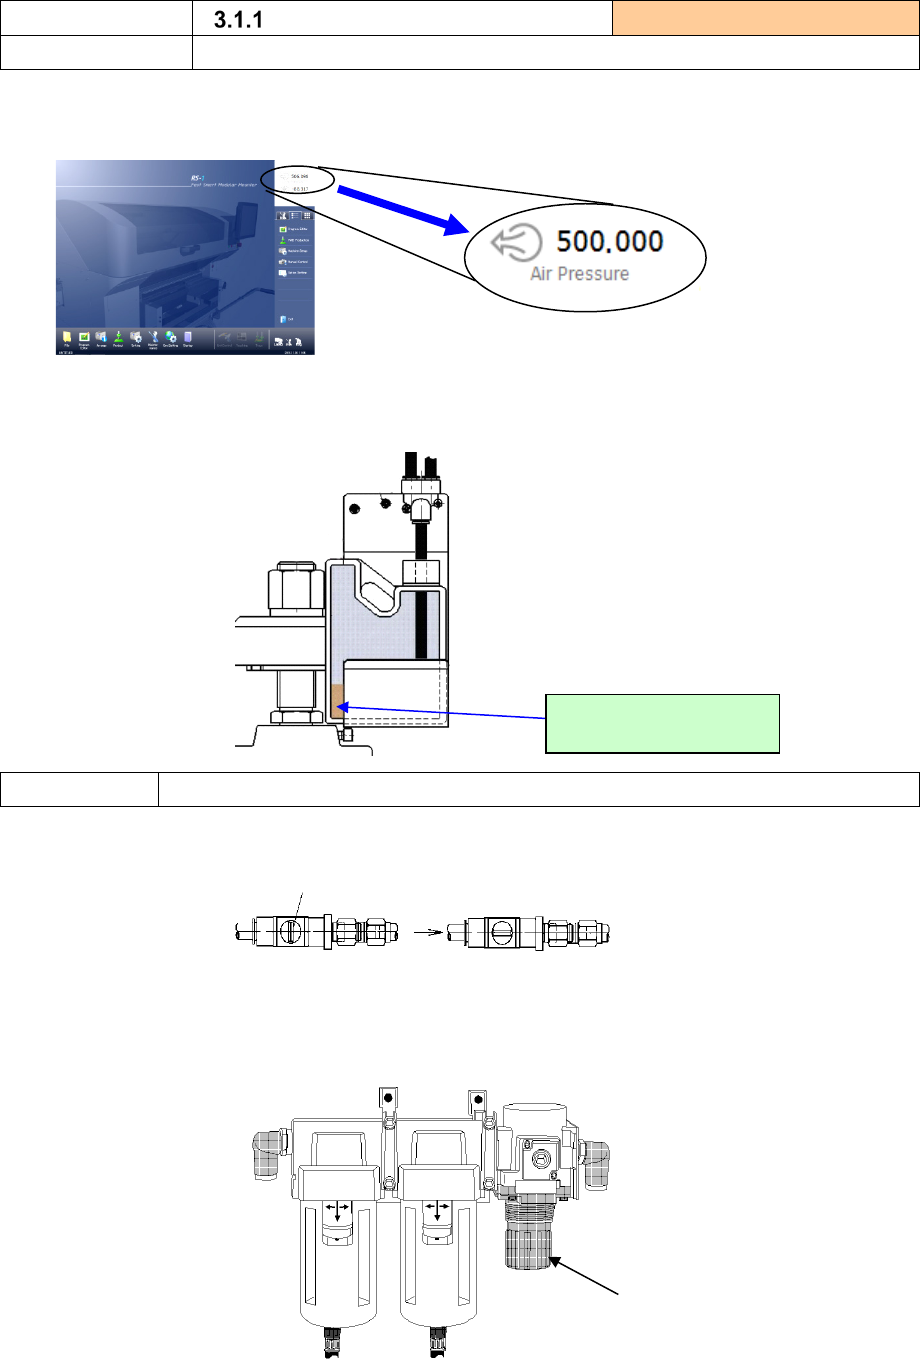
Checking Each Part
Inspection item
Air pressure/drain tank
Inspection frequency: everyday
What to inspect
Check the original air pressure and the drain.
1) Touch the upper right corner of the screen and check to see if the pressure of the used air is 500 ±
50 kPa.
2) If the indicated value is not within this range, check to see if air from the factory leaks anywhere. If
there is not any problem, follow “How to adjust” below to readjust the pressure.
3) Drain oil and water in the bottle connected to the drain.
How to adjust
Adjustment of the original air pressure
1) Put the knob ① into the open state.
2) Pull the knob of the regulator ② downward, then rotate it so that the pressure of the used air can
become 0.5 MPa.
Discard oil or water
collected in the bottle.
Open status
Closed status
①
②
Part 1 Basic Operation Chapter3 Daily maintenance
3-4
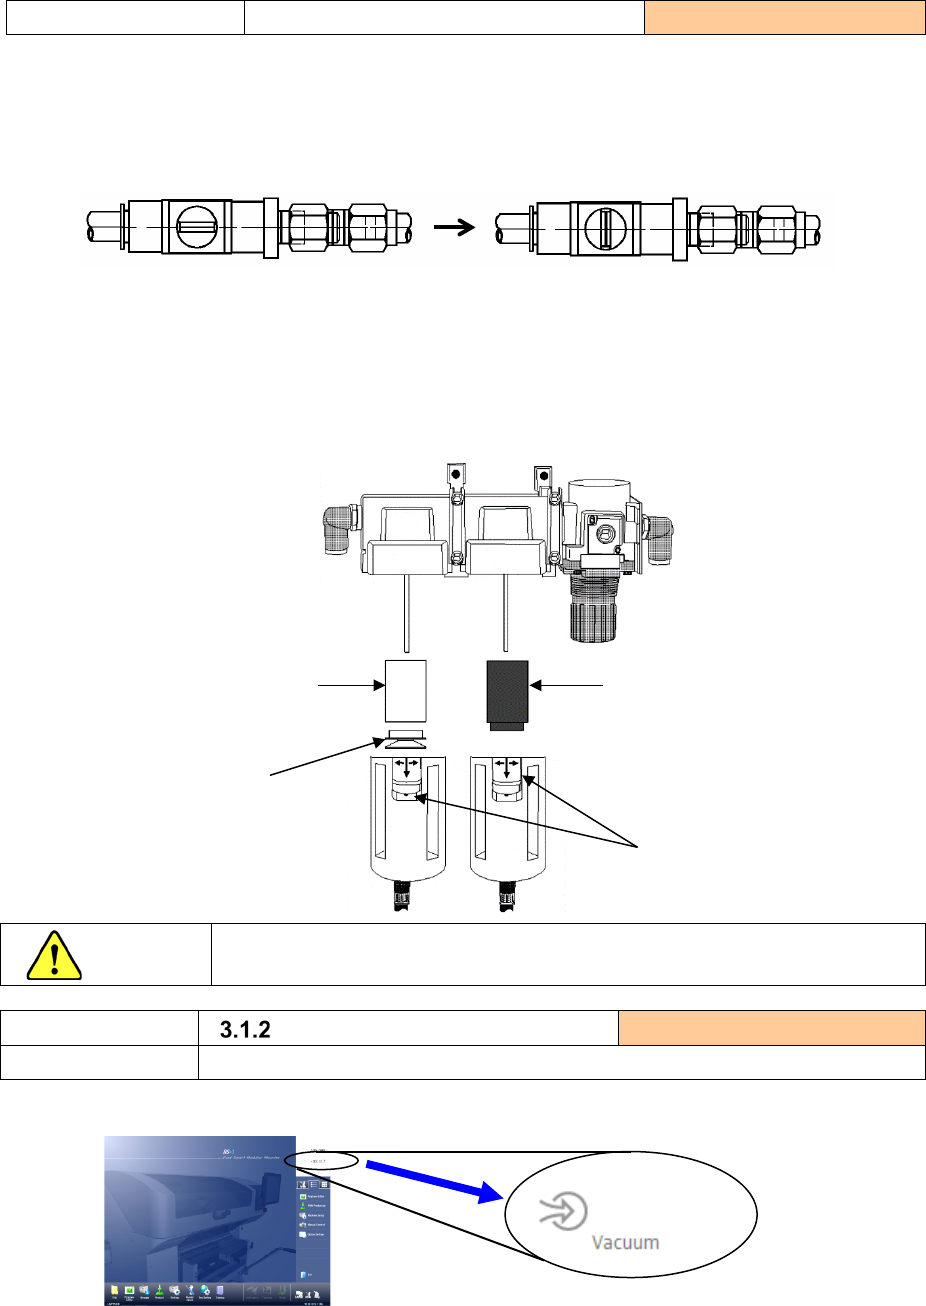
Inspection/Replacement
Replacement of the filter element
When to replace: one year
When to replace a filter element:
Every two years or when the air pressures decreases to approximately 0.1 MPa (1 kgf/cm
2
).
How to replace a filter element
1) Close the finger valve knob.
2) While pushing the sliding part downward, rotate the main unit to the left or the right by 45 degrees to
pull it out downward.
3) Remove the filter element B by rotating the resin part that fixes the filter element B to the left.
Remove the filter element A by rotating it itself to the left.
4) Attach each filter element by following this procedure in the reverse order.
CAUTION
Close the control of the finger valve before following the procedure above.
Inspection item
Vacuum pressure
Inspection frequency: everyday
What to inspect
Check the vacuum pressure.
1) Make sure that the vacuum pressure indication of a standby reaches -88 kPa.
2) If the negative pressure display (max) in standby status with vacuum pump specification decreases
to -88kPa or less, consumables must be replaced. Inspect and replace consumables by referring to
“3.7.2 Replacement of vacuum pump parts.”
Open status
Closed status
Filter element A
PF901010000
Filter element B
PF901006000
Resin part
Sliding part
-88.317