RS-1_instruction manual.pdf - 第797页
Part 2 D etaile d Descript ion of E ach Functi on Chapter 9 M anual Control 9- 25 Electr ic stick feede r E Stick N E St ick W Electric D TS Electric D TS (2) Contr ol it em Select a contr ol item by r adio butt on and e…
Part 2 Detailed Description of Each Function Chapter 9 Manual Control
9-24
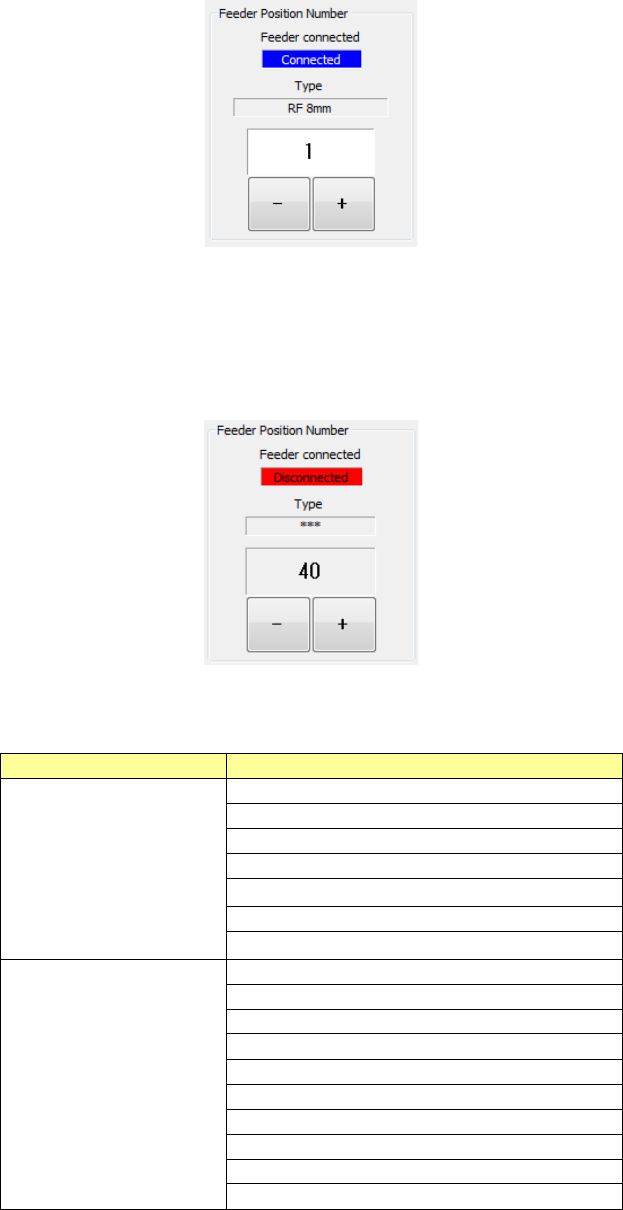
(1) Feeder position number selection
This operation is common regardless of the connected device type.
Select a feeder position No. of the electric feeder to be control by the <+> button and <->
button. When you press he <+> button, the connected electric feeder can be selected by a
larger feeder position number than the currently displayed feeder position number. When
you press the <-> button, the connected electric feeder can be selected by a smaller feeder
position number than the currently selected feeder position number. If any selectable
electric feeder is not found, the feeder position number remains without change.
However, when the “Feeder connected” status of the selected electric feeder is “Not
connected,” <Exec> and <Set> cannot be operated. (Except tape cut control)
In this case, connect the electric feeder to the displayed feeder position number or select a
feeder position number by the <+>/<-> button after connecting the electric feeder to any
optional feeder position number.
The device names that are displayed as types are shown below.
Feeder
Displayed device name
Electric feeder
E 8 mm single
E 12 mm
E 16 mm
E 24 mm
E 32 mm
E 44 mm
E 56 mm
Electric feeder (RF)
RF 4 mm
RF 8 mm
RF 12 mm
RF 16 mm
RF 24 mm
RF 32 mm
RF 44 mm
RF 56 mm
RF 72 mm
RF 88 mm

Part 2 Detailed Description of Each Function Chapter 9 Manual Control
9-25
Electric stick feeder
E Stick N
E Stick W
Electric DTS
Electric DTS
(2) Control item
Select a control item by radio button and exert control by the <EXEC> button.
Selectable control items vary depending on the device type.
<Electric feeder>
When the selected feeder is a double lane feeder, select a lane by the combo box.
1) Initialize
Enter “Origin offset” and press the <EXEC> button, and a return-to-origin operation is
performed.
For the RF **mm feeder, this button cannot be selected.
2) One-pitch feed forward (backward)
Enter “Correction” and press the <EXEC> button, and a one-pitch feed
forward/backward operation is performed.
3) Feed designated distance
Enter “Feed distance” and press the <EXEC> button, a feed designated distance
operation is performed.
For the RF **mm feeder, this button cannot be selected.
4) Step feed forward (backward)
Select the <EXEC> button, and a step feed operation is performed.
For the RF **mm feeder, this button cannot be selected.
<Electric stick feeder>
1) One-pitch Feed Forward
When you select the <EXEC> button, the machine feeds a stick forward by one pitch.
Part 2 Detailed Description of Each Function Chapter 9 Manual Control
9-26
<Electric DTS>
1) Origin
When you press the <EXEC> button, the DTS returns to the origin.
2) Supply Request
This button puts the DTS in the state for supplying the machine with components (you can
open the cover).
When the DTS can supply the machine with components, you cannot return the DTS to the
origin, or pull a tray from the DTS.
3) Speed High 2/Speed High/Speed Low
Select the speed at which a tray is pulled out from the DTS with one of these buttons.
4) Tray A/Tray B/Tray A/B
When you select the <EXEC> button, the DTS starts pulling out a tray at the selected speed.
If the selected tray has been pulled out already when you execute the <Tray A> or the <Tray
B> button, the DTS does not pull out the corresponding tray.
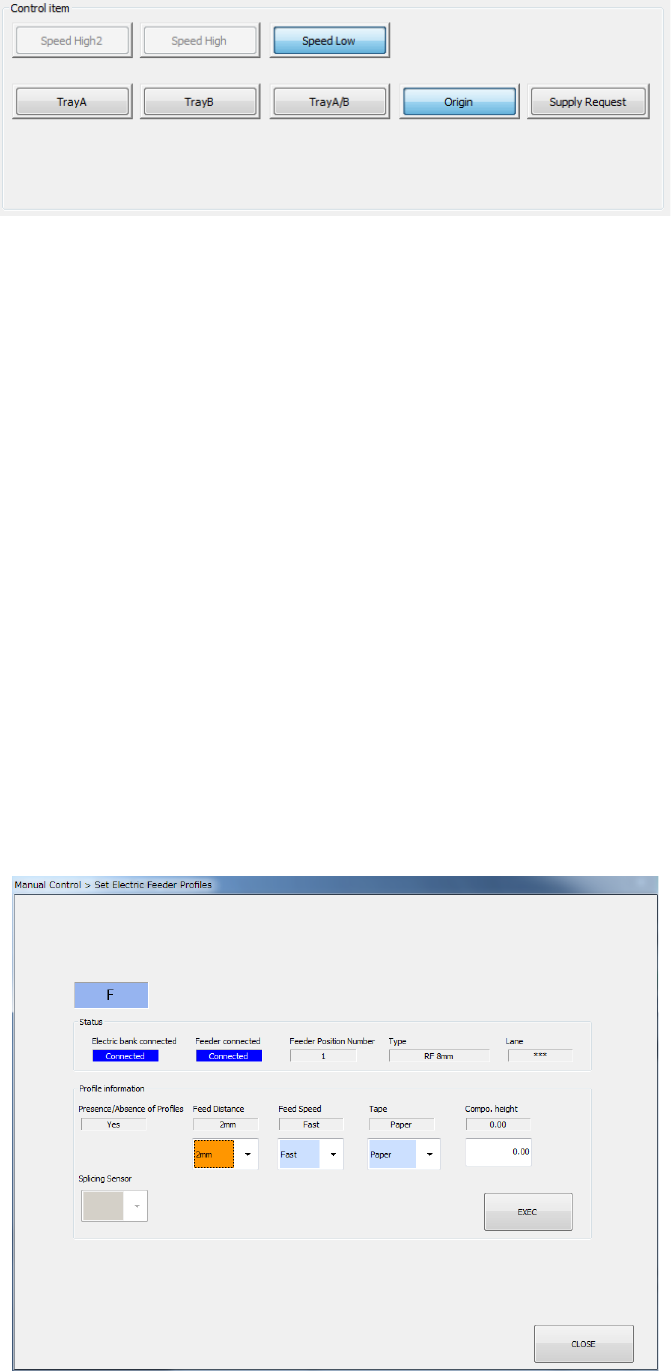
(3) Setting
When the electric feeder or electric stick feeder is connected, the <Set> button is enabled.
When you press the <Set> button, the profile setting dialog of the selected feeder is
displayed. After selecting a feed speed or tape type by the combo box, press the <EXEC>
button. When “Electric bank connected” or “Feeder connected” is set to “Not connected,”
the <EXEC> button cannot be operated.
<Electric feeder>