RS-1_instruction manual.pdf - 第777页
Part 2 D etaile d Descript ion of E ach Functi on Chapter 9 M anual Control 9-5 9.3.2 Head dev ice control When you se lect [Head] – [Head device cont rol] in the menu, the h ead device control screen appears. (1) Statu …
Part 2 Detailed Description of Each Function Chapter 9 Manual Control
9-4
2) Z move
When you select the control item “X move,” enter the coordinates of the movement
destination and press the <Exec> button. Then, the selected head is moved.
The displayed coordinates are updated after the head finishes moving.
3) Theta move
When you select the control item “Theta move,” enter the coordinates of the movement
destination and press the <Exec> button. Then, the selected head is moved.
The displayed coordinates are updated after the head finishes moving.
4) ZA move
When you select the control item “ZA move,” select the height of the movement
destination from the combo box and press the <Exec> button. Then, the ZA axis is
moved.
The current height lateral to the combo box is updated after the ZA axis finishes
moving.
5) Vacuum ctrl.
This button controls ON/OFF of the vacuum device of the selected head.
When you select the control item “Vacuum control,” press the <ON> button, <OFF>
button, or <ON/OFF> button for control.
The displayed pressure is updated when the system finishes controlling the vacuum
device.
6) Blow ctrl.
This button controls ON/OFF of the blow device of the selected head.
When you select the control item “Blow control,” press the <ON> button, <OFF> button,
or <ON/OFF> button for control.
The displayed pressure is updated when the system finishes controlling the blow
device.
(3) Status
This is displayed when control is completed of XY axis coordinates, Z axis coordinates, θ
axis coordinates and pressure values.
The displayed values vary depending on the selected head.
Part 2 Detailed Description of Each Function Chapter 9 Manual Control
9-5
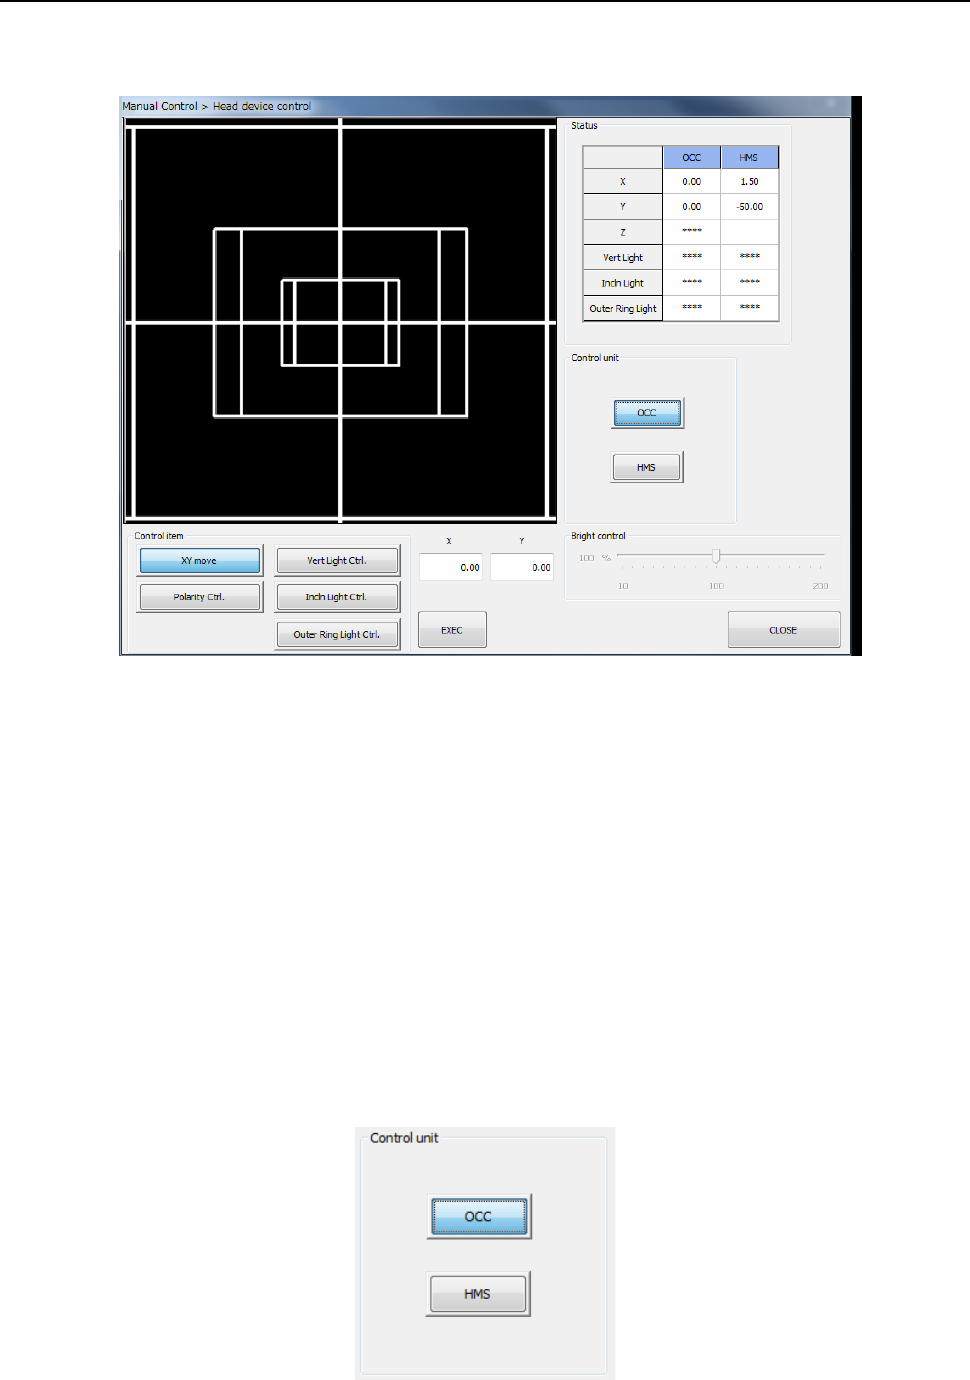
9.3.2 Head device control
When you select [Head] – [Head device control] in the menu, the head device control screen
appears.
(1) Status
1) OCC
The XY-axes coordinates and the ON/OFF status of each light (vertical light (“Vert
Light”), inclined light (“Incln Light”) and outer ring light) are displayed when these items
are controlled completely.
When the option settings for the outer ring light are not set, the display reads “****.”
2) HMS
The XY-axes coordinates and the Z-axis coordinate are displayed when these items are
controlled completely.
(2) Control unit
Select the unit to be controlled with the corresponding push button.
You cannot select any unit that is not checked (that is, not mounted) on the “Option Unit”
screen of the MS parameter utility. The setting of the “Device enable” screen of the
Machine Setup utility does not affect this selection.
Part 2 Detailed Description of Each Function Chapter 9 Manual Control
9-6
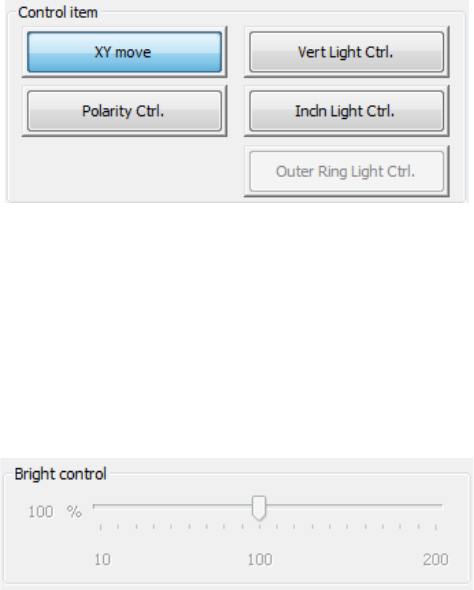
(3) Control item
Select the control item with the corresponding push button.
The displayed buttons vary depending on selection of the unit to be controlled.
1) OCC
a) XY move
This button functions in the same manner as the <XY move> button displayed on the
“Head control” screen does.
b) Vert Light cont
This button turns ON/OFF the vertical light of the OCC.
- Move the Control Item to set the brightness.
- When “Vert Light Ctrl” is selected, press the <ON> button, <OFF> button, or
<ON/OFF> button for control.
- The displayed status of the light is updated when the system finishes controlling the
light.
c) Incln Light cont
This button turns ON/OFF the inclined light of the OCC.
Make the settings of this light in the same manner as (b) the vertical light above.
d) Outer Ring Light cont (optional)
This buttons turns ON/OFF the outer ring light of the OCC.
Make the settings of this light in the same manner as (b) the vertical light above.
This item cannot be selected unless an option setting is performed by MS parameter.
e) Polarity cont
This button sets the polarity of the OCC to negative or positive.
When the control item “Polarity Ctrl” is checked off, press the <Positive> button,
<Negative> button, or <Positive/Negative> button for control.