RS-1_instruction manual.pdf - 第331页
Part 1 Basic Operat ion Chapter3 D aily maintenance 3- 39 Replacing the gas ket 1) R emov e f our hexag on headed bolts (M6 × 95) (total eight bolts on t he left and right sides ) from the pump head cov er . 2) R emov …

Part 1 Basic Operation Chapter3 Daily maintenance
3-38
3) Remove the air tube and harness (power ground wire) connected to the vacuum pump and then
remove the hexagon head shoulder bolts (M6 x 13 mm) and hexagon nuts that fix the
VACUUM_PUMP_STAY.
4) Take out the vacuum pump from the main unit.
*
When taking it out, take care about the harness.
* When removing the vacuum pump, take care not to hold the connecting pipe.
* When taking out the vacuum pump, The rubber leg of a vacuum pump and VACUUM_PUMP_BR
may adhere.
Connecting pipe
Power ground wire
VACUUM_PUMP_ST
VACUUM_PUMP_BR
Air tube
Hexagon head
shoulder bolt x 2
Hexagon nut x 2
Part 1 Basic Operation Chapter3 Daily maintenance
3-39
Replacing the gasket
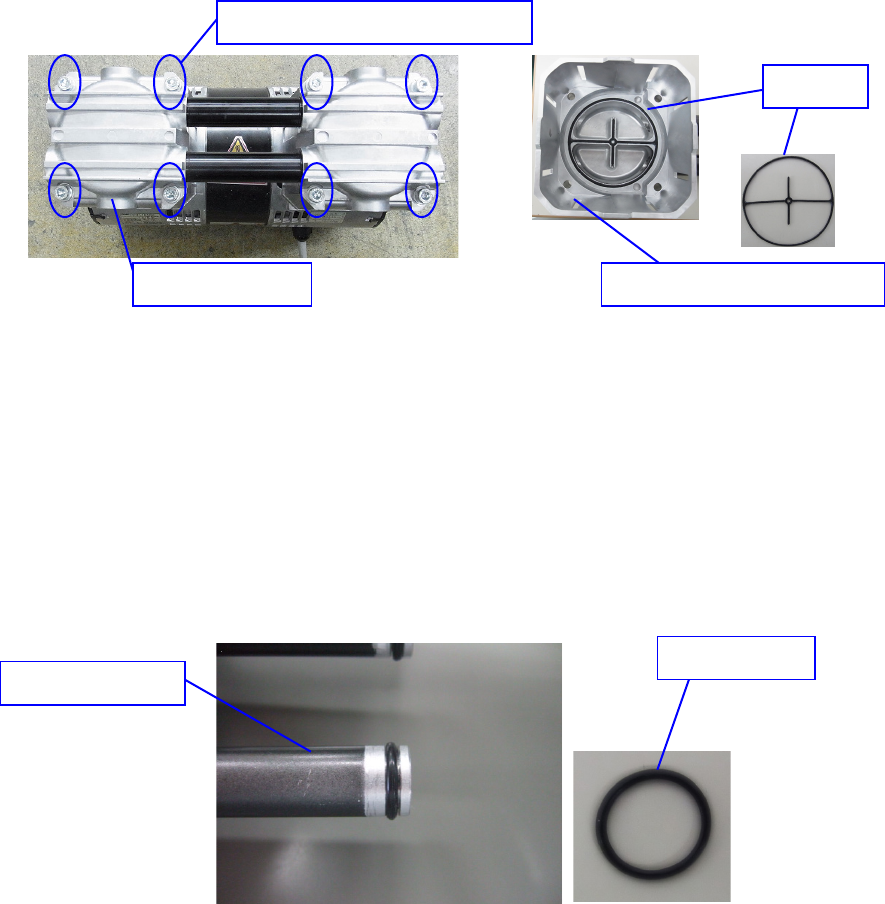
1) Remove four hexagon headed bolts (M6×95) (total eight bolts on the left and right sides) from
the pump head cover.
2) Remove the total of two black gaskets from the inside of the pump head cover, and then replace
them with new gaskets.
* Make sure that the gaskets are fit in the gasket groove of the pump head cover.
3) Tighten the hexagon headed bolts (M6×95) fixing the pump head cover and located in diagonal
lines at 5.0 N·m.
* To replace another consumable part with a new one, see the description of the procedure for
replacing the corresponding part without closing the cover.
Replacing the O-ring P-10
1) Remove the pump head cover and the connecting pipes in the manner described in the
procedure for replacing the gasket above.
2) Attach the O-ring P-10 on the connecting pipe that connects two pump head covers.
3) While taking care not to damage the O-ring when inserting the connecting pipe, replace the
O-ring with a new one. (Replace two O-rings on both sides of each pipe.)
* Before replacing the O-ring, clean the O-ring groove of each connecting pipe and the connecting
pipe attachment hole of the pump head. To assemble the cover, follow the procedure for
replacing the gasket. To replace another consumable part with a new one, see the description
of the procedure for replacing the corresponding part without closing the cover.
Pump head cover
Inside of the pump head cover
Gaskets
Hexagon headed bolts (M6
×
95)
O-ring P-10
Connecting pipe
Part 1 Basic Operation Chapter3 Daily maintenance
3-40
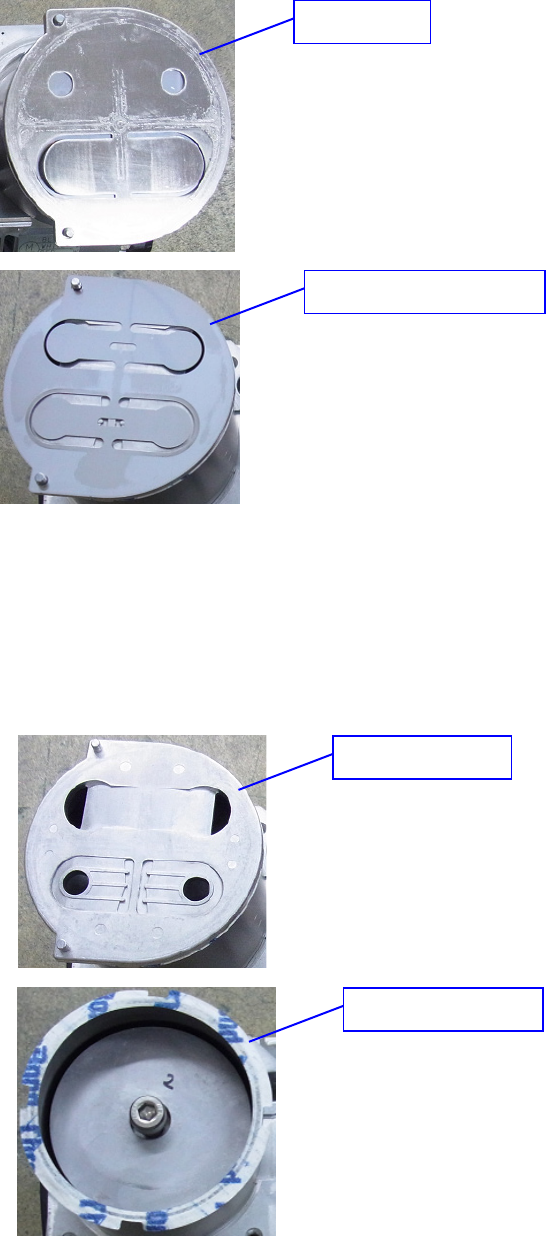
Replacing the air suction/release valve
1) Remove the valve guard.
2) Remove the air suction/release valve, and replace it with a new one.
* To assemble the cover, follow the procedure for replacing the gasket. To replace another
consumable part with a new one, see the description of the procedure for replacing the
corresponding part without closing the cover.
Replacing the cylinder gasket
1) Remove the cylinder plate.
2) Remove the cylinder gasket, and replace it with a new one.
* To assemble the cover, follow the procedure for replacing the gasket. To replace another
consumable part with a new one, see the description of the procedure for replacing the
corresponding part without closing the cover.
Valve guard
Air suction/release valve
Cylinder plate
Cylinder gasket