RS-1_instruction manual.pdf - 第297页
Part 1 Basic Operat ion Chapter3 D aily maintenance 3-5 Inspection it e m Piping and joint Inspection freq uenc y : Ev er y w eek What to inspe ct Check to see if the optional filter is st ained. 1) Chec k that there is …
Part 1 Basic Operation Chapter3 Daily maintenance
3-4
Inspection/Replacement
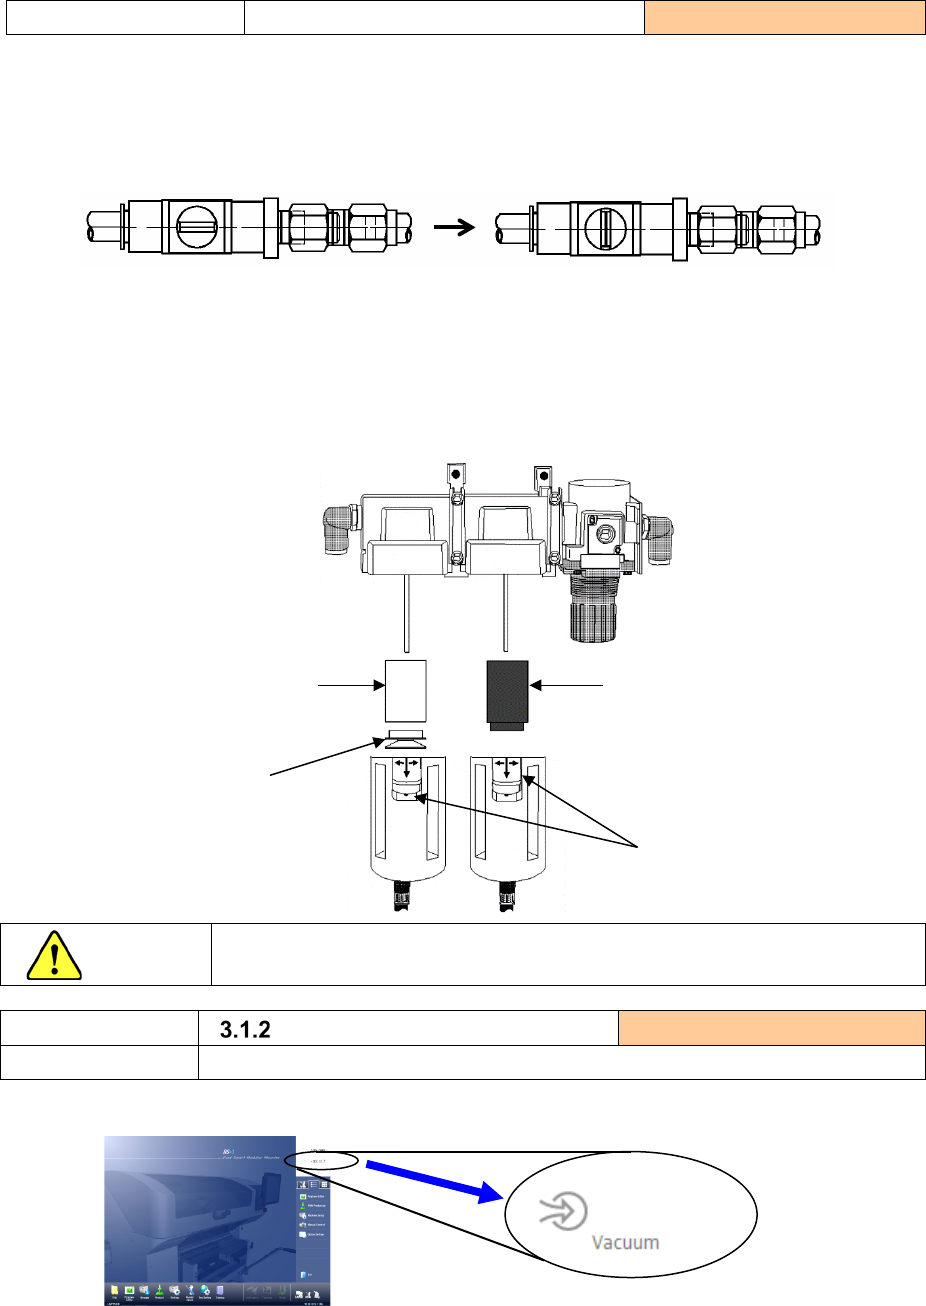
Replacement of the filter element
When to replace: one year
When to replace a filter element:
Every two years or when the air pressures decreases to approximately 0.1 MPa (1 kgf/cm
2
).
How to replace a filter element
1) Close the finger valve knob.
2) While pushing the sliding part downward, rotate the main unit to the left or the right by 45 degrees to
pull it out downward.
3) Remove the filter element B by rotating the resin part that fixes the filter element B to the left.
Remove the filter element A by rotating it itself to the left.
4) Attach each filter element by following this procedure in the reverse order.
CAUTION
Close the control of the finger valve before following the procedure above.
Inspection item
Vacuum pressure
Inspection frequency: everyday
What to inspect
Check the vacuum pressure.
1) Make sure that the vacuum pressure indication of a standby reaches -88 kPa.
2) If the negative pressure display (max) in standby status with vacuum pump specification decreases
to -88kPa or less, consumables must be replaced. Inspect and replace consumables by referring to
“3.7.2 Replacement of vacuum pump parts.”
Open status
Closed status
Filter element A
PF901010000
Filter element B
PF901006000
Resin part
Sliding part
-88.317
Part 1 Basic Operation Chapter3 Daily maintenance
3-5
Inspection item
Piping and joint
Inspection frequency: Every week
What to inspect
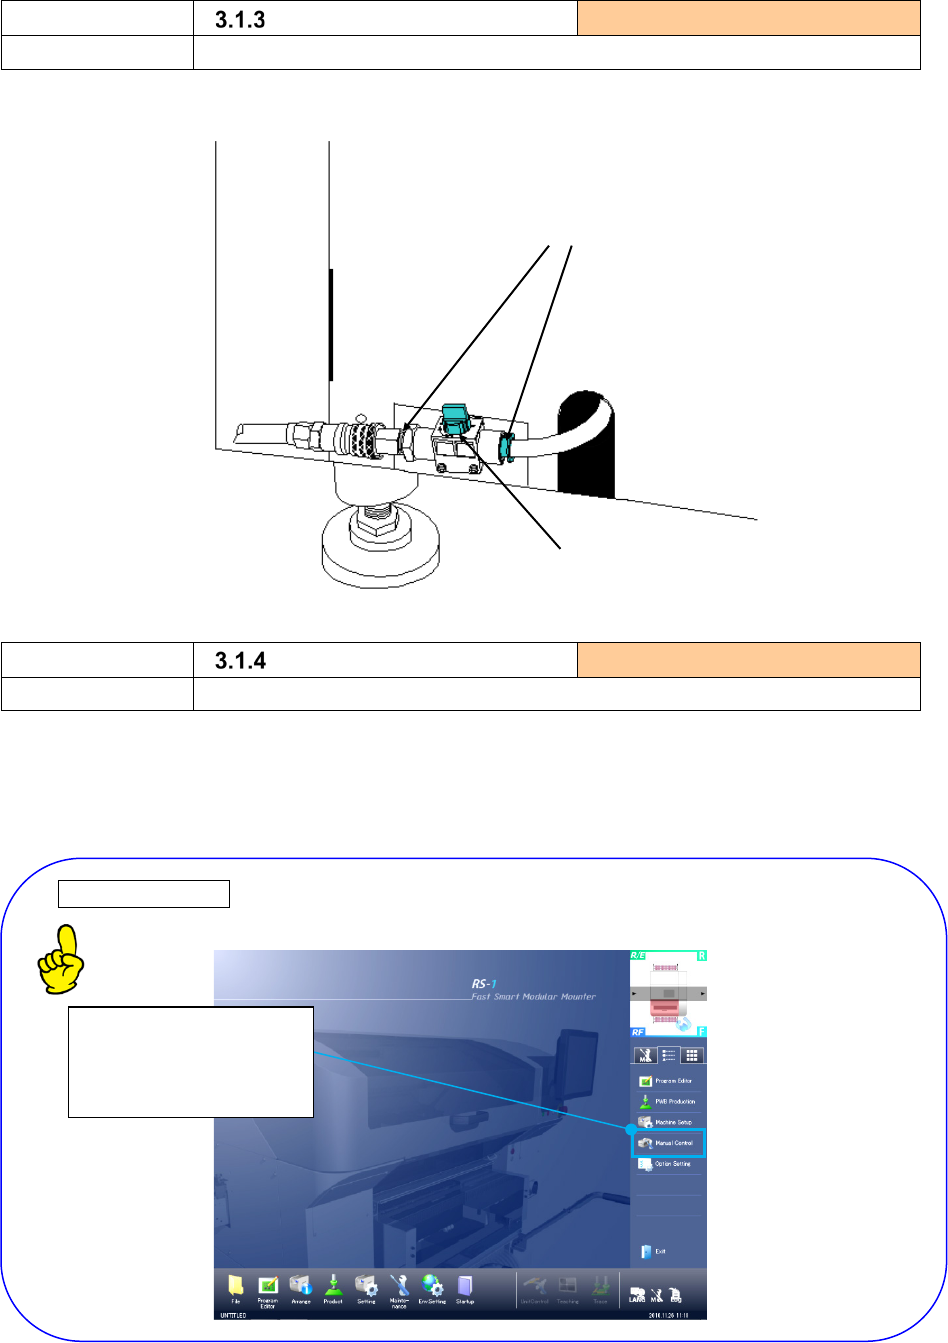
Check to see if the optional filter is stained.
1) Check that there is no air leakage.
<Left inside>
Inspection item
Each unit air cylinder
Inspection frequency: Every week
What to inspect
Check to see if any air does not leak from the air pipes.
1) Turn on the power of the machine, select the "Manual control" items, and check that operation is
possible.
① PWB stopper section
② ATC unit
Manual control Instruction manual Chapter9 “Manual Control”
This is the mode for checking each operation or the ON/OFF status of the sensor.
Check to see if there is
no air leakage.
Finger valve
Select the “Manual” button
of the Information area to
start up the Manual
Control utility.
Part 1 Basic Operation Chapter3 Daily maintenance
3-6
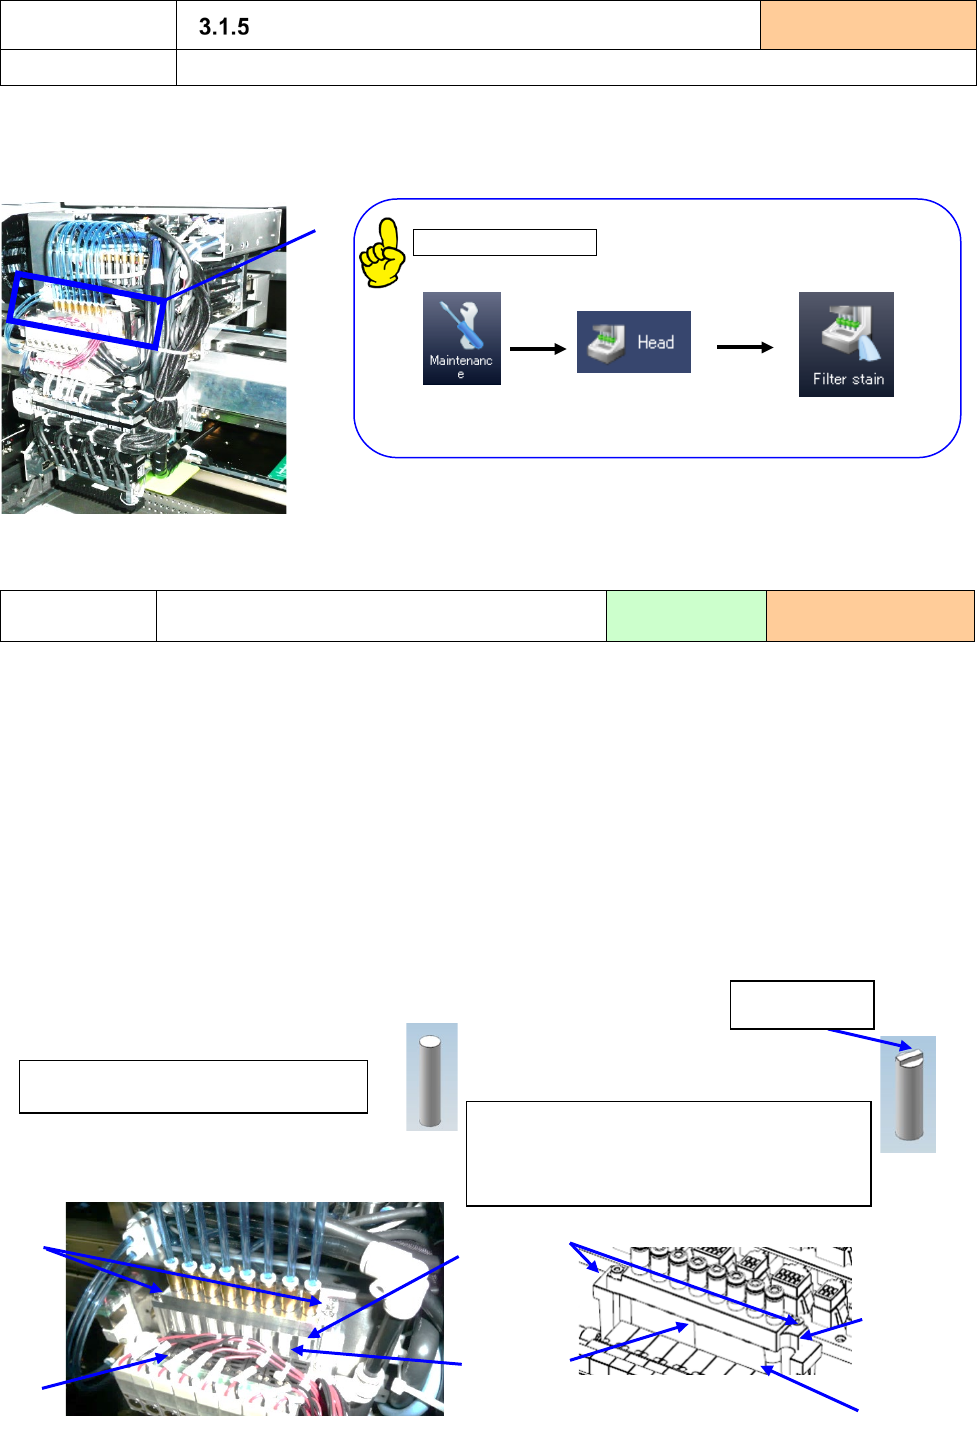
Inspection item
Air filter (LNC120-8 head)
Inspection frequency:
Every month
What to inspect
Check to see if the air filter is not stained.
1) Check to see if “the air filter①” inside the filter box located on the front side of the head unit is not
stained with your eyes.
2) Make sure that there is no problem in Filter stain check.
. Filter stain check
“Instruction manual 11.3.3.2 Filter stain check”
If there is problem, the message to which exchange of a
filter is urged is displayed.
3) If the air filter is stained, replace it with a new one.
Replacement
Replacement of the head air filter
Tool to be used:
Driver
When to replace:
Every six months
1) Loosen the “setscrews ②” (Two positions on the left and right sides) of the filter box to remove the
“filter box U ①.”
*① ③ shape varies depending on the serial number.
2) Check to see if the “filter ③” is stained.
3) If it is, replace the “filter ③” of the “filter box L ④” with a new one.
* Filter with flat tip and no protrusion. Part No.:40046646
* Filter with protrusion at the tip. Part No.:E3052729000
(RS-1 machine Rev. N, RS-1R machine Rev. D, RS-1/1R head Rev. C or later)
4) Insert the new “filter ③” into the “filter box L ④” securely and fix them with the “setscrew ②.”
(Tightening torque: 0.7N·m)
Check to see if the “O-ring F2 ⑤” is fit into the groove of the “filter box L ④” also.
5) Get the vacuum value without nozzle again.
①
Filter ③ Part No.:E3052729000
(RS-1 machine Rev. N, RS-1R machine
Rev. D, RS-1/1R head Rev. C or later)
Filter ③ Part No.:40046646
②
①
③
④
protrusions.
①
④
③
②