RS-1_instruction manual.pdf - 第486页
Part 1 B asic O peration Chapter 4 Cr eating a Produc tion Progra m 4- 151 Data enter ed on the “Cent ering” tab of the “Comp onent” data scree n is displayed on t he screen. Enter the des ired value f or each item. The …

Part 1 Basic Operation Chapter 4 Creating a Production Program
4-150
The conditions you can specify are shown below.
Item Description
Comment
Specify the comment. When an input character string exists in the comment, the record is to be
replaced.
Type
You can specify up to four component types. If you specify two or more component types here,
the system will search through all the specified types of components to replace their data.
If you specify no component type, the system searches through all components.
Component
Size
Specify the maximum and minimum length, width and height of a component. If you omit these
fields, the system automatically sets the maximum and minimum values that can be entered.
Package
size
If the size of a portion of a component on which the laser beam strikes is different from that of the
package part (body) when the component is recognized, enter the package size (PW/PL) here.
Nozzle No.
Specify up to three types of nozzles here.
If you specify two or more types of nozzles here, the system searches through all components
whose nozzles are specified here.
If you do not specify any nozzle number, the system replaces data on a component regardless of
the nozzle number.
Package
Specify the packaging style of a component. If you do not specify any package, the system
searches through components of all types of packages in order to replace their data.
Centering
method
Specify the component centering method.
If you do not specify any centering method, the system searches through components of all
types of centering methods in order to replace their data.
Specify the conditions for replacing data of components, and select the <Next> button.
Part of data displayed on the “Packaging style” tab of the “Component” data screen is displayed on
the screen.
Enter the desired value for each item.
The input range is displayed on the bottom of the dialog box.
When you select the <Back> button, the screen is switched back to the previous screen.
When you select the <Next> button, the screen is switched back to the next screen.
When you select the <Cancel> button, the system aborts the current processing, and then closes
the dialog box.

Part 1 Basic Operation Chapter 4 Creating a Production Program
4-151
Data entered on the “Centering” tab of the “Component” data screen is displayed on the screen.
Enter the desired value for each item.
The input range is displayed on the bottom of the dialog box.
When you select the <Back> button, the screen is switched back to the previous screen.
When you select the <Next> button, the screen is switched back to the next screen.
When you select the <Cancel> button, the system aborts the current processing, and then closes
the dialog box.
Data entered on the “Pick Condition” tab of the “Component” data screen is displayed on the
screen.
Enter the desired value for each item.
The input range is displayed on the bottom of the dialog box.
When you select the <Back> button, the screen is switched back to the previous screen.
When you select the <Next> button, the screen is switched back to the next screen.
When you select the <Cancel> button, the system aborts the current processing, and then closes
the dialog box.
Part 1 Basic Operation Chapter 4 Creating a Production Program
4-152
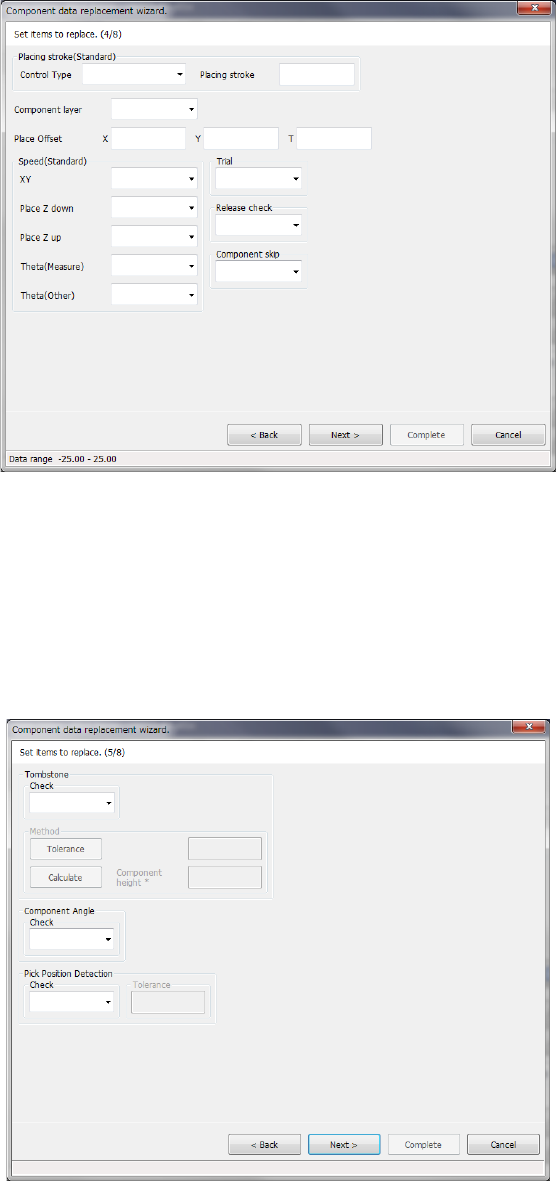
Data entered on the “Place Condition” tab of the “Component” data screen is displayed on the
screen.
Enter the desired value for each item.
The input range is displayed on the bottom of the dialog box.
When you select the <Back> button, the screen is switched back to the previous screen.
When you select the <Next> button, the screen is switched back to the next screen.
When you select the <Cancel> button, the system aborts the current processing, and then closes
the dialog box.
Data entered on the “Inspection 1” tab of the “Component” data screen is displayed on the screen.
Enter the desired value for each item.
The input range is displayed on the bottom of the dialog box.
When you select the <Back> button, the screen is switched back to the previous screen.
When you select the <Next> button, the screen is switched back to the next screen.
When you select the <Cancel> button, the system aborts the current processing, and then closes
the dialog box.