RS-1_instruction manual.pdf - 第335页
Part 1 Basic Operat ion Chapter3 D aily maintenance 3- 43 ● R epla cement of sty lus pen / long key holder 4) P ull out the l ong key holder from st rap hole. 5) P ull out the st ylus pen fro m ring o f long key hol der …
Part 1 Basic Operation Chapter3 Daily maintenance
3-42
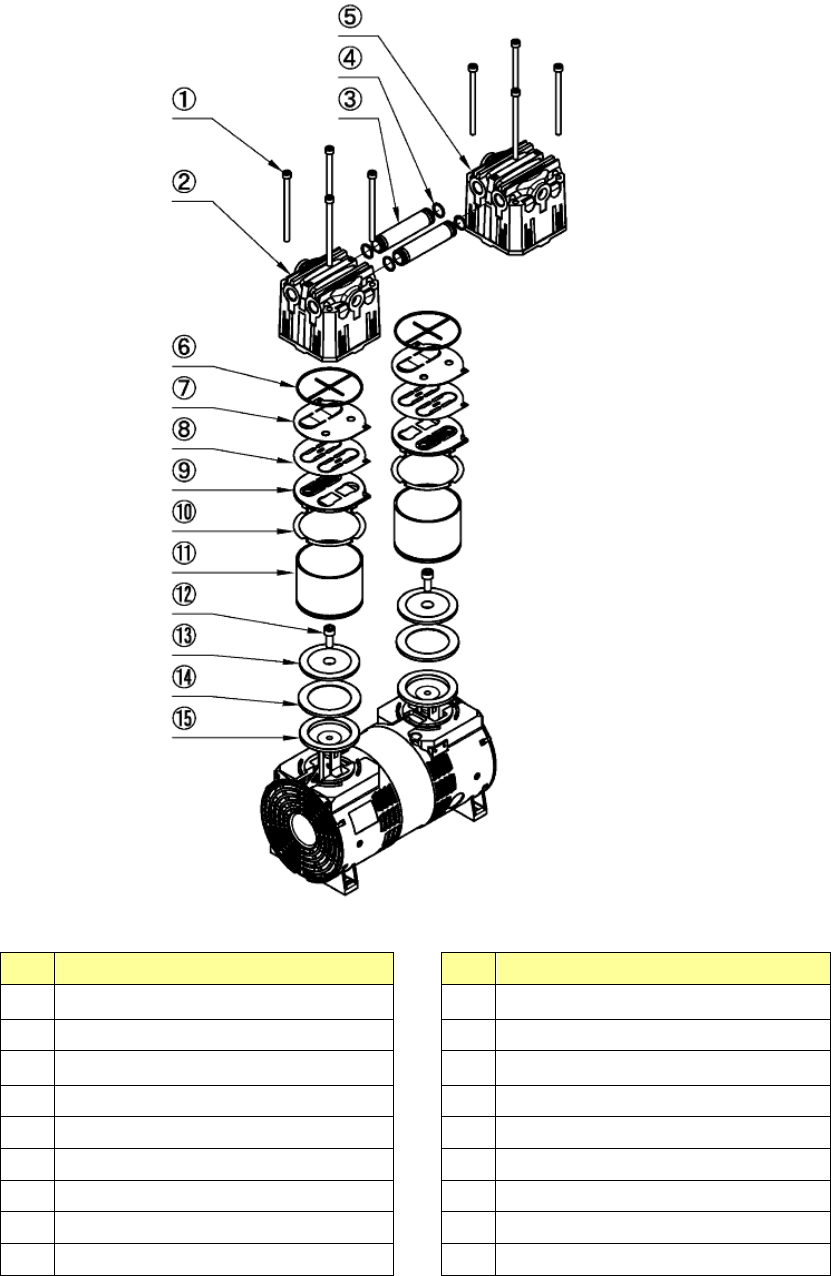
Exploded view of the vacuum pump
No.
Name
No.
Name
1
Hexagon headed bolt (M6×95) (8)
10 Cylinder gasket
2 Pump head cover 1 11 Cylinder
3 Connecting pipe 12
Hexagon headed bolt (M8×20)
4 O-ring P-10 13 Cup packing retainer
5 Pump head cover 2 14 Cup packing
6 Gasket 15 Connecting rod
7 Valve guard
8 Air suction/release valve
9 Cylinder plate
Part 1 Basic Operation Chapter3 Daily maintenance
3-43
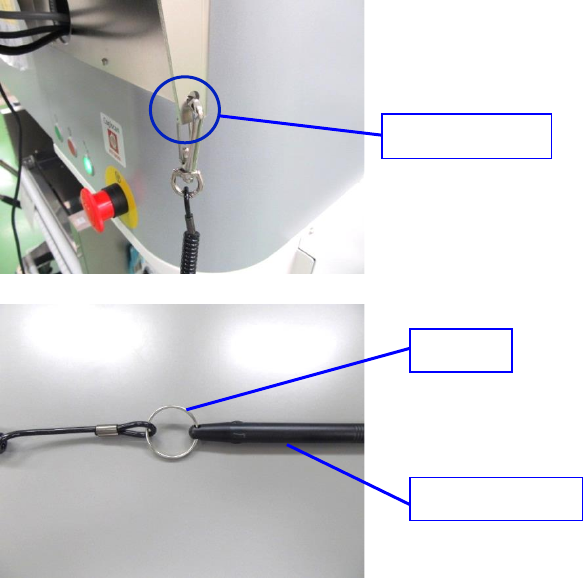
● Replacement of stylus pen / long key holder
4) Pull out the long key holder from strap hole.
5) Pull out the stylus pen from ring of long key holder and replace it with a new stylus pen or long
key holder.
6) Attach the long key holder to the strap hole.
7) In case of optional rear surface monitor, only the position of strap hole is different. Stylus pen and
long key holder are the same.
Strap hole
Ring
Stylus pen

Part 1 Basic Operation Chapter 4 Creating a Production Program
4-1
Chapter 4 Creating a Production Program
4.1 Flowchart
This chapter describes the operation of No.8, and only modification of No.9 basically.
No Flowchart Comment
1
Perform routine inspection including an
ATC-related check.
2
Check the main air pressure (0.5 MPa).
3
Check to see if there is no foreign substance
inside the machine before production.
4
Be sure to warm up the system after holidays or in
cold climates (it takes approximately 10 minutes).
5
6
Change the settings on the “Machine setup” menu
if you clean the nozzle or change the reference
pin position, and you have to change the initial
setup after you perform the daily inspection or set
a PWB.
(See Chapter 8 “Machine Setup.”)
7
See Chapter 5 “Database.”
8
9
If any problem occurs during PWB placement:
for example, the PWB position is shifted from the
regulated position or the centering function fails,
correct the production program on the “Program
Editor” menu. You can correct a part of
component data on the “Production” menu also.
10
11
12
13
Perform the daily inspection periodically.
(See Chapter 3 “Daily Maintenance.”)
Power ON
Inspection of system
Origin return
Warm-up
PWB setting
Change the desired settings
on the Machine setup menu.
Create component data on
the “Database” menu.
Production
End of production
Power OFF
<Creating/editing a production program>
• PWB data
• Placement data
• Component data
• Pick data
PWB placement
confirmation
No
Create the component
database?
Yes
No problem
Daily inspection
No
Modification
Problem
Yes
Change the machine
setup conditions?