RS-1_instruction manual.pdf - 第122页
Part 1 B asic O peration Chapter 2 Pr oduction 2- 11 (3) Y ou c an return a no zzle into t he A TC in two ways: “semi - autom atic way” and “manua l way .” “ Semi - automat ic way”: Click the <Sem i - Auto> button.…
Part 1 Basic Operation Chapter 2 Production
2-10
Nozzle attachment error at power-on
If a nozzle is attached on a head at power-on or if an error occurs when a nozzle is being replaced
with another one, the nozzle attachment information of the head (information internally stored in the
main unit) may be inconsistent with data on a nozzle that is actually attached on the head. In such
a case, perform the procedure below.
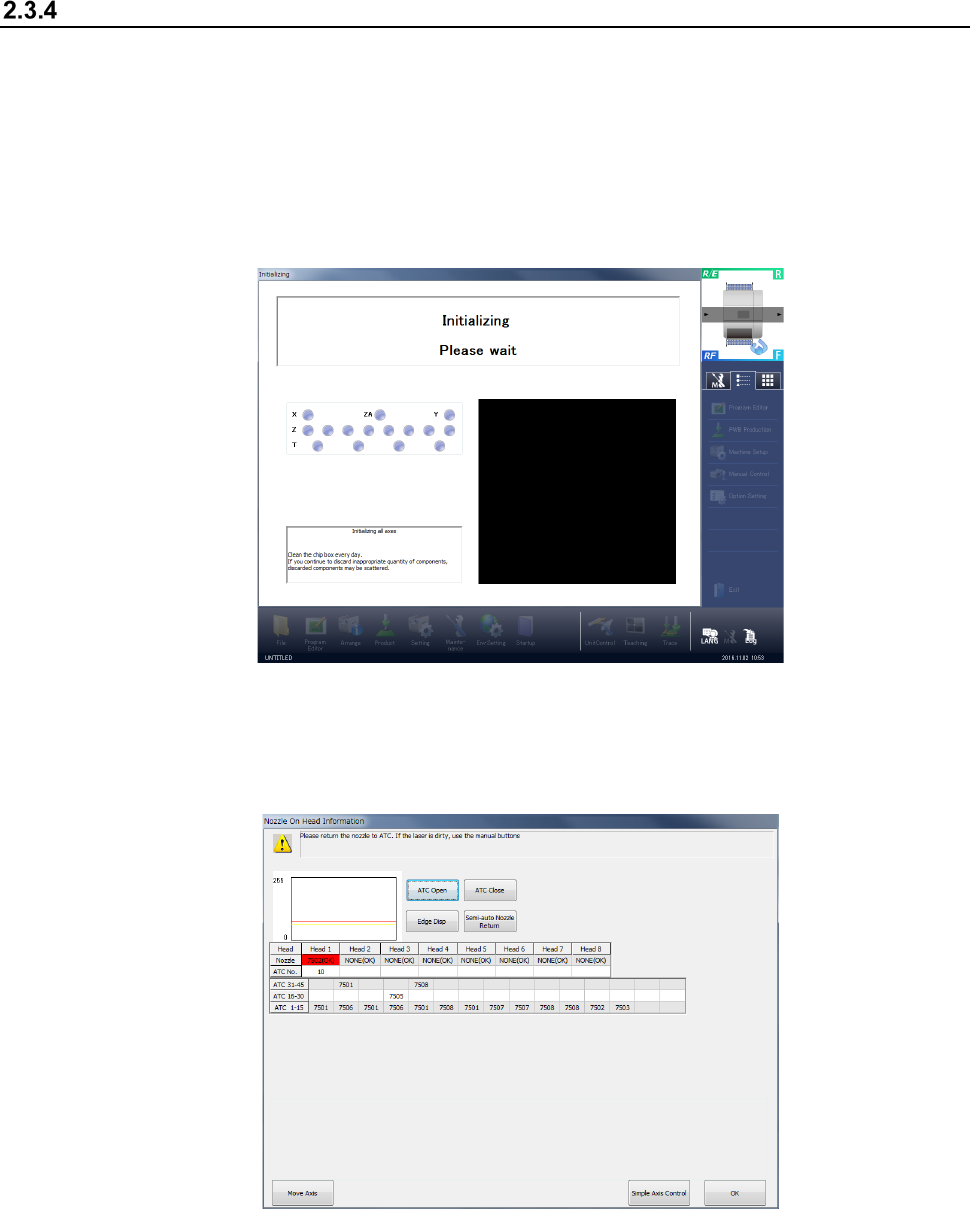
(1) Checking a nozzle
Press the <START> switch on the operation panel. After all axes finish being initialized, the
message “Checking Nozzle on Head” appears at the bottom line of the “initializing” screen.
(2) Detecting whether a nozzle is attached on a head
If the check operation described above is performed to find that “information controlled with the
machine internally indicating whether a nozzle is attached on each head” is inconsistent with
“information whether a nozzle is attached on each head actually,” the following screen appears.
The machine returns a nozzle that is attached on each head shown on the screen above to the
ATC.
Part 1 Basic Operation Chapter 2 Production
2-11
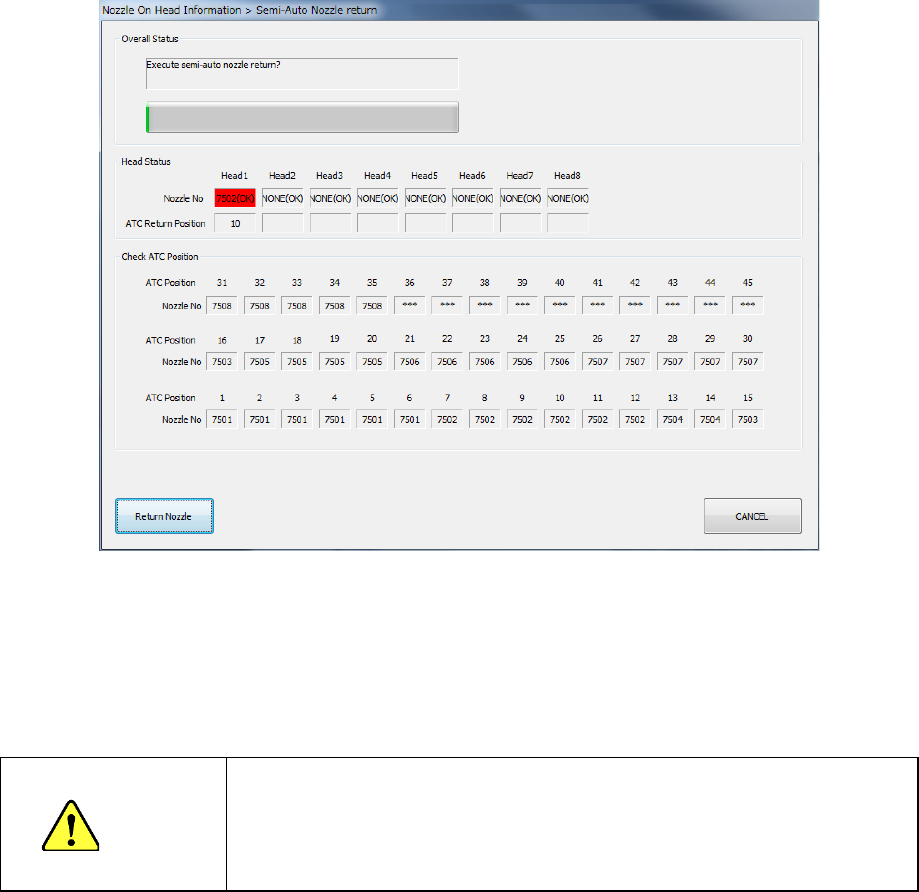
(3) You can return a nozzle into the ATC in two ways: “semi-automatic way” and “manual way.”
“Semi-automatic way”: Click the <Semi-Auto> button.
“Manual way”: Use the “Simple Axis Control” function to control XY-axes and the
Z-axis, and open/close the ATC to move the head to a position where
an operator can handle a nozzle with hands easily and he or she can
remove the nozzle from the head to return it onto the ATC.
1) Semi-automatic way
If there is not any information in the “Detected Head” column, you can perform this method
safely.
Step 1: Click the <Semi-Auto> button on the “Nozzle On Head Information” screen.
Step 2: The “Nozzle Return” screen appears that asks you whether to execute
semi-auto nozzle return operation.
Step 3: When you click the <Return Nozzle> button at this point, the machine starts
returning a nozzle semi-automatically.
The operation to be performed next varies depending on whether the HMS is used or not.
If the use of the HMS has been enabled in the “Machine Setup”, it is used to detect whether a
nozzle is set in the HMS or not.
If the use of the HMS has been disabled in the “Machine Setup”, a nozzle is not returned using
the HMS in the semi-automatic way.
WARNING
When you click the <Return Nozzle> button or <OK> button, the axis
moves to return a nozzle. Before clicking either button, be sure to
check to see if there is no person who is working the internal parts of
the machine. To avoid injuries, do not put your hands inside the
machine or keep your face or head away from the machine.
Part 1 Basic Operation Chapter 2 Production
2-12
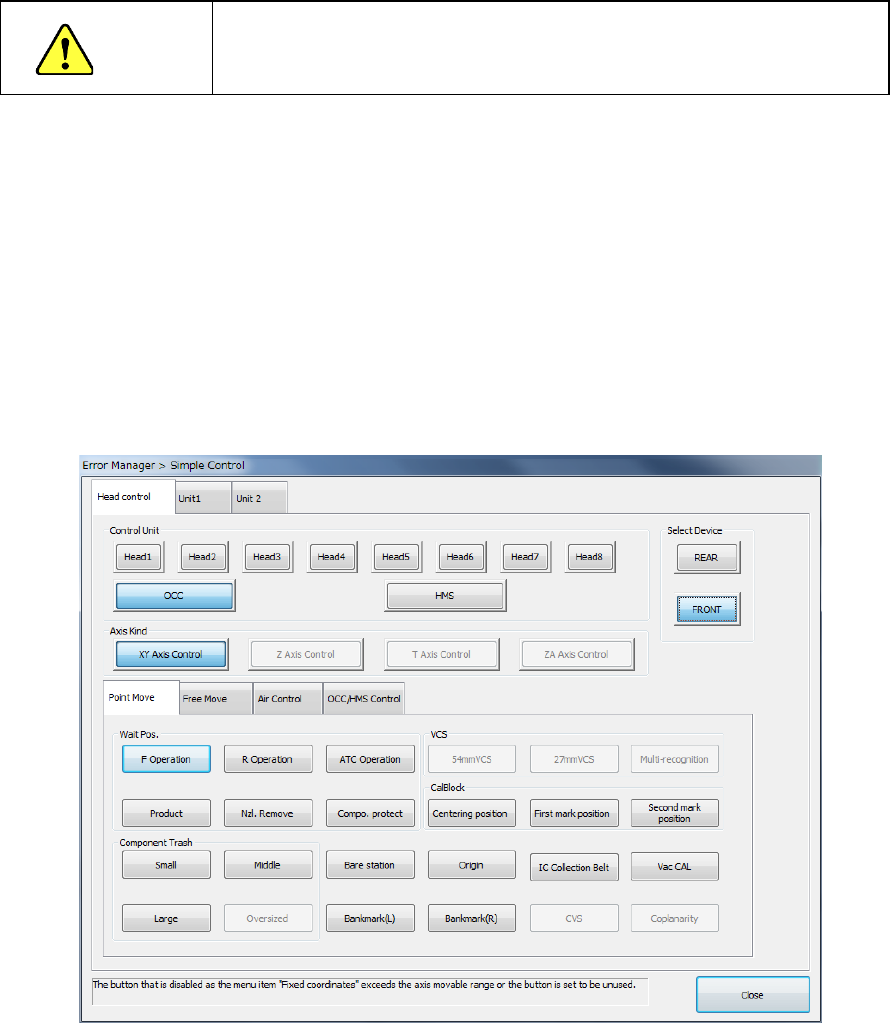
2) Manual way
If any head is detected in the “Detected Head” column, return the nozzles “manually.”
CAUTION
Be sure to check to see if the head stops completely before taking out
a nozzle and return it manually.
As described before, this method allows you to move a head to the position where an
operator can remove a nozzle easily, and take out a nozzle from the head to return it into the
ATC.
Select the <Simple Axis Control> button to move a head or open/close the ATC.
When you click the <Simple Axis Control> button on the “Nozzle On Head Information”
screen, the following screen appears.
The origins of the XY coordinates (0. 0) are the left edge on the front side where the
operation panel is located.
The origin of the Z axis (0) is the height of a board, and the up direction is “+,” and the down
direction is “-.”
The “Axis Move” tab invoked from the “Simple Control” screen provides the menu items “XY
Axis Control” and “Z Axis Control.” They allow you to control the axes operation. In the
same manner, the menu item “ATC Control” on the “Unit” tab allows you to open/close the
ATC.
See Section 9.7 “Simple Control” for details of these operations.