semi合集-English.pdf - 第4049页
SEMI F53-0600 © SEMI 2000 6 13.8.3.1 Connect sp ike ge nerato r out pu t b et ween negat ive DC lea d and gro und a nd ad just sp ike ge nera tor outp ut co ntrol for mini mum amp li tude. 13.8.3.2 Using the X100 probe, …

SEMI F53-0600 © SEMI 20005
13.7.2.1 Mount the conical log spiral antenna on the
tripod. Test in a sequence similar to that in Sections
13.7.1.1–13.7.1.9.
13.7.2.2 Verify that RF power amplifier #1 is still in
place.
13.7.2.3 Test at the following frequencies, using RF
power amplifier #1: 300 MHz and 400 MHz. Record
the MFC indicated flow, flow standard outputs, and the
frequency for each test point on the data sheet.
13.7.2.4 After completion of the test at 400 MHz,
reduce amplitude of signal source to zero and shut
down test equipment.
13.7.2.5 Disconnect RF power amplifier #1, install RF
power amplifier #2, turn on equipment, and resume
testing.
13.7.2.6 Test at the following frequencies using RF
power amplifier #2: 500 MHz, 600 MHz, 700 MHz,
800 MHz, 900 MHz, and 990 MHz.
13.7.2.7 Check operation of the controller in the
presence of the fields generated. Record the MFC
indicated flow, the flow standard outputs, and the
frequency for each test point on the data sheet.
13.7.2.8 After testing at fixed frequencies, sweep the
signal source from 300 MHz to 990 MHz. If a
malfunction occurs during the sweep, stop and go back
to that frequency range and try to find the malfunction
by testing at single frequencies. Record the MFC
indicated flow, the flow standard outputs, and the
frequency on the data sheet. If the malfunction cannot
be found by testing at single frequencies and only
shows up when sweeping, the problem is probably that
the signal source has to switch ranges at certain
frequencies and during the switching can create strong
transient noise. Only the results at single frequencies
can be trusted; the sweep is only to locate problems, not
to completely define them.
13.7.2.9 Reduce signal source output to zero, de-
energize test equipment, and disassemble test setup.
13.8 Transient Susceptibility of Power and Control
Leads (CS-06) (Conducted Susceptibility)
NOTE 5: If any calibration is required during the performance
of this procedure, such calibration shall be done in accordance
with manufacturers’ specifications.
13.8.1 Spikes on DC Power Lines
13.8.1.1 Verify that the test equipment and DC power
are off before making connections for performing tests
on DC-powered equipment.
13.8.1.2 Connect the parallel output of the spike gen-
erator between the binding posts as shown in Figure 4.
NOTE 6: The output from the spike generator must be from
the parallel output. Otherwise, the DC power supply would
be shorted by a low DC resistance.
13.8.1.3 The spike is injected across the DC power
line to ground, not in series.
13.8.2 Spike on positive DC Lead:
13.8.2.1 Connect spike generator output between
positive DC lead and ground and adjust spike generator
output control for minimum amplitude.
13.8.2.2 Using the X100 probe, connect one channel
on the scope to monitor the amplitude of the spike
applied on the positive lead. Put the scope probe
ground clip on the green wire safety ground, not on any
of the spike generator output terminals.
13.8.2.3 Energize test equipment and observe polarity
of low amplitude spikes to determine the polarity of the
transient. Connection to the generator output should be
such that positive spikes are applied on the positive
lead. If the pulses are negative, reverse leads at the
generator output.
13.8.2.4 Apply DC power.
13.8.2.5 With the scope synchronized to line voltage
and the spike repetition rate set so that the spike will
move slowly across the screen, increase spike
amplitude to 100% of the voltage rating of the input
power or MFC malfunction. Record the MFC indicated
flow, the flow standard outputs, and the spike amplitude
on the data sheet.
13.8.2.6 If the controller is not initially susceptible
below the voltage rating and if the equipment is digital,
hold the upper limit condition for five minutes. This
condition need only be held momentarily if the
controller is analog. Record the MFC indicated flow
and flow standard outputs on the data sheet.
13.8.2.7 Reduce spike amplitude control, de-energize
test equipment, and turn off DC power before switching
spike polarity.
13.8.2.8 Reverse leads at the spike generator output to
apply negative spikes to the controller.
13.8.2.9 Energize test equipment.
13.8.2.10 Repeat Sections 13.8.2.4 through 13.8.2.6
with the negative voltage spikes applied to the positive
lead. Then go on to Section 13.8.2.11.
13.8.2.11 Reduce spike amplitude to zero, de-energize
test equipment, and turn off DC power.
13.8.3 Spike on negative DC Lead:

SEMI F53-0600 © SEMI 2000 6
13.8.3.1 Connect spike generator output between
negative DC lead and ground and adjust spike generator
output control for minimum amplitude.
13.8.3.2 Using the X100 probe, connect one channel
of the scope to the negative lead in order to monitor the
amplitude of the spike applied on the negative lead. Put
the scope probe ground clip on the green wire safety
ground, not on any of the spike generator output
terminals.
13.8.3.3 Energize test equipment and observe polarity
of low amplitude spikes to determine the polarity of the
transient. Connection to the generator output should be
such that positive spikes are applied on the negative
lead. If pulses are negative, reverse leads at generator
output.
13.8.3.4 Repeat Sections 13.8.2.4 through 13.8.2.6
with the positive voltage spikes applied to the negative
lead. Then go on to Section 13.8.3.5.
13.8.3.5 Reduce spike amplitude control, de-energize
test equipment, and turn off DC power before switching
spike polarity.
13.8.3.6 Reverse leads at the spike generator output to
apply negative spikes to the controller.
13.8.3.7 Energize test equipment.
13.8.3.8 Repeat Sections 13.8.2.4 through 13.8.2.6
with the negative voltage spikes applied to the negative
lead. Then go on to Section 13.8.3.9.
13.8.3.9 Reduce spike amplitude to zero, de-energize
test equipment, turn off the DC power, and disconnect
equipment from test setup patch panel.
13.8.4 Spike on control (setpoint) signal lead:
13.8.4.1 Connect spike generator output between
control signal lead and ground and adjust spike
generator output control for minimum amplitude.
13.8.4.2 Using the X100 probe, connect one channel
on the scope to monitor the amplitude of the spike
applied on the setpoint lead. Put the scope probe
ground clip on the green wire safety ground, not on any
of the spike generator output terminals.
13.8.4.3 Energize test equipment and observe polarity
of low amplitude spikes to determine the polarity of the
transient. Connection to the generator output should be
such that positive spikes are applied on the setpoint
lead. If pulses are negative, reverse leads at generator
output.
13.8.4.4 Apply the maximum DC control signal level.
13.8.4.5 Repeat Sections 13.8.2.5 and 13.8.2.6 with
the positive voltage spikes applied to the setpoint lead.
Then go on to Section 13.8.4.6.
13.8.4.6 Reduce spike amplitude control, de-energize
test equipment, and turn off DC power before switching
spike polarity.
13.8.4.7 Reverse leads at the spike generator output to
apply negative spikes to the controller.
13.8.4.8 Energize test equipment.
13.8.4.9 Apply the maximum DC control signal level.
13.8.4.10 Repeat Sections 13.8.2.5 and 13.8.2.6 with
negative voltage spike applied to the setpoint lead.
13.8.4.11 Reduce spike amplitude to zero, de-energize
test equipment, turn off the DC power, and disconnect
equipment from test setup patch panel.
14 Calculations or Interpretation of Results
14.1 Calculations
NOTE 7: Use the data sheet (see Table 1) to record the test
data. Then record the calculated values at each data point in
Table 2.
14.1.1 Convert MFC indicated flow output data (v)
and the flow standard output data to percent of full-
scale flow as follows:
MFC Indicated Flow:
Percent of Full-Scale Flow =
Output Data (v)× 100
Full Scale output (v)
14.1.2 Record on data sheet for each measurement
point.
14.1.3 Flow Standard (actual flow)
14.1.3.1 Follow the manufacturer’s recommendations
for the flow standard output conversion to percent of
full scale.
14.1.4 Record on data sheet for each measurement
point.
14.1.5 Calculate the zero-corrected percent of full-
scale values for both the MFC indicated flow and the
flow standard output as follows:
MFC Indicated Flow or Standard Flow = MFC or Flow
Standard Value (%FS) at a Data Point – MFC or Flow
Standard Value (%FS) at the Zero Flow
14.1.6 Record these values at each data point in Table
2.
14.1.7 Calculate the change in flow for the MFC and
flow standard as follows:
Change in Flow (%FS) = MFC Standard Value (%FS)
Corrected for Zero – MFC or Flow Standard Value
(%FS) Corrected for Zero at Reference Conditions
SEMI F53-0600 © SEMI 20007
14.1.7.1 Where reference conditions are defined by
50% FS flow with the EMI source at zero field strength.
14.1.8 Record these values in Table 2.
14.2 Interpretation of Results
14.2.1 The changes in flow columns in Table 2 give an
indication of the effect of EM susceptibility, both
radiated and conducted. If the effect is larger than can
be tolerated for the process in the fab, two steps may be
necessary. EM field strength and frequency
measurements should be made at the fab under normal
operating conditions. If EM measurements in the fab
match areas that cause unacceptable effects on the
MFC, shielding may be necessary to reduce the effect.
Shielding design is beyond the scope of this test
method.
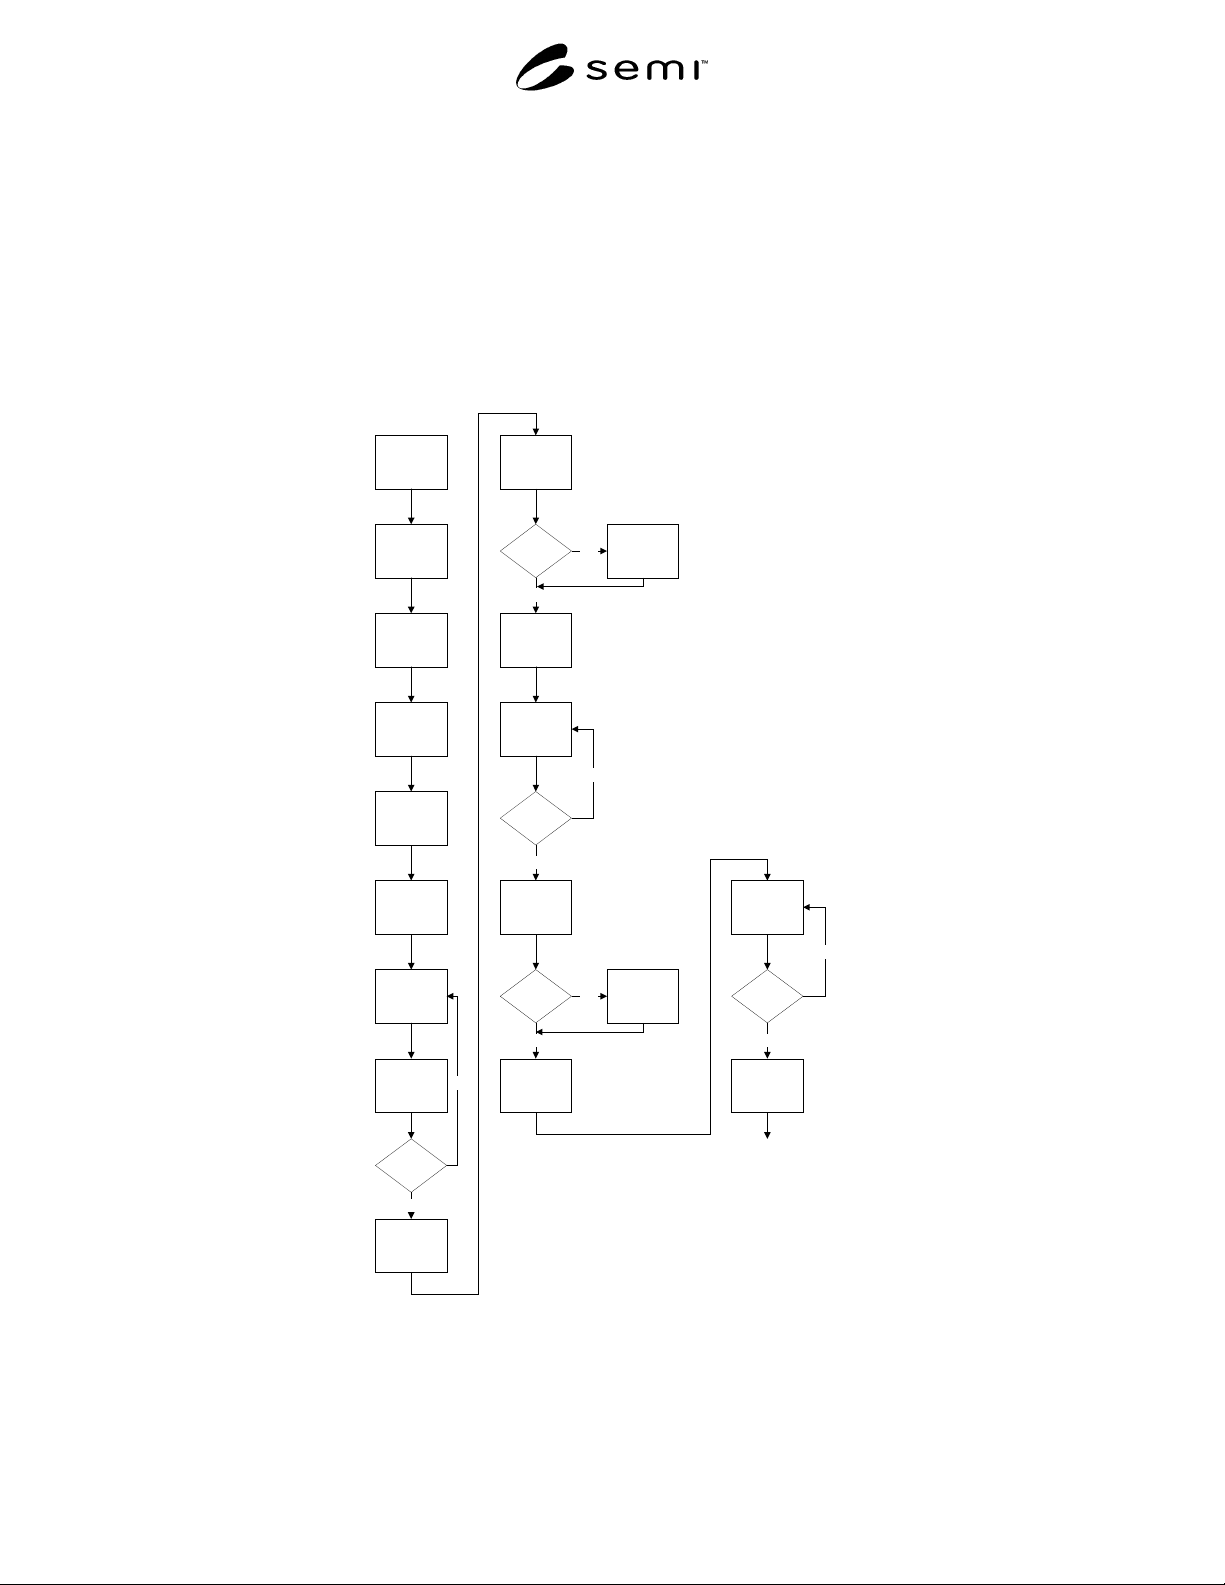
15 Illustrations
Start
Set up Test
Apply Power
Allow Warm
Up
Purge With N2
Zero MFC and
Record Data
Set Up 50%
Flow of N2 and
Record Data
Initiate
Radiated EM
Testing
Set Frequency
and Record
Data
Repeat Until all
Frequencies
are Covered
Are all
Frequencies
Tested
Set Up for High
Frequency
Sweep
Frequency 50
KHz to 20 MHz
Any
Malfunctions
Locate
Frequency of
Malfunction
and Record
Set Up for
Higher
Frequencies
Set Frequency
and Record
Data
Are all
Frequencies
Tested
Sweep
Frequency 30
MHz to 200
MHz
Any
Malfunctions
Locate
Frequency of
Malfunction
and Record
Set Up for High
Frequency
Set Frequency
and record
Data
Are All
Frequencies
Tested
Sweep
Frequencu 300
MHz to 990
MHz
Yes
No
Yes
No
No
Yes
Yes
No
No
Yes
Figure 1
Flow Chart of Test Method