semi合集-English.pdf - 第6250页
SEMI G48-89 © SEMI 1989, 1996 7 Figure 1 Figure 2

SEMI G48-89 © SEMI 1989, 1996 6
5.21.2 Pin Marks (e.g., Pin 1 indicator at end of
package).
5.21.2.1 Equipment — Toolmaker’s Microscope.
5.21.2.2 Focus the microscope on the surface of the
package and measure the diameter of the pin hole. (D1)
5.21.2.3 Focus on the bottom surface of the pin hole
and measure the diameter. (D2)
5.21.2.4 Tangent of Draft angle = (D1 – D2)/2H where
H is pin depth from Section 5.12 or cavity thickness.
5.21.2.5 In some cases ejector pin holes may require
measurement if a deep hole is specified.
5.22 Lead Spread — (Figures 1, 7, and 7a)
5.22.1 MDIP, SO — (Figure 7, 7a)
5.22.1.1 Equipment — Optical Comparator at 10×
Magnification.
5.22.1.2 Place the package squarely on the comparator
with the leads “UP” and find the mid-point of the
bottom cavity width.
5.22.1.3 Measure the distance to the outer edge of each
row of leads at the widest point of spread.
5.22.2 PCC (J bend lead dimension) (Foot Print)
Measure from perpendicular to the greatest extension of
the “J” radius of the leads on one side of the package to
the perpendicular tangent to the greatest extension of
the “J” radius of the leads on the opposite package side.
(See Figure 1.)
5.23 Foot Angle — (Figure 7)
NOTE: Applies to gull-wing leads.
5.23.1 Equipment — Optical Comparator at 20×
Magnification. Device Holding Fixture (see Section
5.16).
5.23.2 Place the device in the fixture, so that the flat
section of the leadframe at the junction with the plastic
body rests on the fixture’s flats. Leads to be facing
“UP”.
NOTE: Do not rest the radiused sections of the leads on the
flats. Be sure that all mold flash is removed from the area of
the frame that rests on the flats.
5.23.3 Measure the angle of the foot with respect to the
horizontal.
5.24 Foot Length — (Figure 7)
NOTE: Applies to gull-wing leads.
5.24.1 Equipment — Optical Comparator at 20×
Magnification. Device Holding Fixture (see Section
5.23).
5.24.2 While the foot angle is being measured, place a
circle template that contains the same radius as the
formed part onto the comparator. Align this template to
the radius of the outside bend. Where the radius of the
template meets the radius of the outside bend, this is the
tangent point to measure foot length.
5.25 Stand-Off
5.25.1 Measure the plastic stand-off, when applicable,
using the procedures of Section 5.12.
5.26 Lead Sweep
5.26.1 Equipment — Toolmaker’s Microscope or
Optical Comparator.
5.26.2 Method
5.26.2.1 Determine centerline of lead at egress of lead
from molded body (CL1) (see Figure 4).
5.26.2.2 Determine centerline at the end of the lead
(CL2). The difference between the two centerlines
CL2 – CL1, shall be the lead sweep.
NOTE: On “J” lead devices, the end of the lead is defined as
the bottom of the “J” lead radius.
5.26.3 Cautionary Notes
5.26.3.1 Verify centerlines on leadframe before
measuring to ensure lead-frame is correct.
5.26.3.2 Verify lead position in relation to the top
cavity centerline.
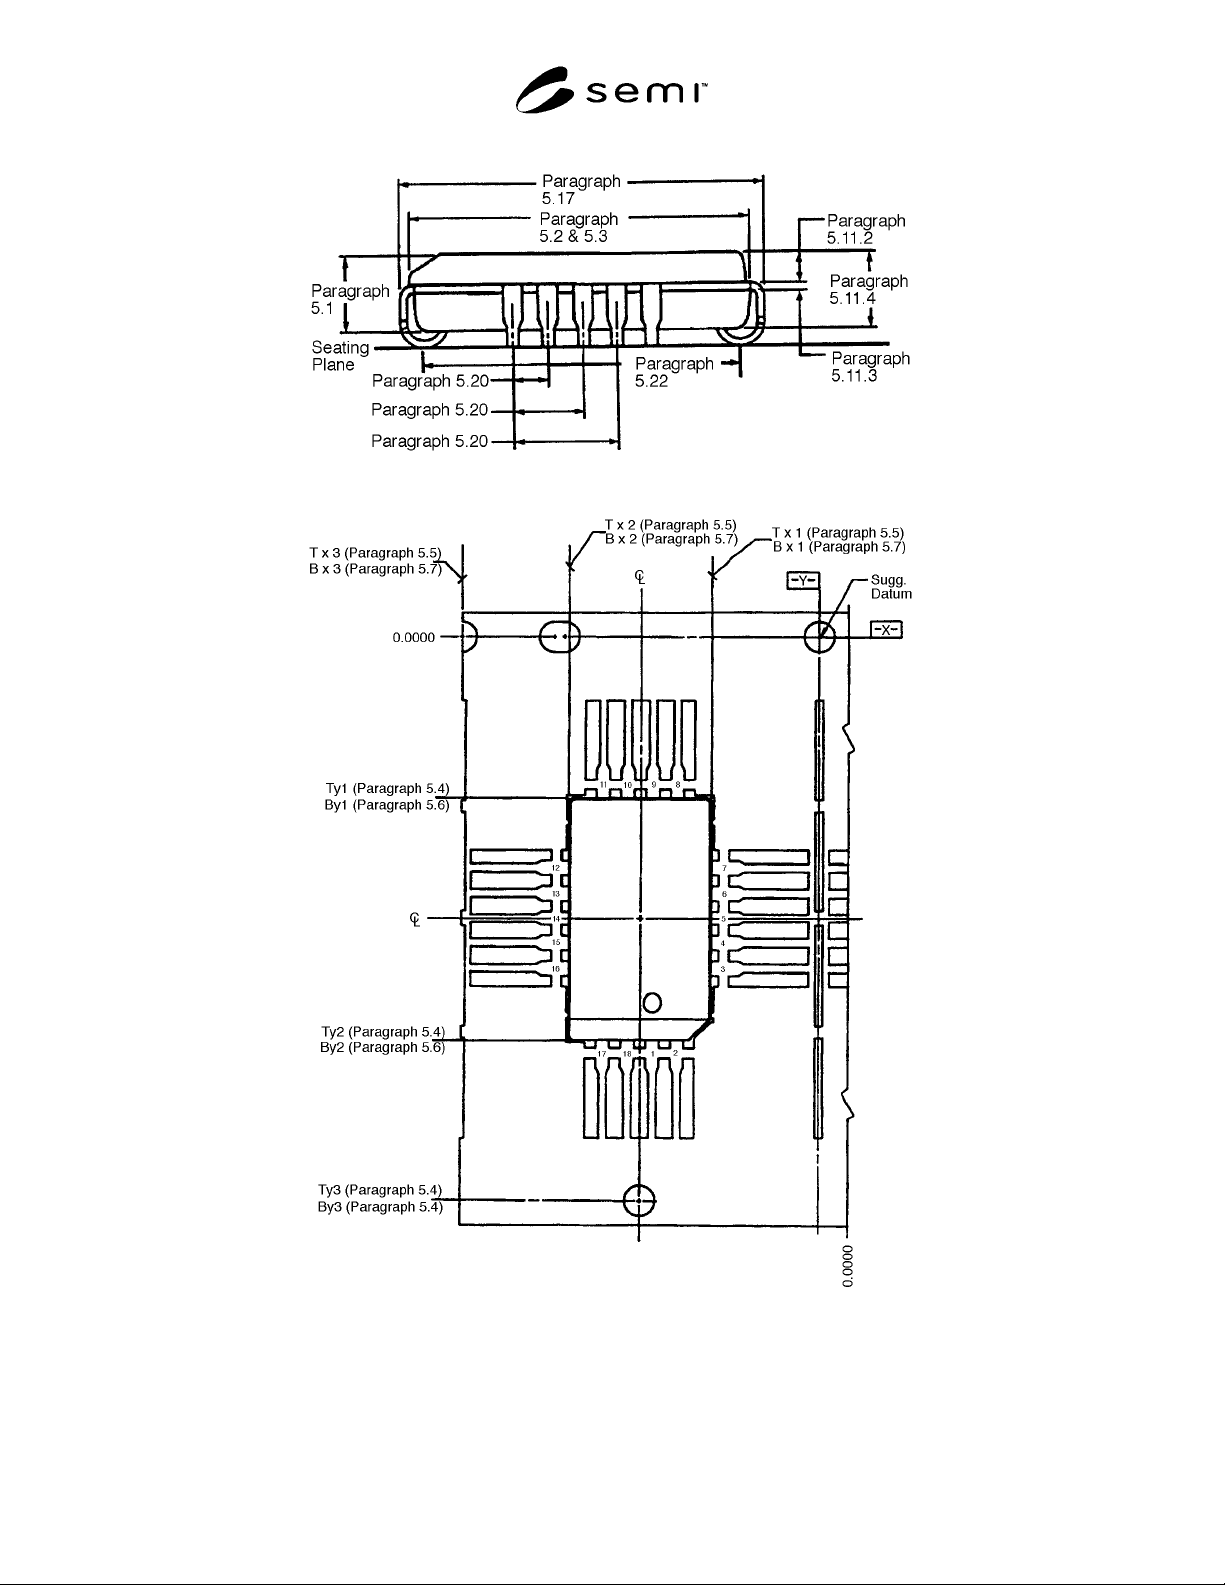
SEMI G48-89 © SEMI 1989, 1996 7
Figure 1
Figure 2
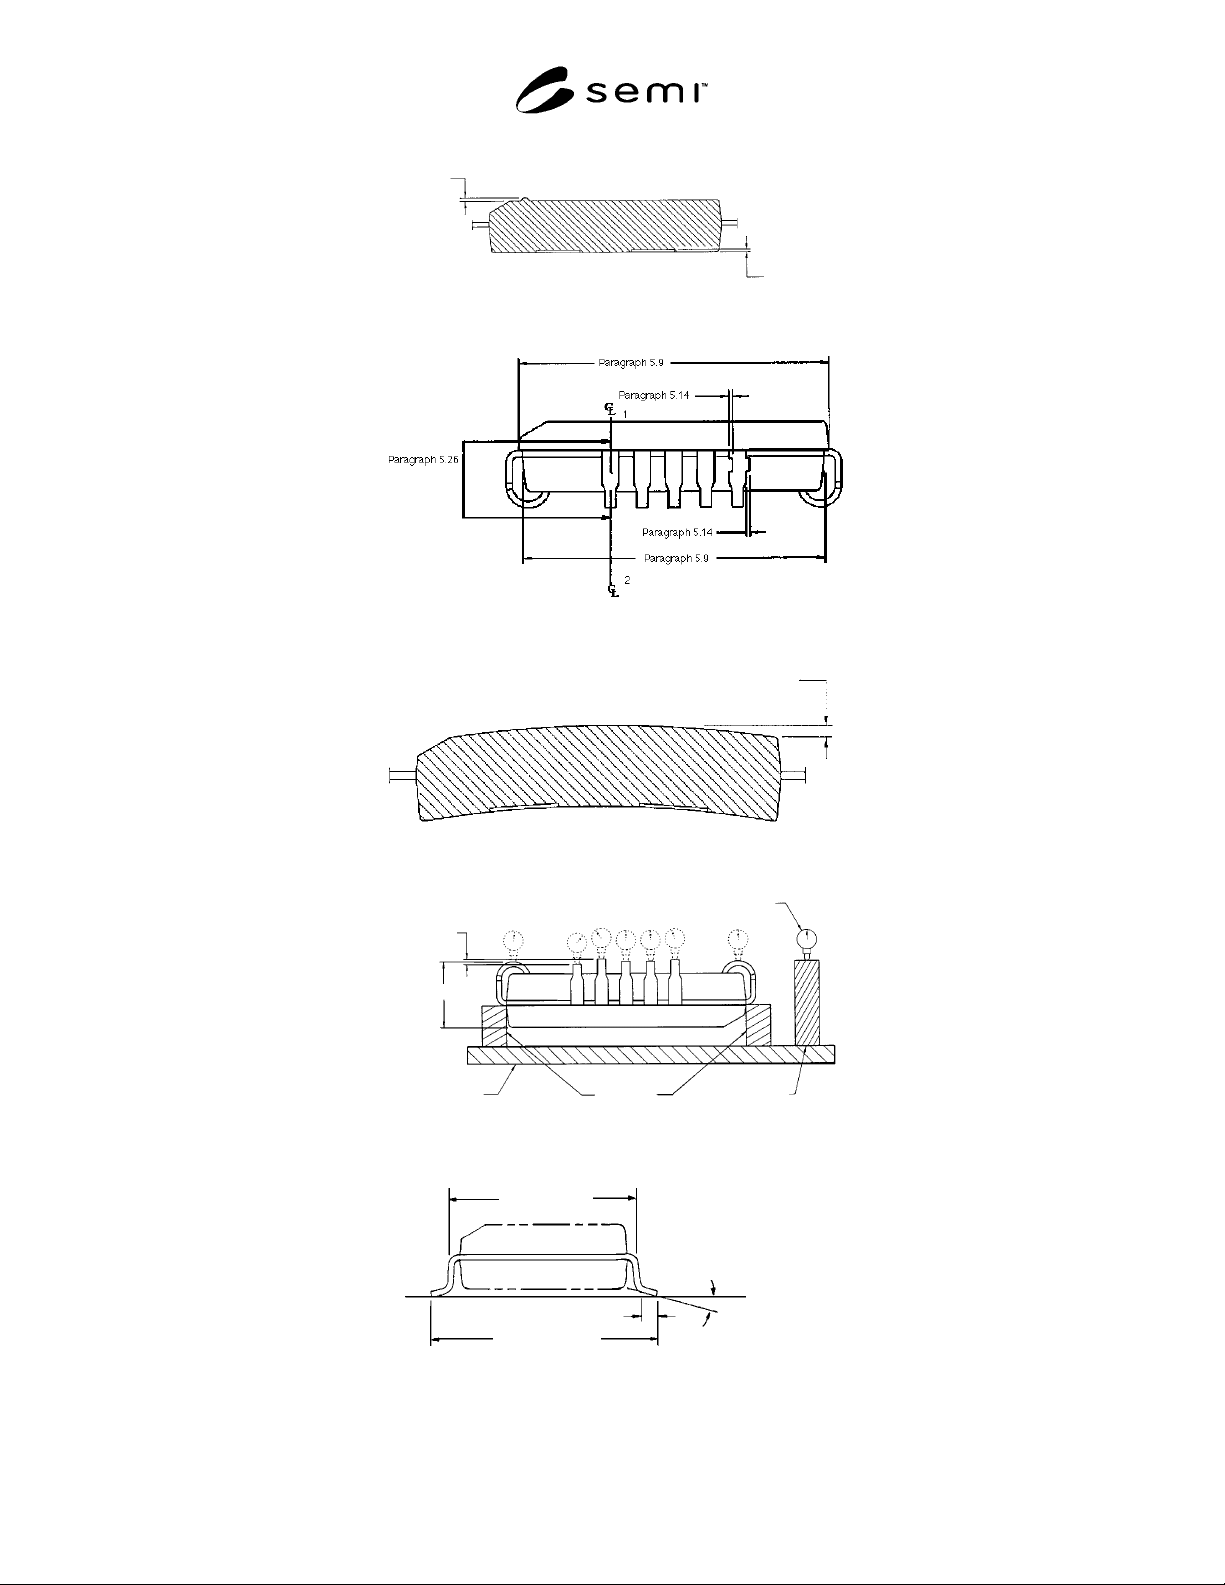
SEMI G48-89 © SEMI 1989, 1996 8
Paragraph 5.13
Paragraph 5.12
Figure 3
Figure 4
Paragraph 5.15
Figure 5
Paragraph 5.16
Surface Plate
Parallel
Flats
Reference
Gauge Block
Dial Indicator
Height Guage
∆H
Figure 6
Paragraph 5.17
θ Paragraph 5.23
Seating Plane
(Surface Mount)
Paragraph 5.24
Paragraph 5.22.1
Figure 7